
Adding animations
Beginning to Present - Lesson 6
Objectives
- Make simple changes to selected text, e.g. colour, style and size.
- Import images into a presentation
- Position an image on a specific layer on a page
- Make use of graphics, video and sound to enhance text in multimedia work.
Lesson Resources
- Lesson slides
- 2Connect
Lesson 1 - Planning a non-linear presentation
Lesson 2 - Starting to Research
Lesson 3 - Collecting and Converting
Lesson 4 & 5 - Creating the Presentation
Lesson 6 - Adding animations
Introduction
Recap the whole process that they have gone through to get to this point:
- Mapping out their pages with 2Connect
- Researching their information
- Adding notes to their pages
- Looking for or making images to go in their presentation
- Converting their plan into an actual non-linear presentation
- Formatting and designing their pages
- Importing images into their work.
Also recap the way in which their non-linear presentation is a bit like a website in terms of how people can move around it. The buttons that 2Create creates for you are like links on a website.
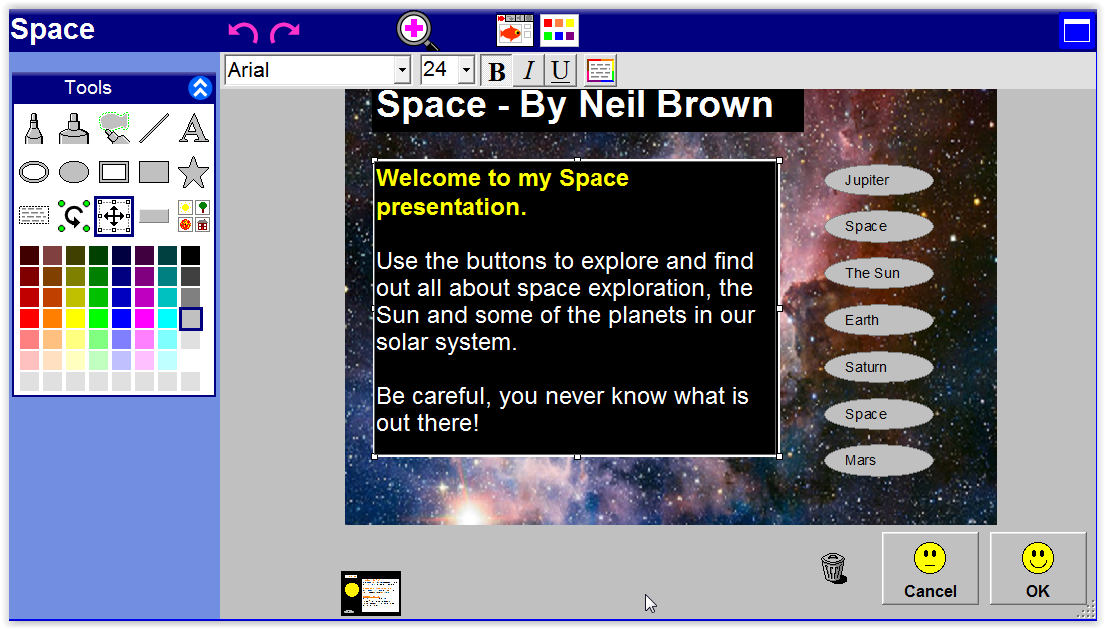
The homepage
Go back to the homepage. What needs to be on this page? What needs to be on a website homepage? It needs to be clear what the site is about, some ideas about the things people can find in it, and it needs to be clear how to get to those things... Oh, and it needs to look interesting so people want to look at it!
Background images can be added to some pages if wanted. To do this find and save an appropriate picture from the web. Right click on the page and import your image to the page, then enlarge it to fit the whole page. Finally, right-click the image and choose the second layering button which will move the image to the back layer on the page.

To make the pages even more interesting, you might also want to add animated objects to your pages, this could be things like spinning stars, moving spaceships, or whatever is appropriate for your topic.
To do this, first add an object to the page, this could be some clipart from the collection that comes with 2Create or an image of your own that you have imported.
The clipart can be found with this button.


Browse and choose an object for your page. Note, that when you click on a picture it appears straight away on the page, although this is not always immediately obvious if the window is covering the page. For this reason sometimes children add more than one of something without realising it. Click on an object and press the delete key to remove any unwanted pictures.

Once you have added your object, double-click on it to see the animation options for the object. These are fairly self explanatory, but let you control the direction, speed and special effects for the object (if wanted). You can also add sound effects and other features (explore for yourself). Press OK and then press the green play triangle at the top of the screen to see the effects working.

Adding extra pages and buttons
If some children want to further add to their presentation with extra pages, this can be done directly from 2Create.
Return to the page overview screen and click the button with the green + symbol at the top of the screen.

This creates extra pages so add as many as you need, perhaps a quiz or activities page and answers if needed.

Once the page is there you can click on it and edit it like the other pages. Do this for all your new pages, adding text, images and/or animated objects to the page.

Then you will need to add navigation buttons to allow access to this page in the presentation, and also a way to get back to the other pages. Click on the add button option:

In this example we are adding two buttons, one that will take us to the answers page (for the quiz) and a second that will take us back to the homepage. Once the buttons are on the page you can move them around with the select tool, double click them to rename them with the page names that they will take you to and resize if necessary to fit the words on.

When you are happy with the way the buttons look, return to the page overview page by pressing OK.
You will see green dots on the page you have just added the buttons to. These represent the buttons. Drag the green dots and connect them to the page(s) that you want the buttons to take you to. You will see a smiley face when you are in the right place. Let go and you’ll see a coloured arrow showing the connection.

Repeat this process on the other pages where new buttons are needed; the homepage will need a new button to get to your new page, and any sub pages (like the answers page in this example) will also need buttons to get back to the quiz and the home page.


Be sure to test all your buttons by pressing the play button at the end, and keep saving your work as you go!
Plenary
Give your children time to try out and look at each other’s presentations towards the end of the lesson. Ask them to check all the buttons work and that their pages look good and have accurate information. Have they kept a uniform look and feel in their presentation? Have they chosen contrasting colours? Have they chosen good images? Have they added any animation to their pages?