
Kodu Football part 2
Kodu Sports - Lesson 4
Objectives
- Use variables to create game systems
- Use logical reasoning to predict outcomes and debug algorithms
- Evaluate a program that they have created and say what they liked and what could be done to improve it.
Lesson Resources
Lesson 1 - Air Hockey part 1
Lesson 2 - Air Hockey part 2
Lesson 3 - Kodu Football part 1
Lesson 4 - Kodu Football part 2
Lesson 5 - Kodu Speed Pool part 1
Lesson 6 - Kodu Speed Pool part 2
Introduction
Recap the last lesson and the current project:
- What challenges did we identify for a Kodu football game?
- What features have we added so far?
- What’s working well so far?
- What do we still need to do?
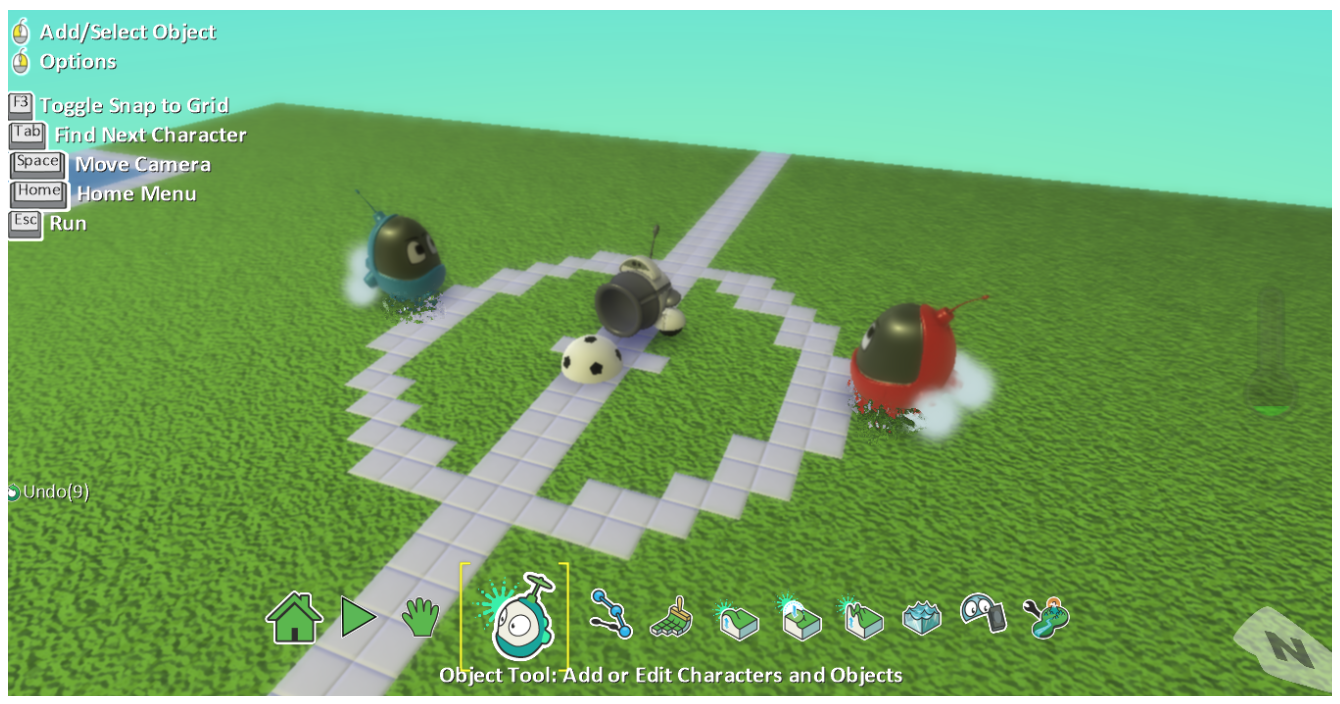
Coding the ball
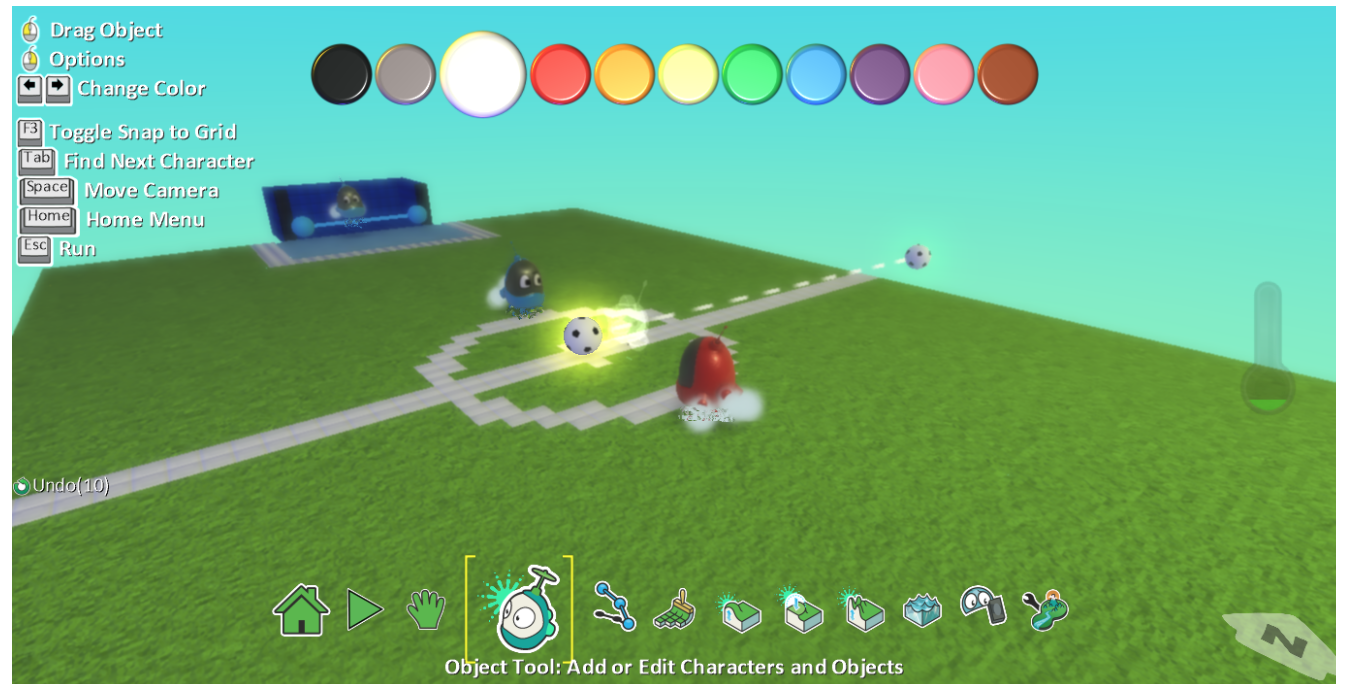
We added a ball last lesson, but now we need to add some more code to control scoring systems and the restart of the game when a goal is scored.
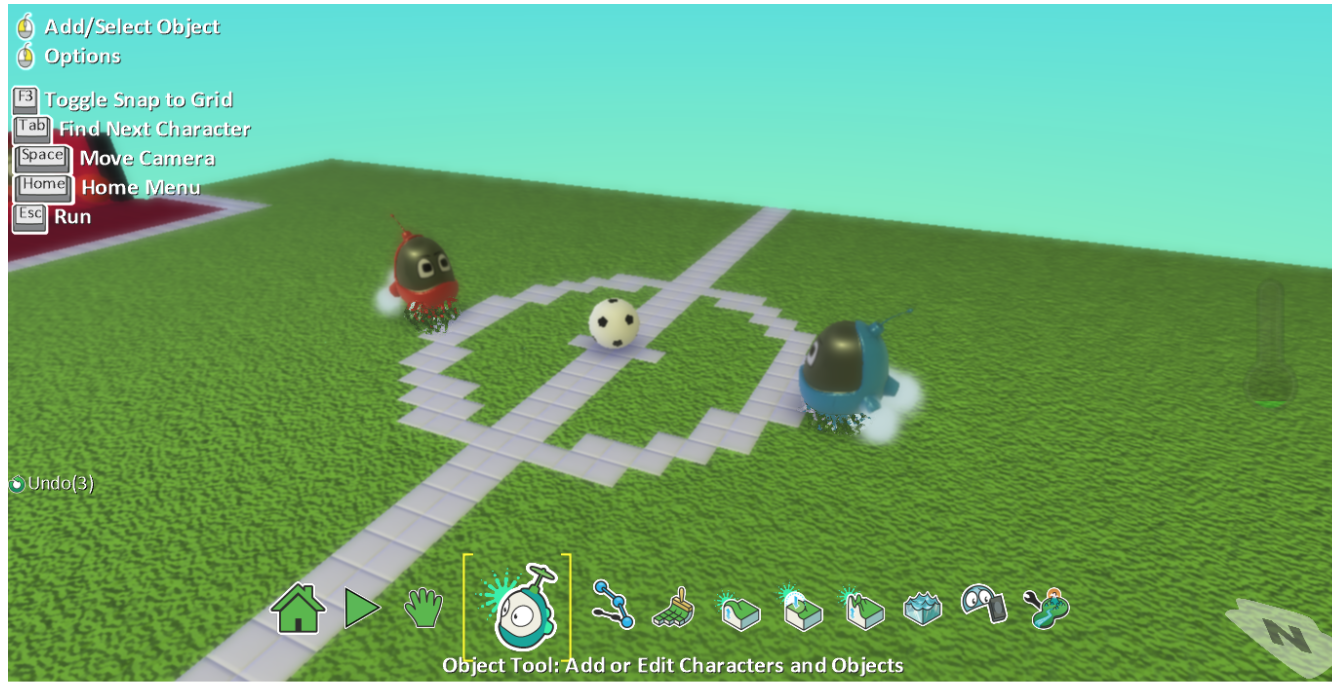
How could we make the game award a team a point when the ball is in one of the goals? The flooring type we used when making the goals is the key to this (and why we took such care creating the goals in a particular way).
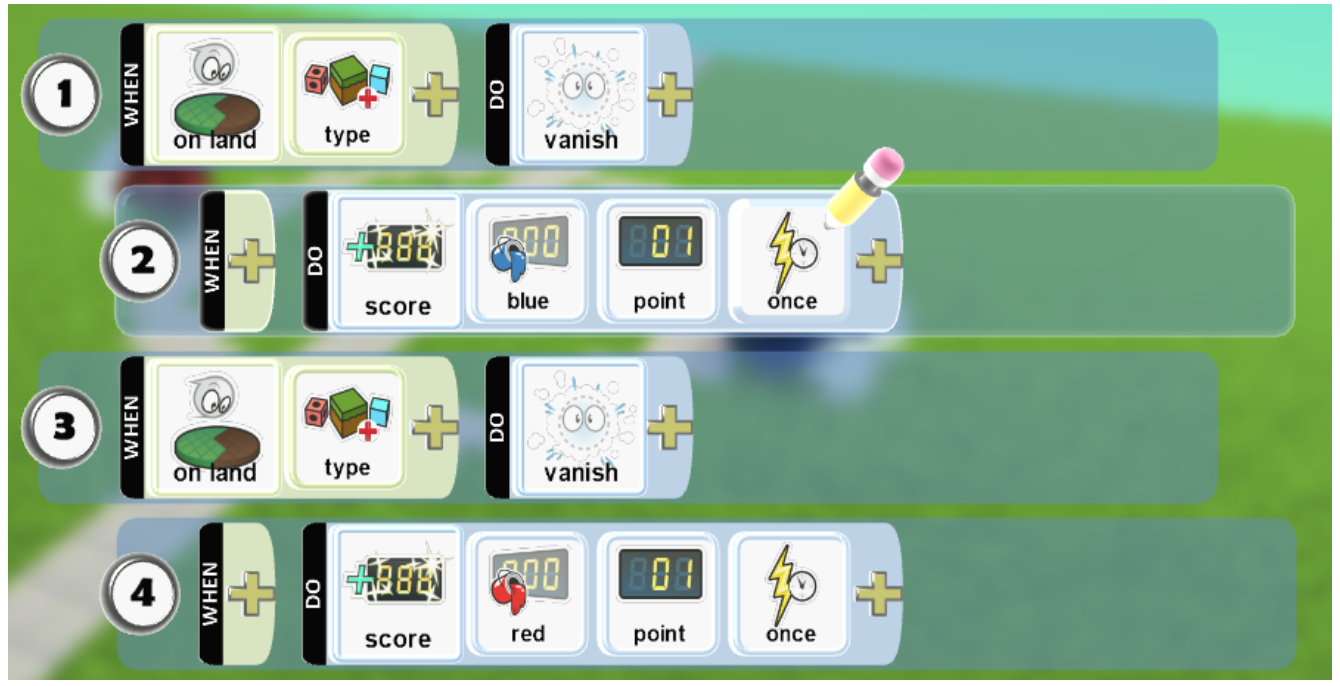
The code below will make the ball disappear when it touches the land type that makes up either goal area. Nested under that is a line of code that adds one point to the team that has scored. Doing it in this order makes the ball disappear instantly and prevents the ball bouncing round and scoring more than one point when the ball is in the goal.
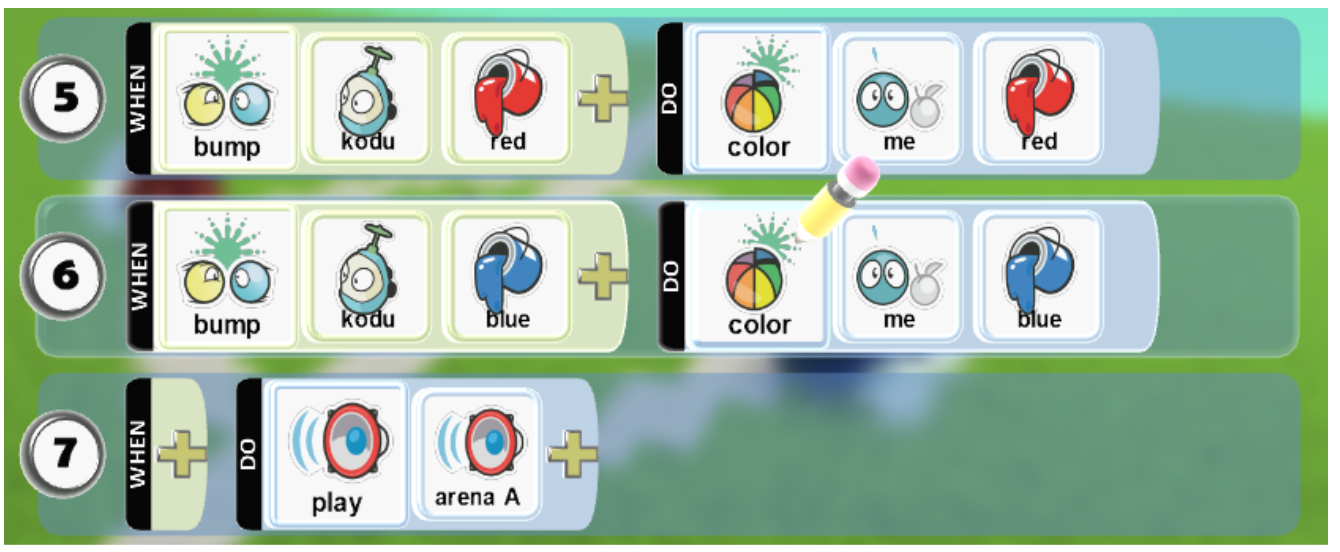
Here are some ideas for some nice optional extra features for the ball. This code makes the ball change colour to the colour of whichever team is in possession. We’ve also added some stadium sound effects that will play at all times to add some atmosphere. You can find these in DO > actions > more > play + environ > arena.
As the ball has disappeared when a goal is scored, we need now need it to reappear somewhere or it will be a short game! You can just use the ‘restart world’ method we used in the air hockey game, but we’re going to use a more complex method this time.
How could we make the ball be fired back into the arena in a random direction when a goal is scored? What will we need to add to make this possible?
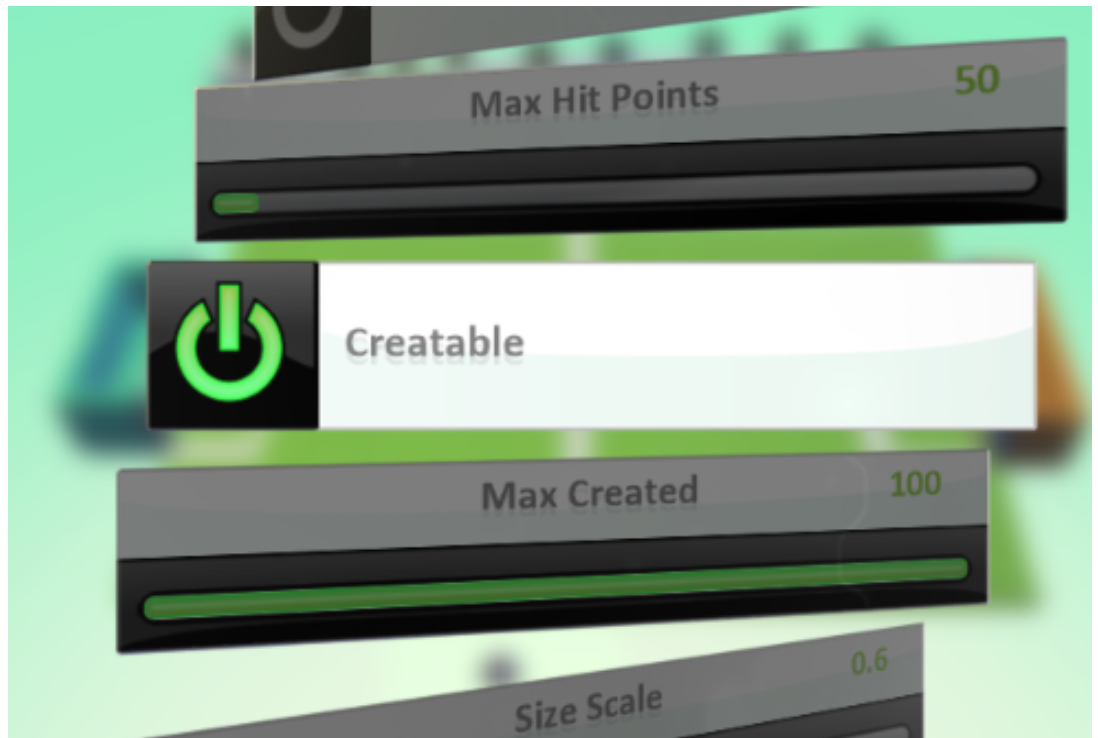
The first step to make this achievable is to make the ball into a ‘Creatable’. This means the sprite can be re-spawned as an exact copy of itself when it vanishes, complete with all it’s settings and code already in place. To make it into a Creatable go to the ball’s settings and scroll down five places to the option, then hit the switch so it goes green.
Re-spawning the ball
At this point we need a new character, the cannon, which will be used to fire the ball back into play when a goal has been scored. It will be made invisible once the game starts to keep it out of the way of the players, and also so the players cannot see where the ball might appear, adding a level of unpredictability to the game.
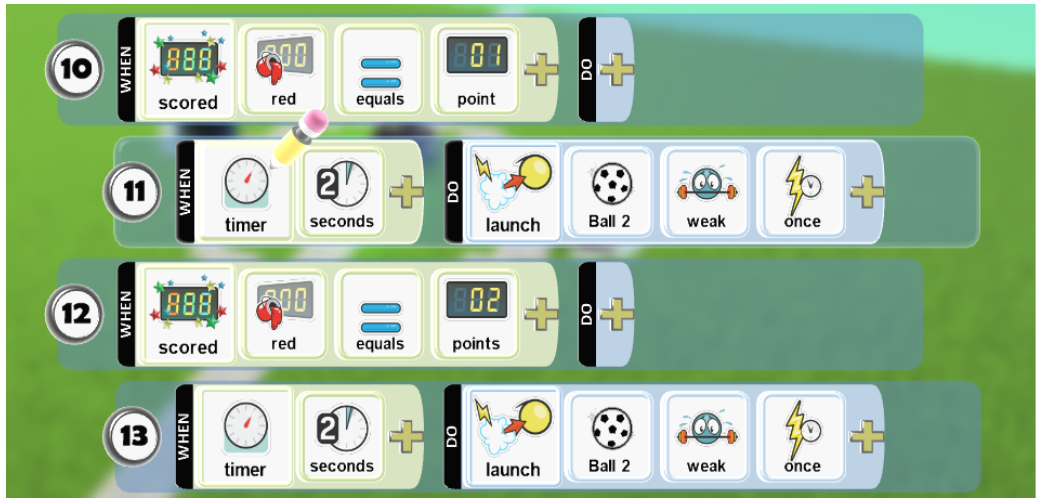
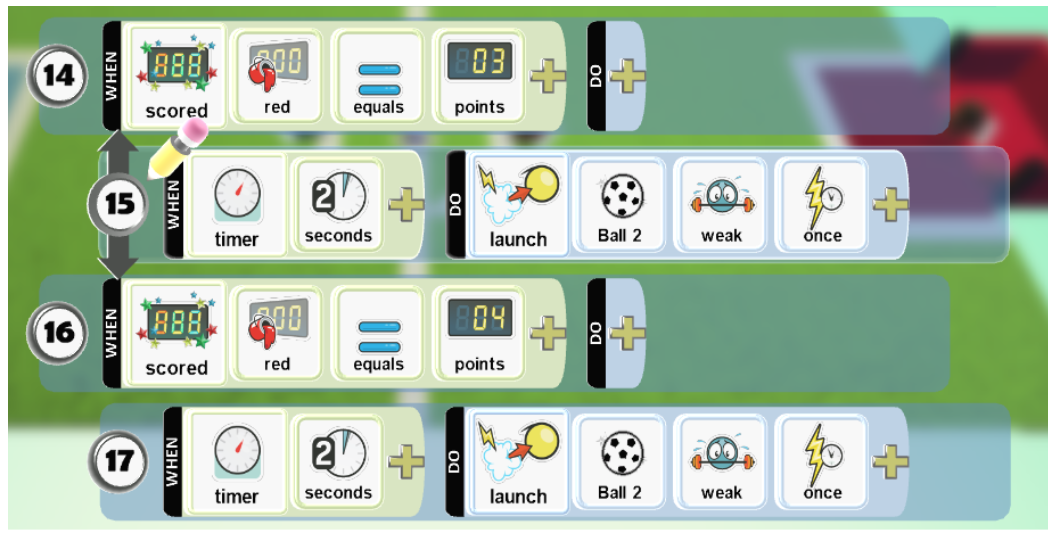
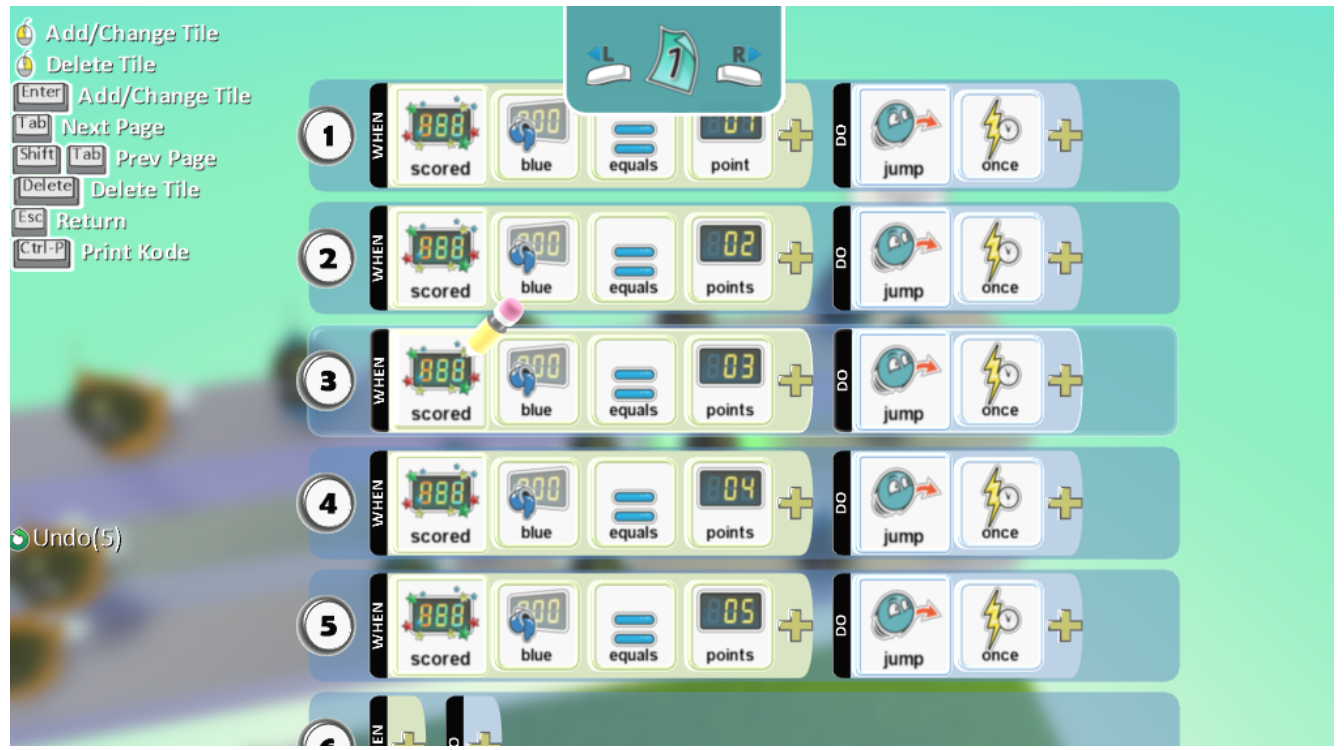
How will the cannon be able to recognise when a goal has been scored and therefore when to fire the ball? The score will change! As the game is first to five, each team’s score can only ever be 0-5, each one of the possibilities needs to trigger the ball to be re-spawned.
Line 1 of the code will make the cannon constantly rotate, so the ball could be fired in any random direction when it reappears.
Line 2 and 3 shows how the ball is re-spawned. When the blue score is equal to 1, there is a wait of two second and then a copy of the creatable (Ball 2) is launched (find it in actions) onto the field once. (Note, you will only see the option to launch a creatable if you remembered to make the ball a creatable!). It’s vital that you choose to launch the creatable and not just another ball from the objects menu, as that will not have the settings and code needed attached to it. You can then copy and paste row 2 (right click the number of the left of the row) and paste three copies in, just changing the ‘point’ number on each row so scoring 1, 2, 3 or 4 points triggers a new ball to be launched. Why don’t we need a line for when 5 points have been scored? As the game is won at this point it’s not necessary.
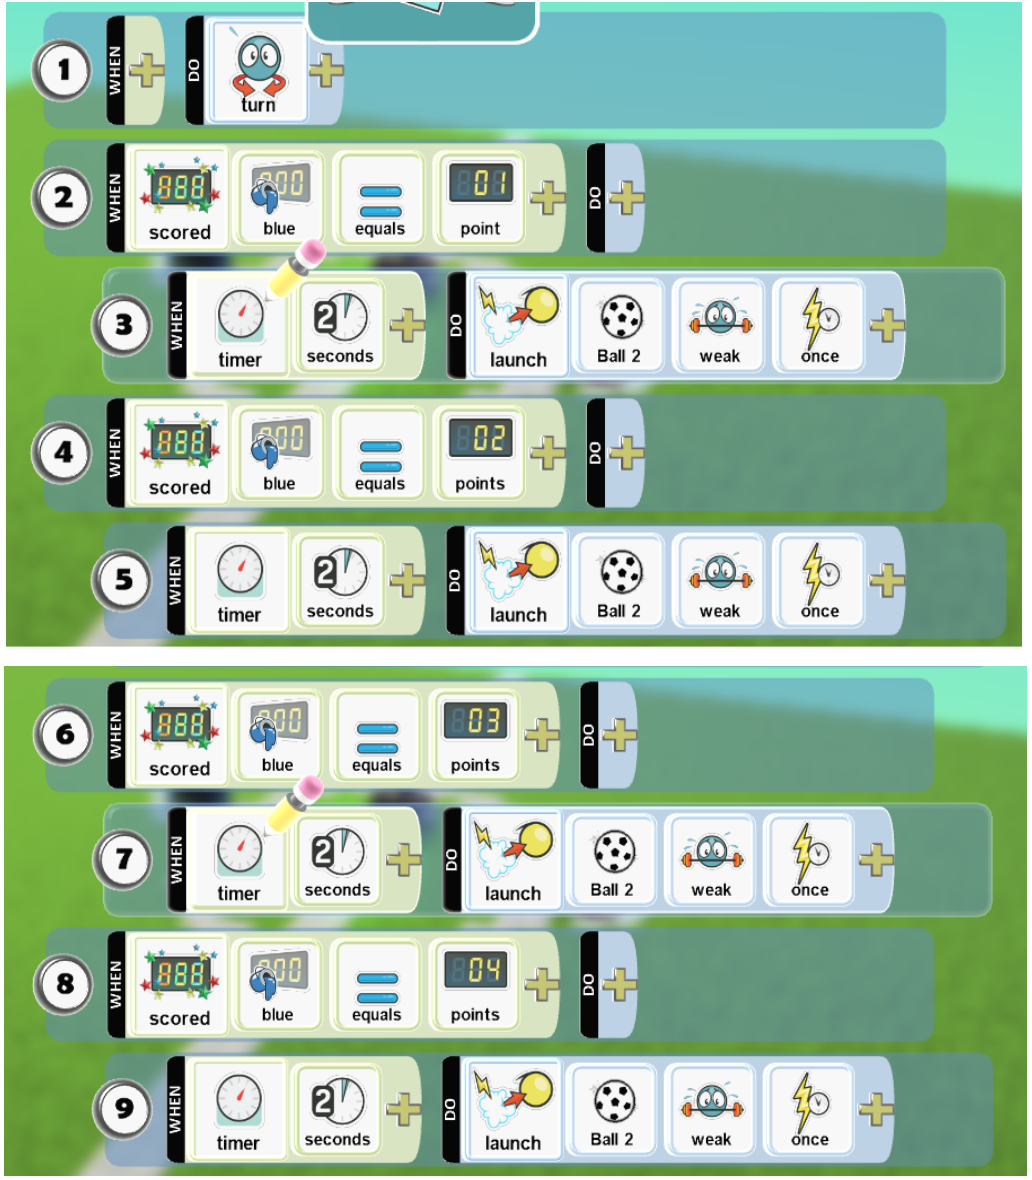
This then needs to be repeated for the other team’s colour:
The final steps for the cannon are to hide it so it’s not in the way while the game is being played. Three of its settings need to be activated for this to work properly.
Immobile - This stops the cannon from moving in the game:

Invisible - This hides the cannon from view

Ghost - This stops the other characters from being able to bump into the cannon, if not used characters can still bump into the cannon, even though it’s invisible.

Finally, making a creatable makes that object the source for future copies, however, the original (ball) is not usable in the game and will not be onscreen when the game starts. So move the original to the side of the pitch and rick-click it to make a copy. Paste the copy onto the centre mark on the pitch so there is a ball there to start the game with. You will always see glowing dotted lines linking any copies of creatables to their ‘master’ version when your mouse cursor is on them.
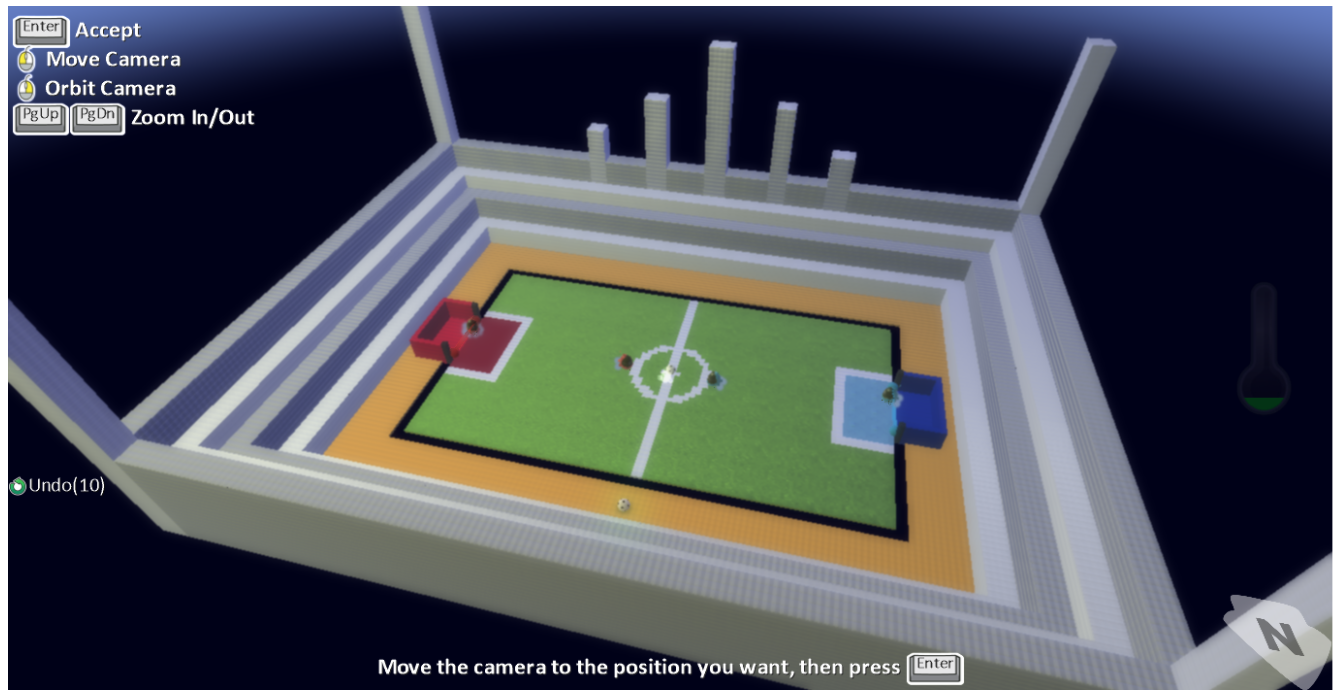
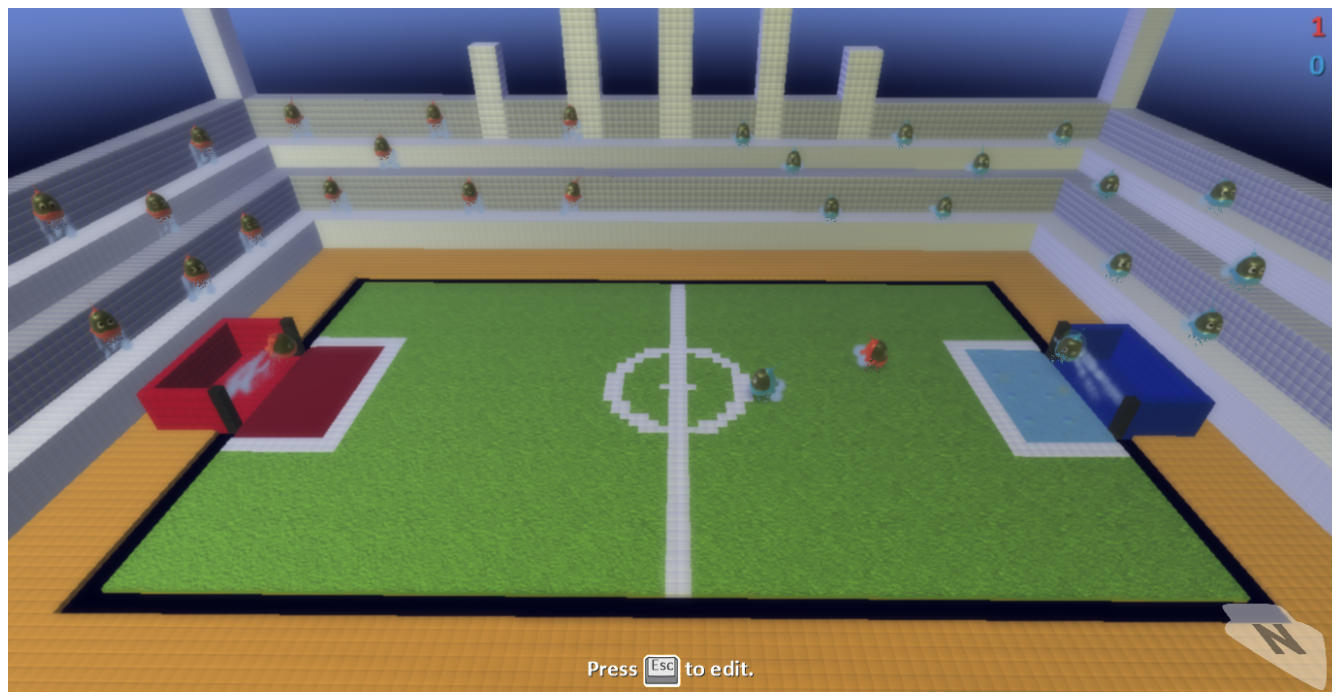
You should now have a fully functioning game that the students need to test. They should play their game against a friend so all characters and settings are thoroughly tested.
Extras
Once your game is working, it is up to the students what they want to add to their game. It might be extra functions in terms of gameplay or it might be a case of adding to their world, such as adding a stadium around their pitch or even a crowd in the stands.
Here’s a couple of ideas.
Stadium
If you want to add a stadium and terraces around your pitch, remember to leave a thin gap between the pitch and any surroundings, otherwise players and the ball will be able to leave the pitch and the wall effect for the edges will be lost. Creating a stadium is best done with the square brush and the linear square brush to keep edges nice and straight. Alternating shades of grey (or any other colour) for the steps of the terrace lets you use the magic brush with the up/down tool to raise the levels of each step independently. You might also want to adjust the lighting and sky colour.
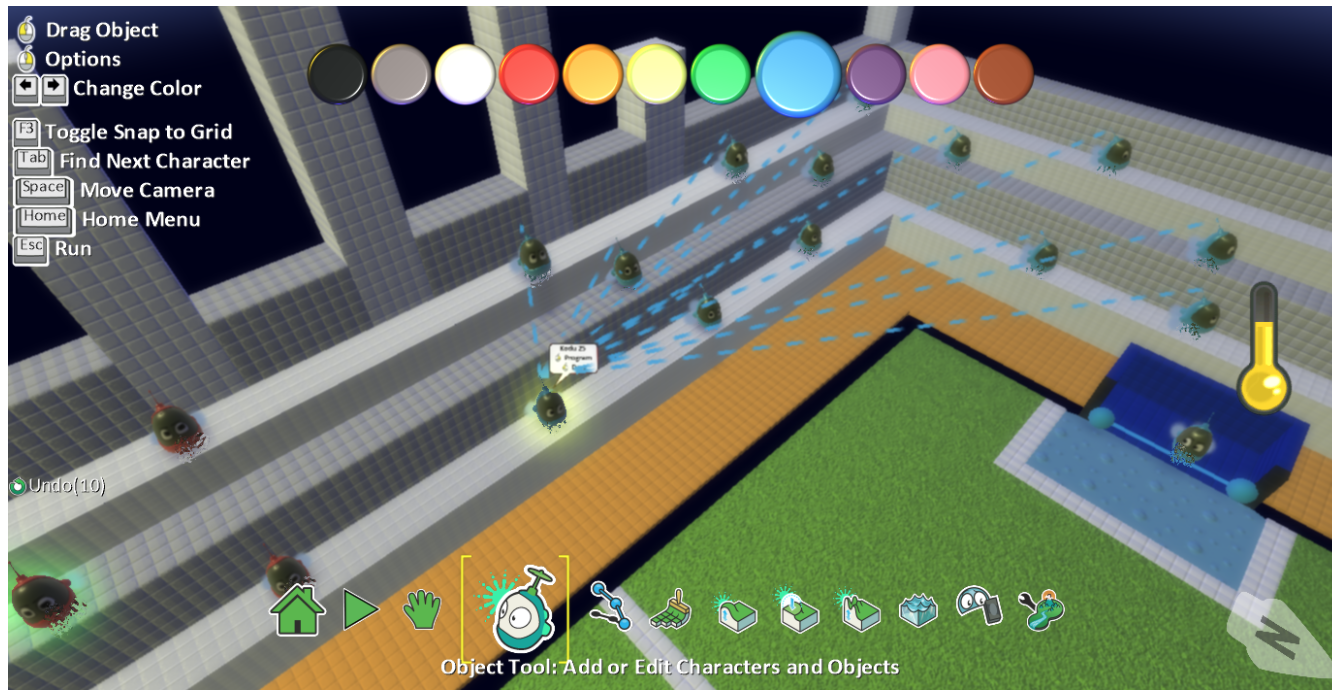
Crowd
You can add other Kodus to be a crowd in your stands. You can even make them cheer when you score! This is a nice little extra challenge for your students, can you make the correct set of supporters jump and cheer when their team scores a goal?
But be careful with how many supporters you add, as adding them will cause the barometer on the right of the screen to rise (this represents how much of your computer’s memory is being used and can cause problems and crashes if it reaches red).
Make one (blue) supporter first. Position it on the terrace and adjust the size, height and rotate it so it’s looking at the action. The following code will make the Kodu jump when the blue team scores a goal:
Test that’s working and then make that Kodu a creatable, and copy and paste some copies around the stadium. Only place them where they will be seen by the fixed camera otherwise they will be a pointless drain on your computer’s resources.
Add a new Kodu for the other team and repeat the process. Then kick off and watch the crowd jump as the goals go in:
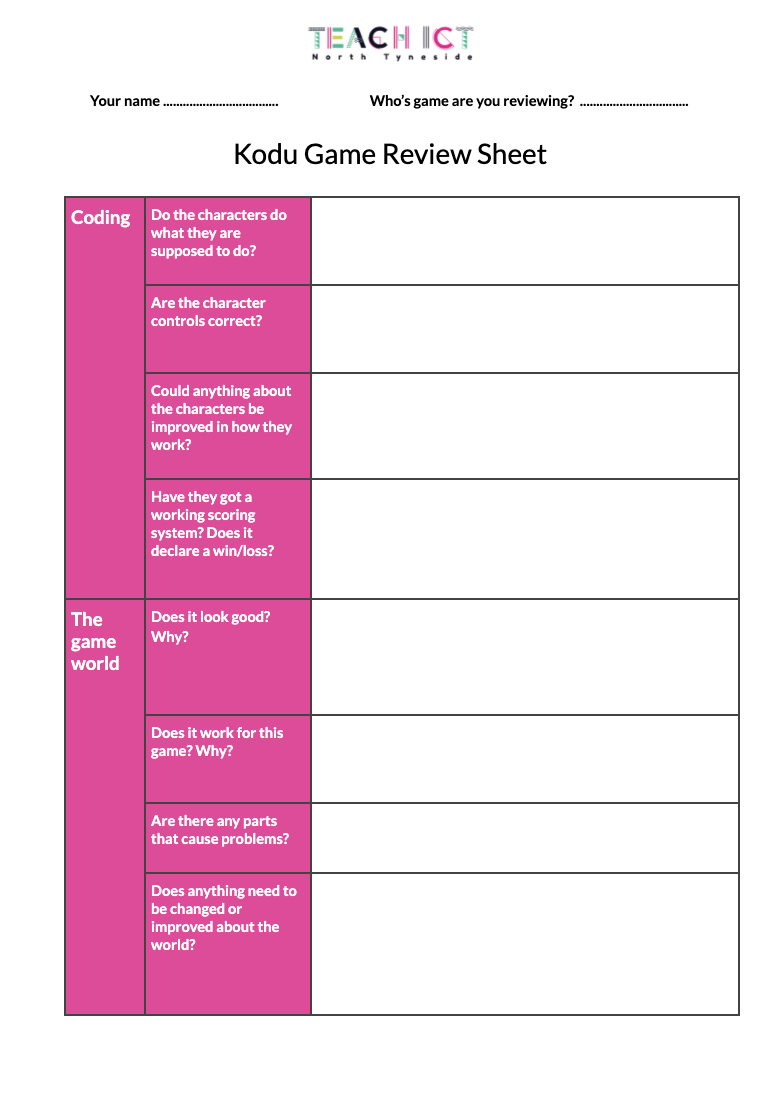
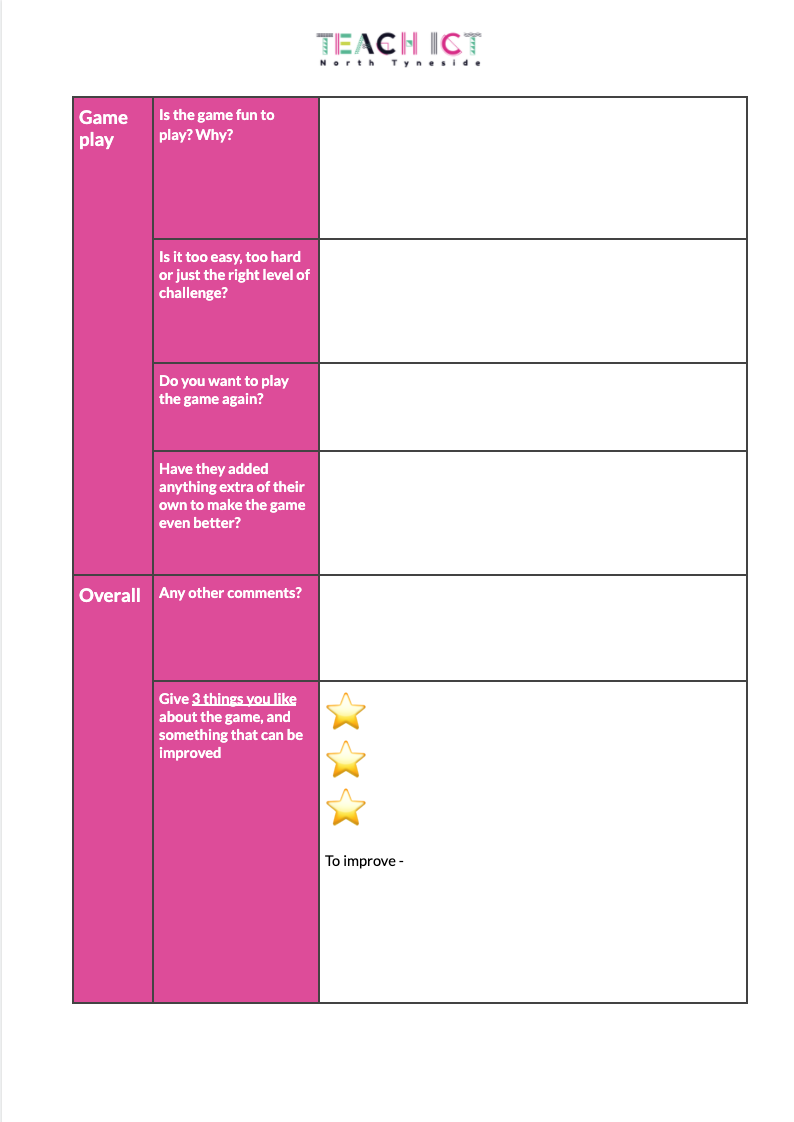
Ensure they save a final copy of their completed game. Finish off by asking students to evaluate someone else’s final game. You can use our Game review sheet or use your own criteria and system if you prefer.
You can download the example version of our Kodu Football game below. Click the link, then when the Drive screen opens, save the file to your computer by clicking on the download arrow that appears as you move your cursor to the top of the screen, and then copy and paste the downloaded file into the following folder on your computer so you can open it in Kodu: Documents > Saved Games > Boku > Player1 > Imports
Then from the main Kodu menu go to Load game and the file should appear in the Downloads section.
Download Kodu Football demo version