
Using conditions and random numbers
Getting started with the BBC micro:bit - Lesson 5
Objectives
- Understand what conditional statements (selection) are, and why and when to use them in a program
- Understand what variables are and why and when to use them in a program.
- Learn how to create random outputs from a range of possibilities.
Lesson Resources
- Lesson Slides
- micro:bits and USB cables (approximately 1 between 2 students)
Lesson 1 - Getting started and the LED Grid
Lesson 2 - Inputs and outputs
Lesson 3 - More inputs and outputs
Lesson 4 - ‘Beat the buzzer’ – Pin inputs and outputs
Lesson 5 - Using conditions and random numbers
Lesson 6 - Variables: Building a scorekeeper
Introduction
Computer programs are instructions telling the computer how to process inputs and deliver an output. An important part of programming is telling the computer WHEN to perform a certain task. For this, we use something called ‘conditionals’. Conditionals get their name because a certain Condition or Rule has to be met.
Students are all already familiar with the concept of conditionals in their daily lives!
Ask - Have you ever heard your parents say...?
“If you clean your room, you can go out with your friends.”
“If your homework is done, you can play video games.”
“If you do your chores all week, you get your pocket money, else you are grounded.”
These are all conditionals! Conditionals follow the format of IF this, THEN that.
IF (condition is met), THEN (action performed)
Have the students share a few conditionals from their own lives with the class or within small groups.
The extension of this is adding an ELSE portion to a conditional. This gives two possible outcomes, depending on whether a condition has been met or not. If it is met one thing happens, if it is not met a different thing happens:
IF (condition is met), THEN (action performed), ELSE (different action performed)
Example:
IF it is snowing, THEN wear wellies, ELSE wear trainers.
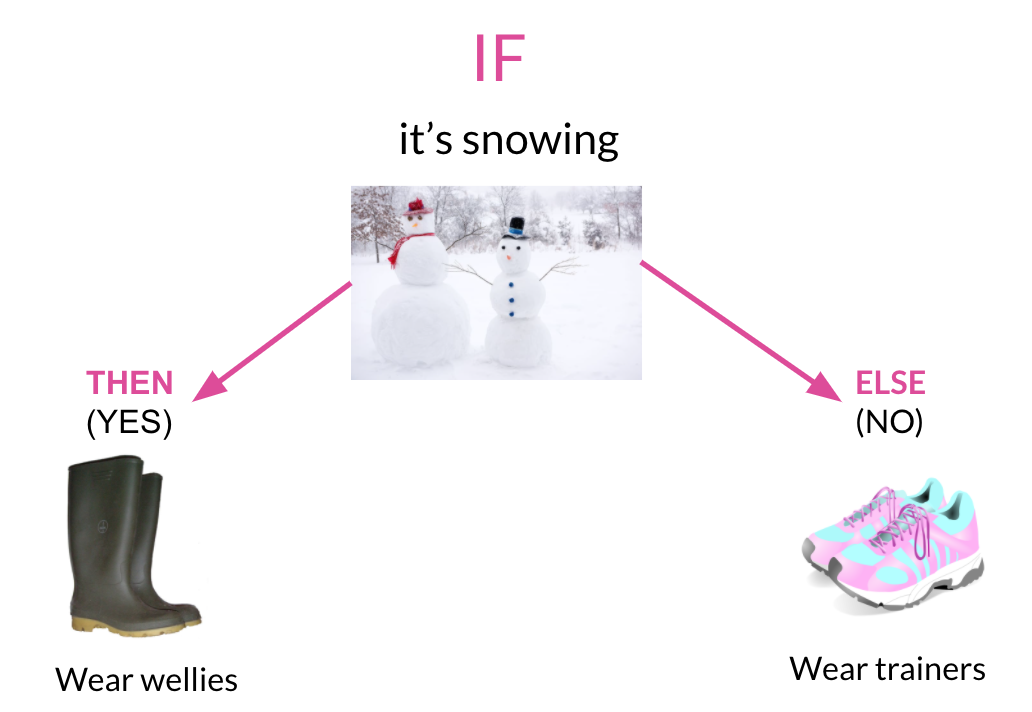
The ELSE portion makes sure that a different action is performed in either case. Without the ELSE action, your students might be barefoot!
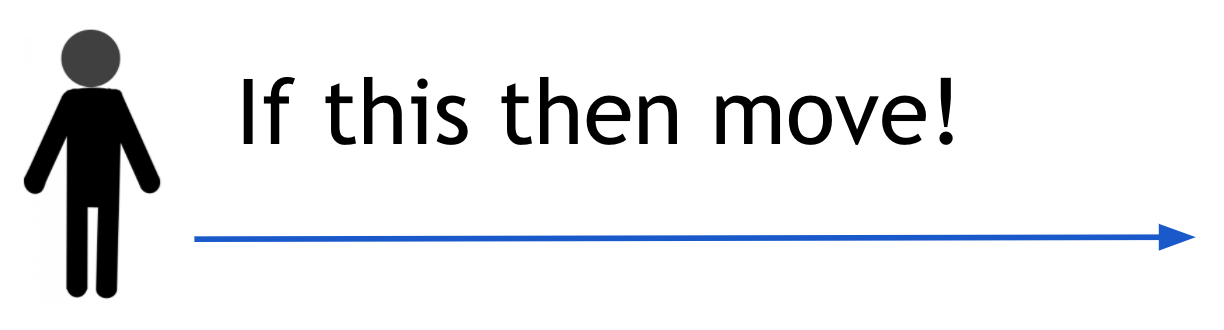
The conditions game
(if you have space) Tell the students that they will be acting out some conditionals as though the whole class is a computer program for a game. Each student will perform a described action if the indicated condition is met. Then have the students line up at one side of the room. If you don't have room to do this, you can simply award points for conditions being met, instead of moving. They can all play along by keeping score on their fingers.
Explain the rules:
The object of the game is to get across the room first.
- For if...then conditionals: If the condition called out is true for you, then perform the action described in the then. If the condition called out is false for you, then do nothing.
- For if...then...else conditionals, listen carefully to the whole condition, as the else may apply to you.
Example conditional statements
- If you have eaten fruit today, then take one step forward.
- If you have the letter ‘e’ in your first name, then take two giant steps forward.
- If you have a brother, then take a step forward, else take 2 steps forward.
- If you’ve had your birthday this year then take a giant step forward, else take two steps backwards.
The conditionals you use will depend on your individual class but all conditionals should to apply to at least two people in the class.
Reflect
- How did they do?
- Were there any ‘run-time errors’? - Did a student miss a conditional being met or fail to correctly carry out the THEN or ELSE action?
- Were there some conditions that could be evaluated as something other than True or False (maybe, sometimes)?
Using conditions previously
In our previous lessons we've used conditions in our code to help decide what happens and when. Another name for this is selection. Ask the class - Can you give an example of where we have used selection or conditions in our micro:bit projects?
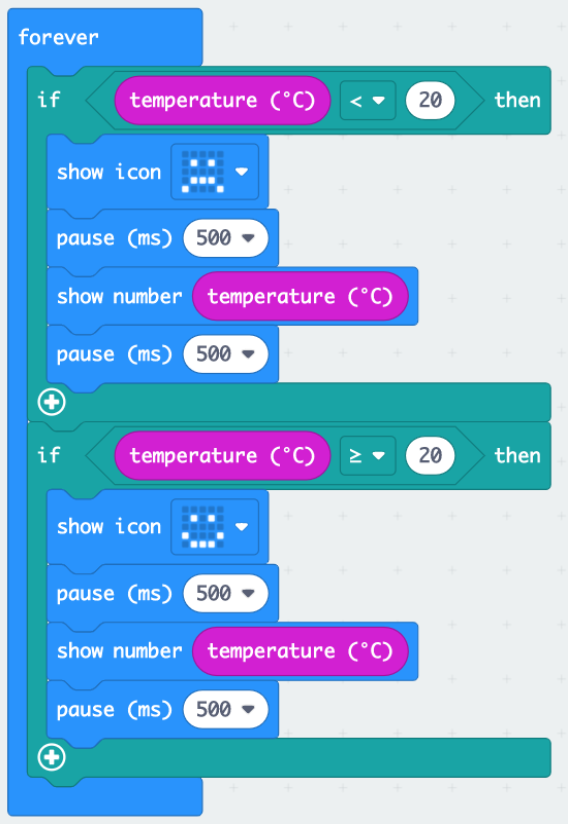
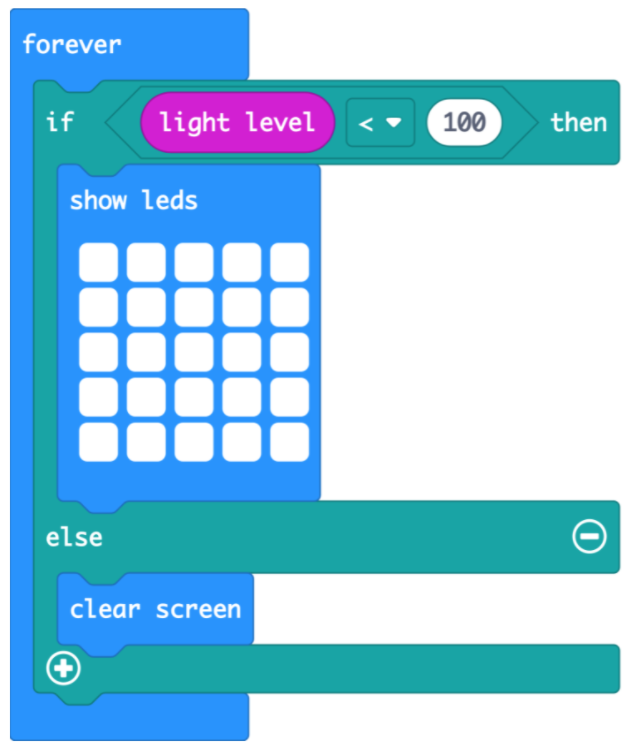
Both the temperature and light sensor projects used 'if then' condition blocks:
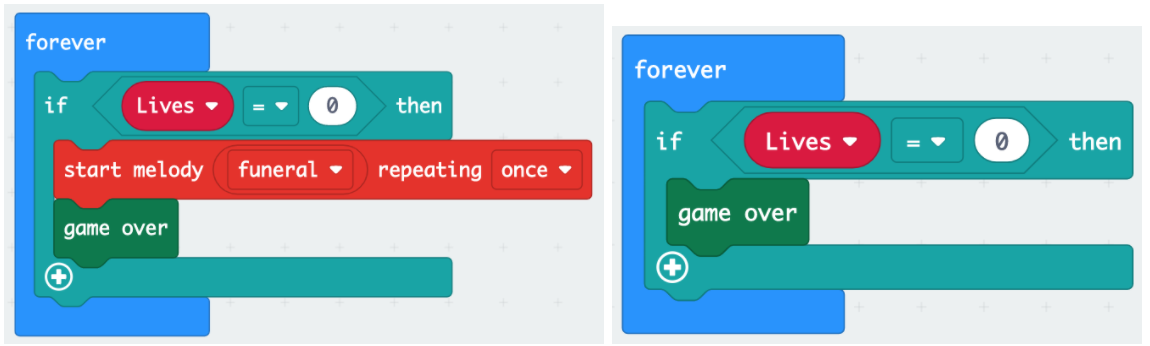
Our Beat the Buzzer game also used one to measure our variable and dictate when the game ended:
Magic 8 ball
In this lesson we are going to focus on using conditions again, but also adding a random element into what happens. All three projects will follow a similar structure. Let's start with making our very own Magic 8 Ball toy.
Who has come across the Magic 8 ball toy before? It’s a ‘fortune telling’ ball that, when you ask a question and shake it, will give you a response to the chances of that thing happening.
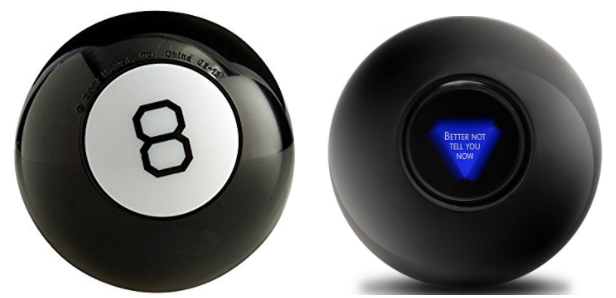
Take a look at this short video which explains a bit more.
For example, questions such as “Will I be famous one day?” might get responses such as “Definitely!”, “The chances are slim” or “It’s possible”.
We’re going to have a go at programming our micro:bit to behave just like the Magic 8 Ball toy and give us varying responses when we shake it and ask a question.
Programming your own 'magic 9-ball'
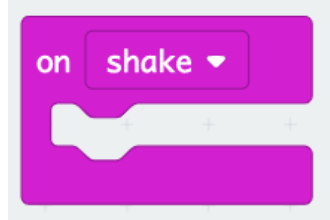
Ask the students - Which of the inputs from our previous lessons might be really useful to start things off? The on shake option will work perfectly for this as that is exactly how the original toy works.
What should happen next when you shake the micro:bit? Like our previous 'Beat the buzzer' project, it's a great idea to start with the pseudocode of what we want to happen. After the initial shake, a Magic 8 Ball invites you to ask it a question, so we’ll do the same.
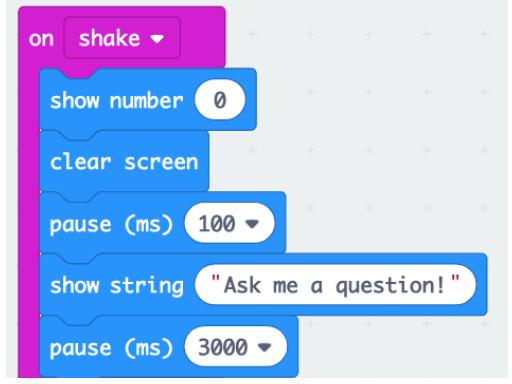
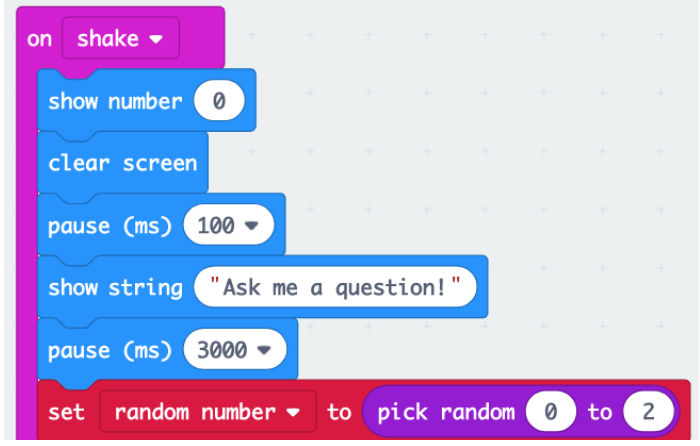
Here’s what we want to happen first, can you code it?
- When the micro:bit is shaken the LEDs show a number 8
- Then the screen is cleared
- Short pause
- Then it tells the user to ask a question
- Then it waits for three seconds (to give them time to ask the question verbally)
Here’s how it might look so far:
Then ask:
- What should happen next after the question has been asked?
- Should it always give us the same answer?
- How could we make it give different answers?
To begin with, we’re going to have three possible answers to the question we ask: Yes, No and Maybe.
To pick which answer we get (randomly) we’re going to use a variable (called random number) and a block that sets it value to one of three choices.
In programming, a variable is a placeholder for a value, a place that you can store information in, much like x and y are popular variables in algebra. Variables are values that can change, for example, in a video game you may have variables for the score, lives or time; all numeric values that may go up or down as the game runs.
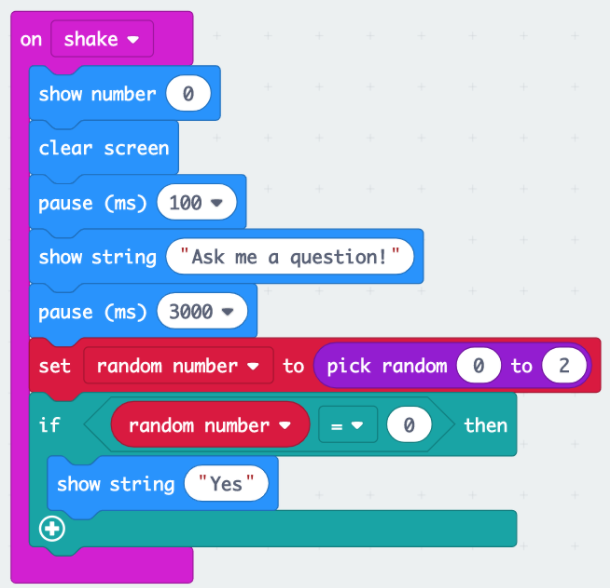
To get the ‘set random number’ block, go to the Variables category and make a variable. Name it ‘random number’. The random number picker block is in the Math category.
Note that the range for the value of the variable goes from 0 to 2, that’s because computers start counting at 0.
So the choices are 0, 1 or 2.
Next we add a condition statement to test which number the computer picks for our ‘random number’ variable. The teal coloured blocks are in the ‘Logic’ category. If the computer picks a 0 from the possible choices, the string (answer) “Yes” is shown on the micro:bit
How could we use the same method to get other answers from our Magic 8 Ball?
Ask the students to attempt to add the rest of the code that would show the ‘No’ and ‘Maybe’ answers when 1 or 2 are chosen randomly.
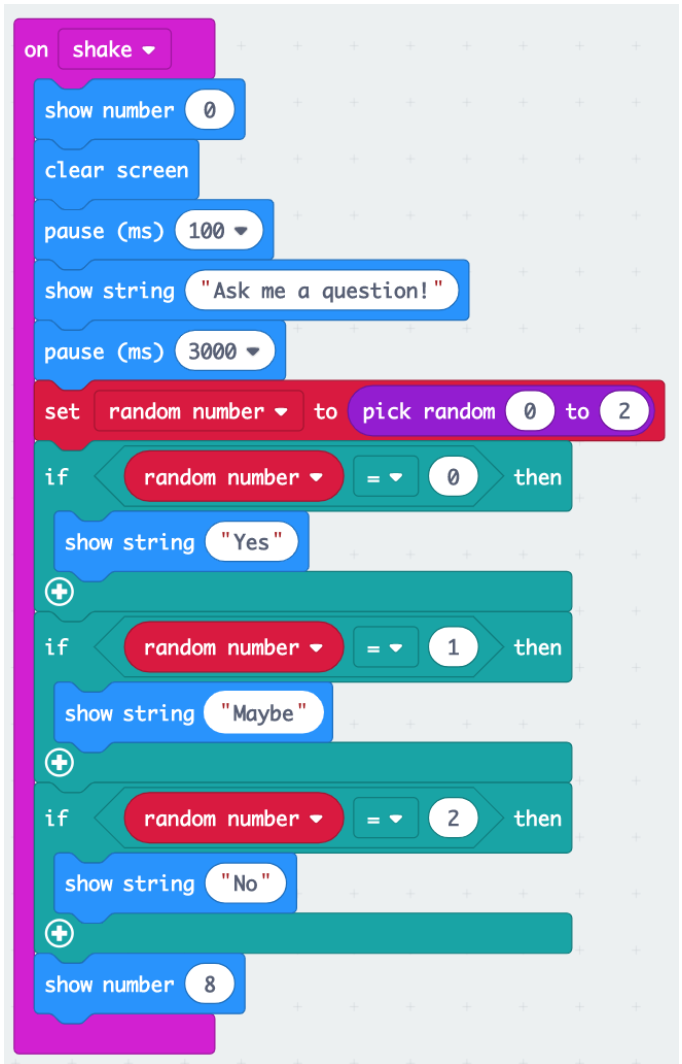
Once complete test out your Magic 8 Ball and doing a bit of fortune telling!
Finally, ask the students to add some more possible answers of their own and adjust their code to allow them to be chosen. This will require more conditions with ‘if’ blocks and increasing the range of the random number variable to allow more than three choices.
A digital dice
To follow on, set the students the challenge of adapting their code to complete this challenge.
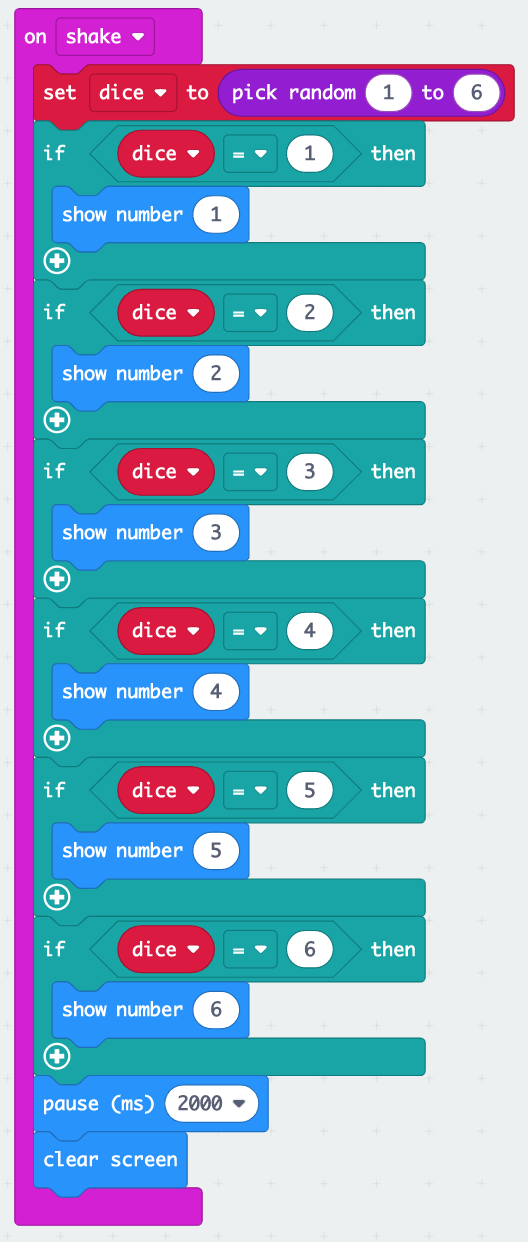
Can you convert your micro:bit from a Magic 8 Ball into a digital dice?
Each time you shake the micro:bit it should display a random number from 1 to 6, then reset itself to a blank screen.
The solution might look something like this.
Rock, Paper, Scissors
Finally, have students recall the classic rock, paper, scissors game.
What are the rules of the game? What are the conditionals? E.g. If Player A gets rock, and Player B gets scissors, Then Player A wins.
Ask the students to (as independently as possible) make a program for this game on our micro:bits, they should use the Magic 8 Ball code as a guide as much of it can be done in a similar way as their new program should also have three possible random outcomes.
Solution
Take a on shake block (inputs) and create a variable called ‘Hand’ (variables), then add set Hand to and a block to choose us a random number. Use the range of 0 to 2, this gives us three possibilities 0, 1 and 2 (computers start counting at 0!).
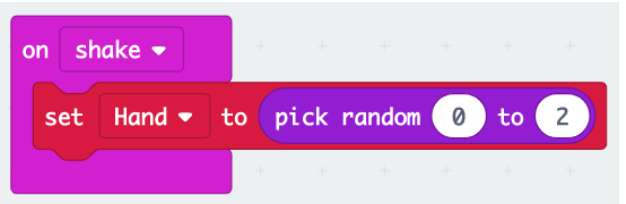
This will set the variable for Hand to a random number each time we shake the micro:bit.
Example:
- If the computer chooses the random number as 0 the player gets a rock
- If the computer chooses the random number as 1 the player gets paper
- If the computer chooses the random number as 2 the player gets scissors
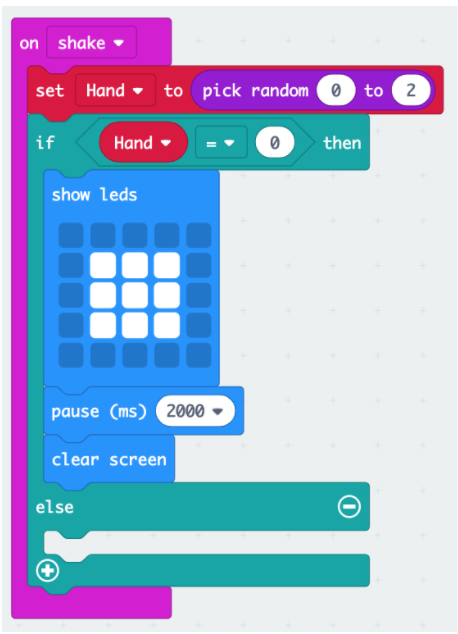
So next we need to code this and get the micro:bit to display a picture to represent the item chosen by the random number. Here’s how to do the first one using an if/else block (which is the most efficient way to do this):
The rest of the code should cover paper and scissors being chosen based on the selection of a random number. Below is an example of the completed code that makes use of an if/else statement. Some students may just use three ‘if’ blocks as they did with the Magic 8 Ball code.
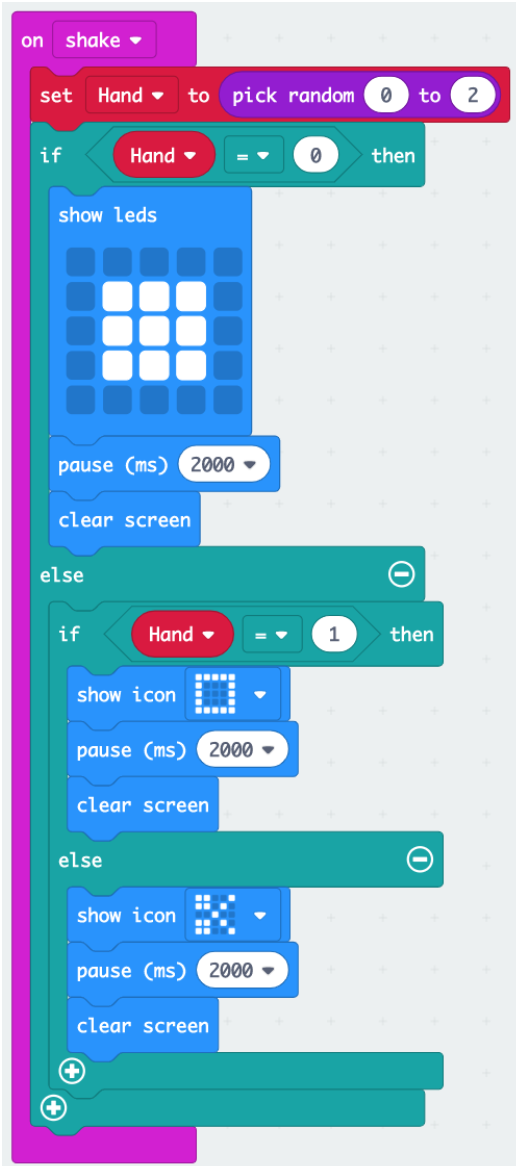
Note the nested If...then... else blocks. This allows for the three possibilities of rock, paper and scissors. A single If...then... else block only allows for two possibilities.
So our conditions are:
- If a 0 is chosen as the random number, a rock image is displayed for two seconds.
- If a 1 is chosen as the random number, a paper image is displayed for two seconds.
- If neither (else) a 0 or 1 is chosen (i.e. a 2 is chosen) as the random number, a scissors image is displayed for two seconds.
Play!
Get them to download and test their programs as they go. When it’s working they can join up with another person (or pair) that also has a working program on their micro:bit so they can play rock, paper, scissors against each other using two micro:bits.
Plenary
Ask the students to talk to their partner and discuss the success of their projects today. They should consider the following questions:
- Did your programs begin in response to an input?
- What are conditional statements in a program?
- Why are they useful?
- How have you used variables today?
- Can you think of any ways to improve your programs today?
In the next lesson we’ll take a deeper look at using variables in programs as we build a game and a scorekeeping device.