Fantastic Figures 2
An Introduction to Animation - Lesson 6
Objectives
- To create a smooth stop motion animation by moving objects in small steps
- To plan and tell a simple story with stop motion animation.
- To work successfully in a team
Lesson Resources
- Lesson Slides
- Animation planning sheet
- iPads with iMotion or a PC with a tabletop webcams (1:2)
- Small toy figures to use for animations (Lego, Playmobil, animal figures etc are ideal size.)
- Blu Tack / Masking tape
- Scissors
- Printed (or drawn) landscape images to use as backgrounds or flooring (A3 or A4 size)
- Strong card
Lesson 1 - Getting Stated: Making Pictures Move
Lesson 2 - 2Animate Advanced tools
Lesson 3 - Adding details
Lesson 4 - Stop Motion Fun
Lesson 5 - Fantastic Figures 1
Lesson 6 - Fantastic Figures 2
Introduction - Create the set
In this lesson the children will be building a small set for their animation. Some preparation in advance will be needed for this. You can either look for and print off images to use as backgrounds or get the children to design their own with pens or paints - This can make it a really nice cross-curricular topic.
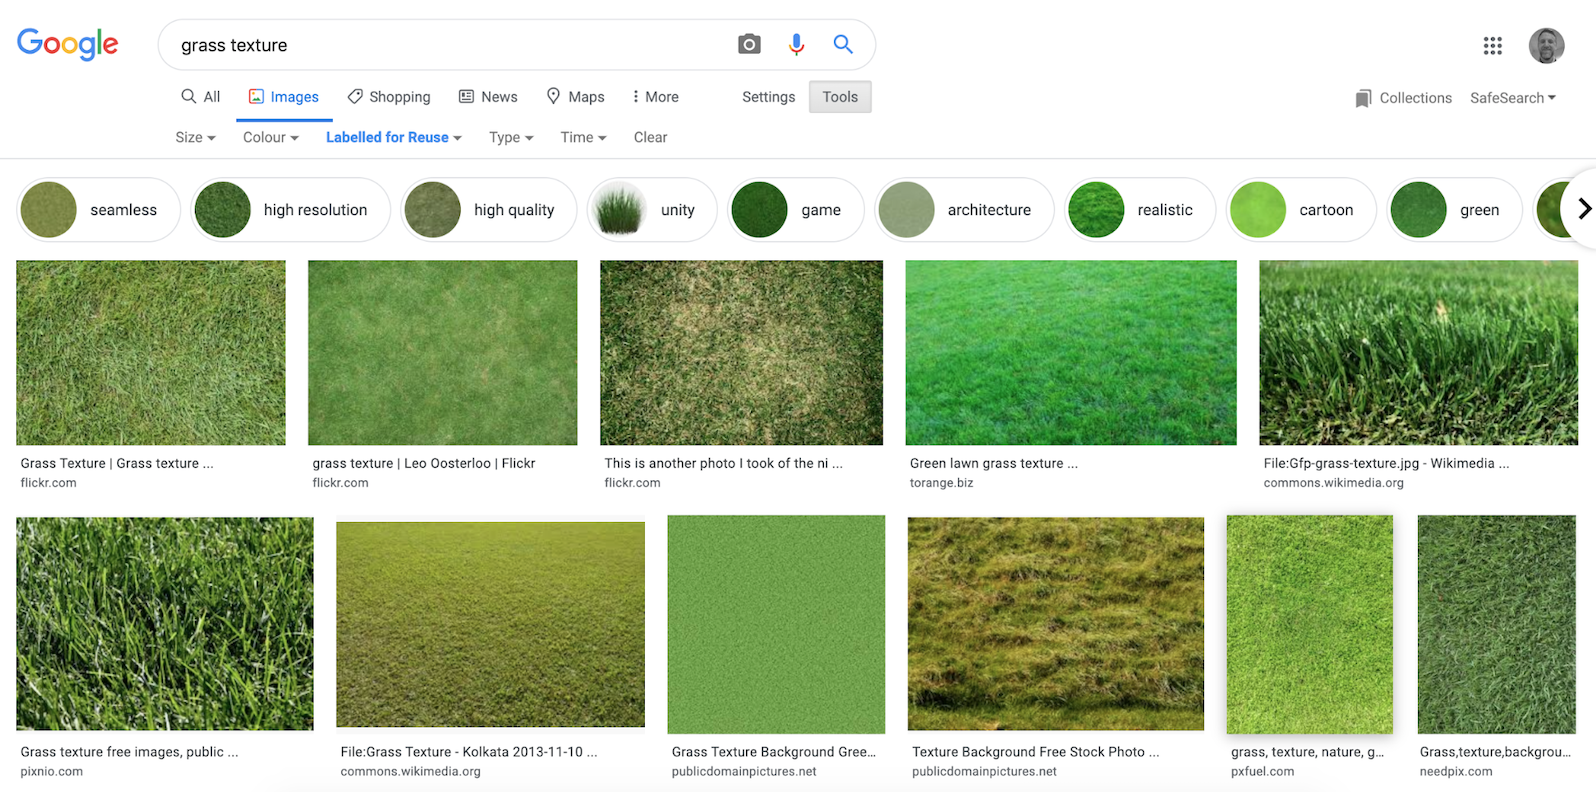
If searching online, search for a material followed by the word ‘texture’ and you should find good images to use for the set floor. Like this example of ‘grass texture’. Open the image to its full size before saving, and check for images that are labelled for reuse (in Google Images click Tools > Usage rights > Labelled for reuse).
If possible, print or paint them on A3 paper as its size makes it easier to create a set that hides everything else (the classroom) from the camera.
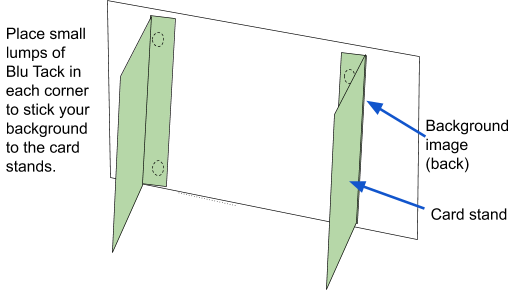
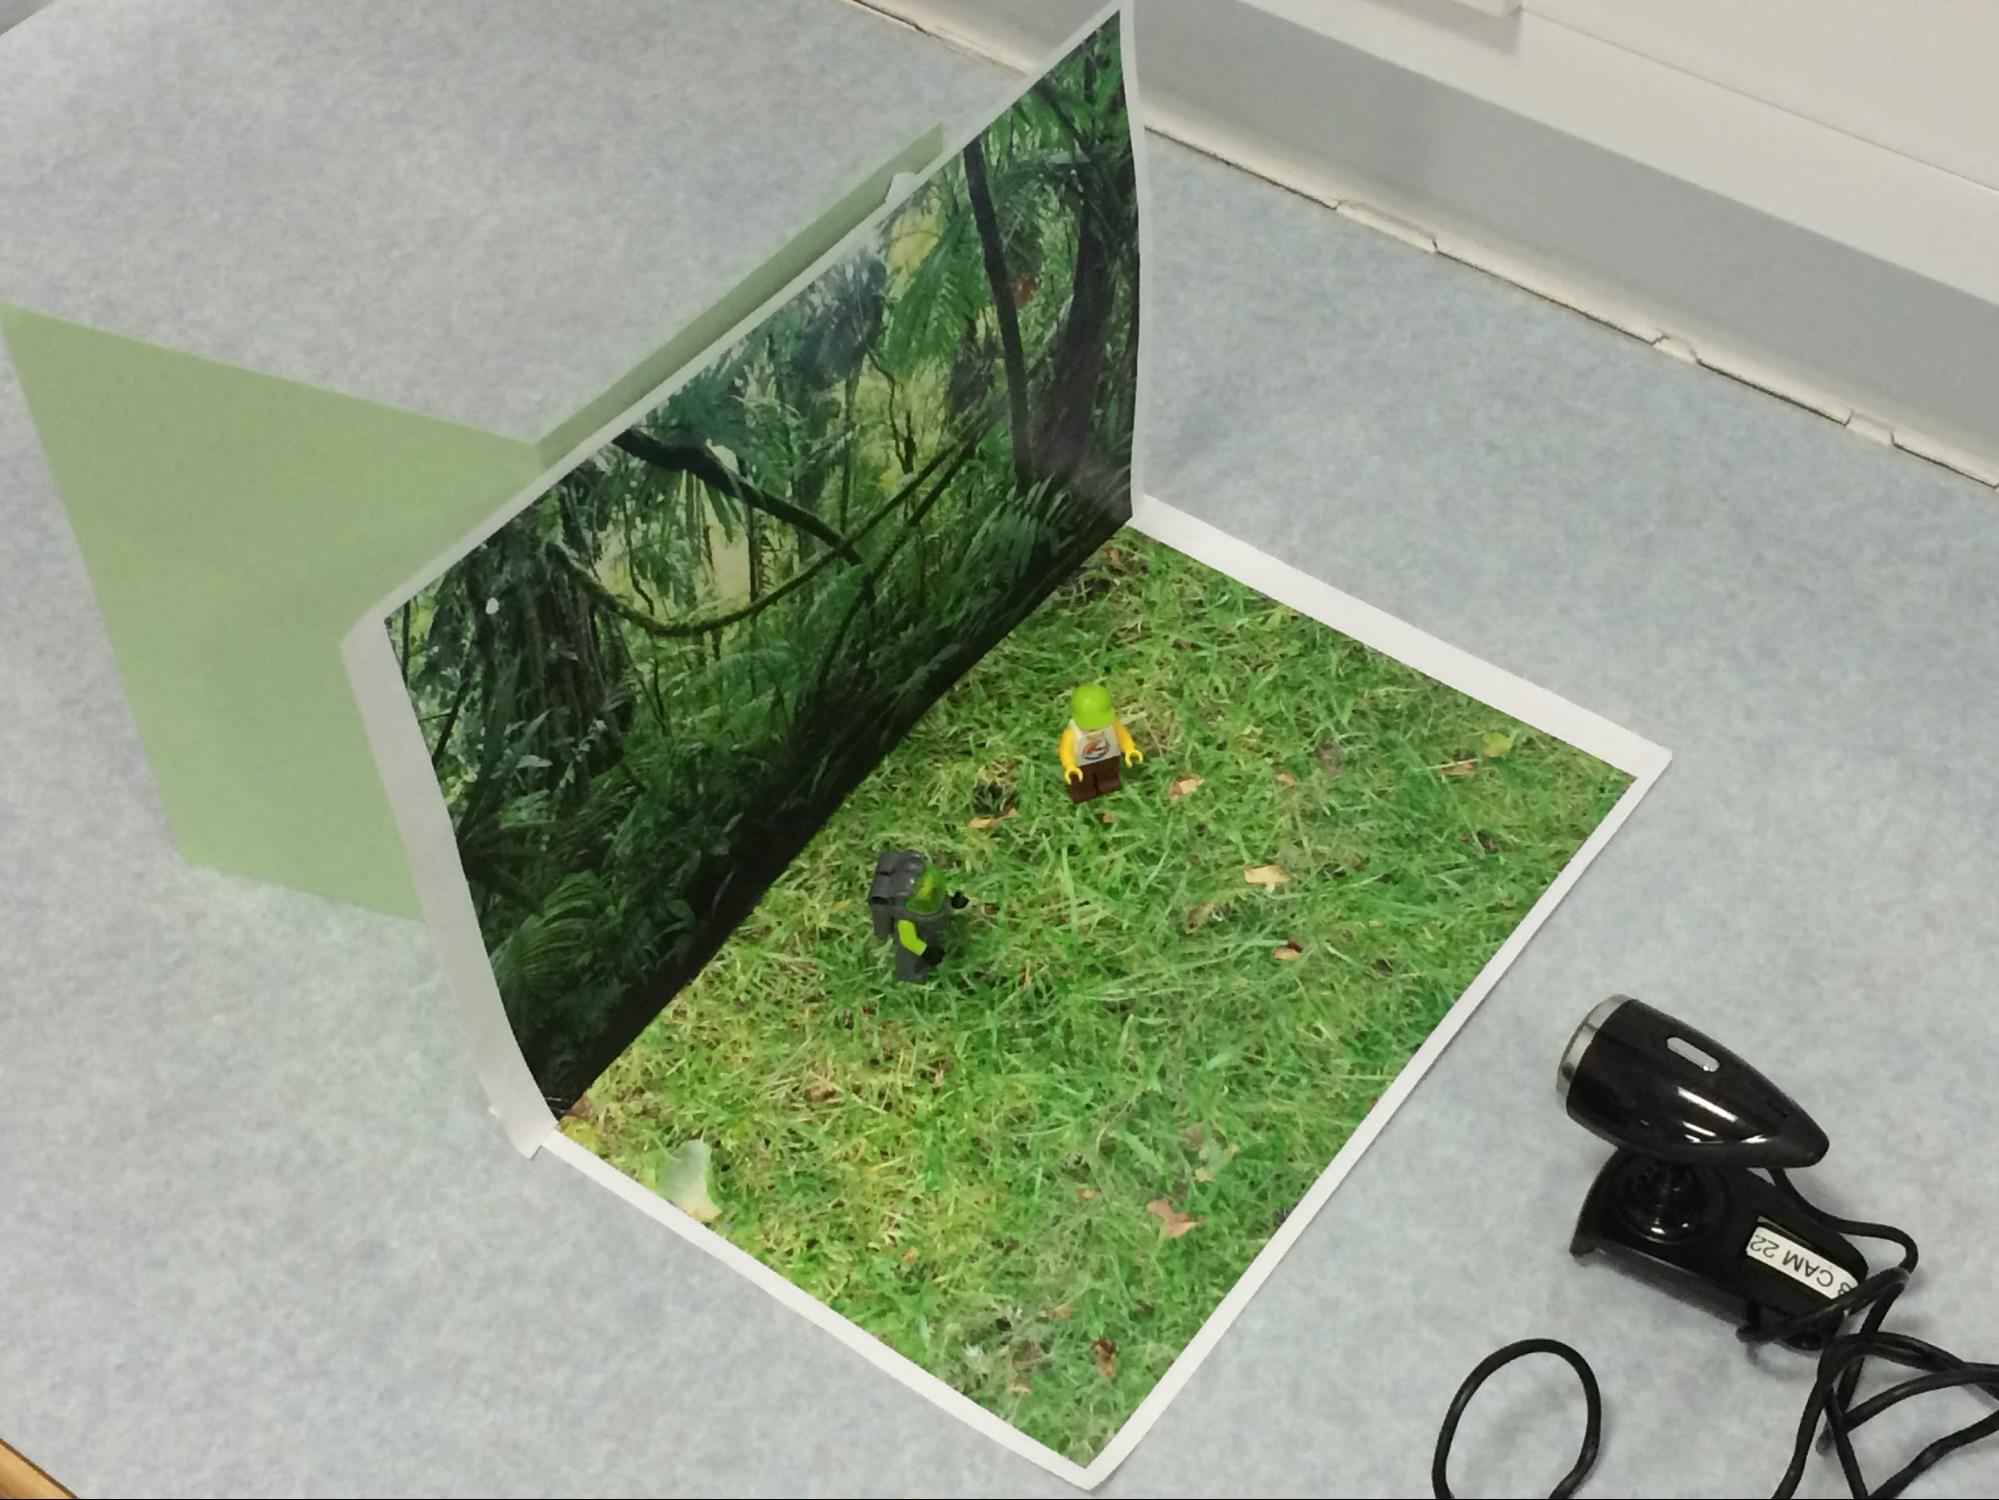
Trim any white edges from the bottom of your background image (if you printed them). Then use the Blu Tack to stick the background to pieces of folded card so it will stand up on the table like this.
Opened up and painted boxes can also work really well.
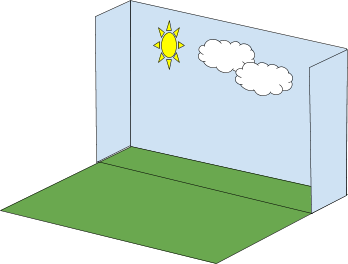
Put some small lumps of Blu Tack on the bottom of the flooring image and stick this to the table. Position your background at the back edge of your flooring and get your camera in position so it's central to the set and so (as much as possible) you can only see the set, but make sure the set floor is visible as that is where the figures will be!
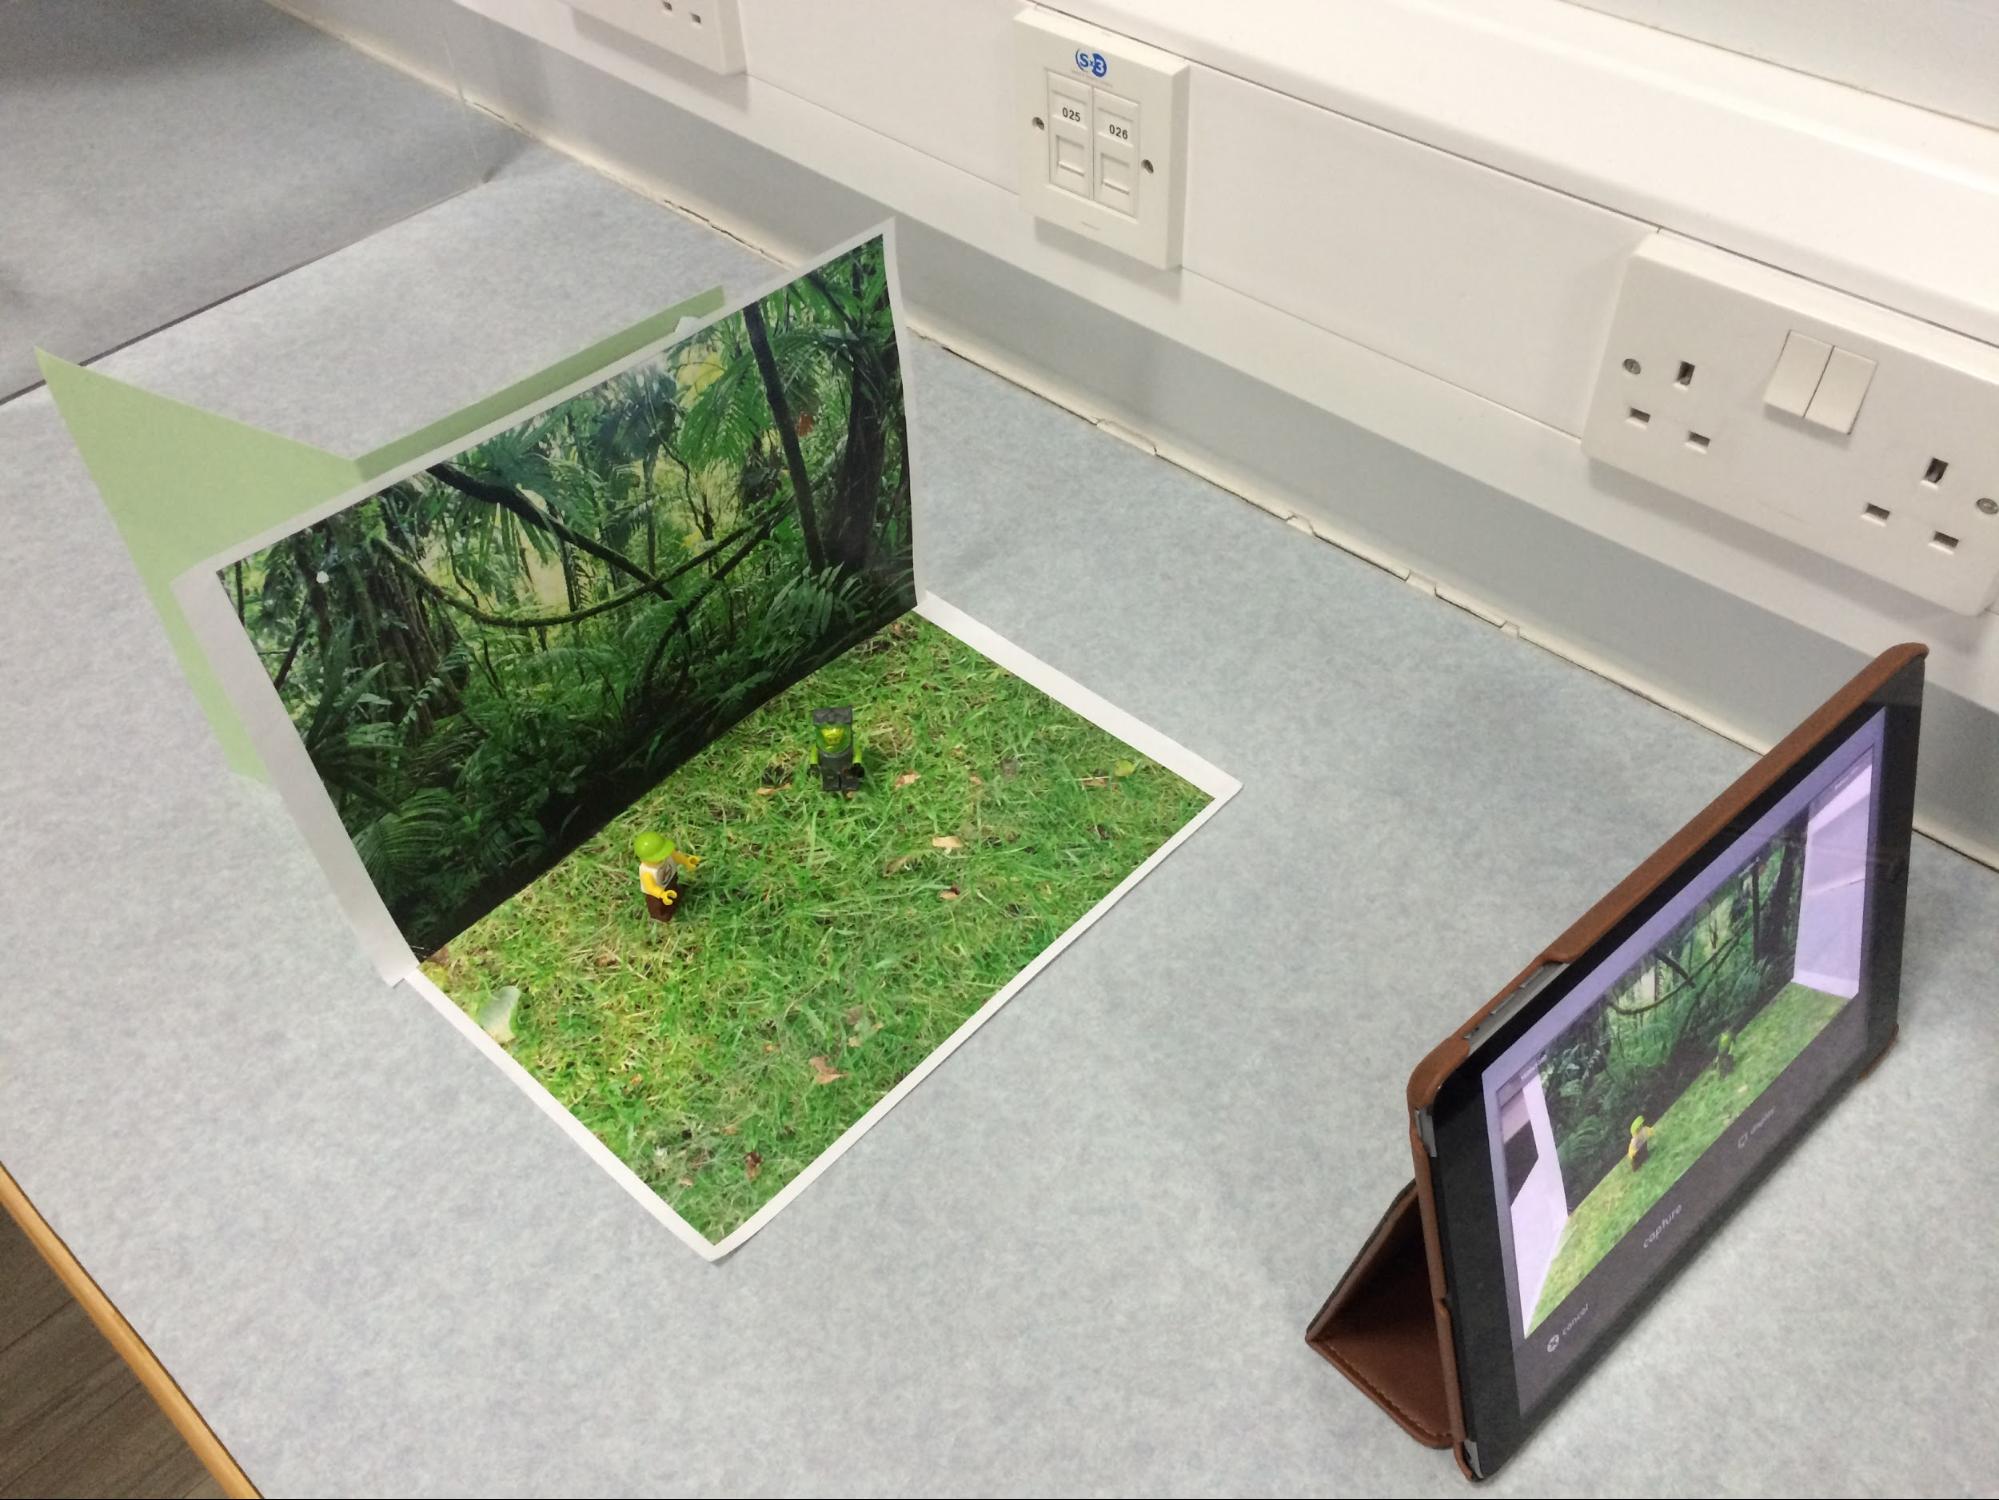
Once in position, you can stick the camera to the table using either Blu Tack or masking tape, or place some paper (that is stuck to the table) under the tablet and draw around the tablet base, so it can be put back in this position if knocked.
Emphasise to the children how important it is to keep this still from now on. What is the only thing that should move now? The characters!
Planning their story
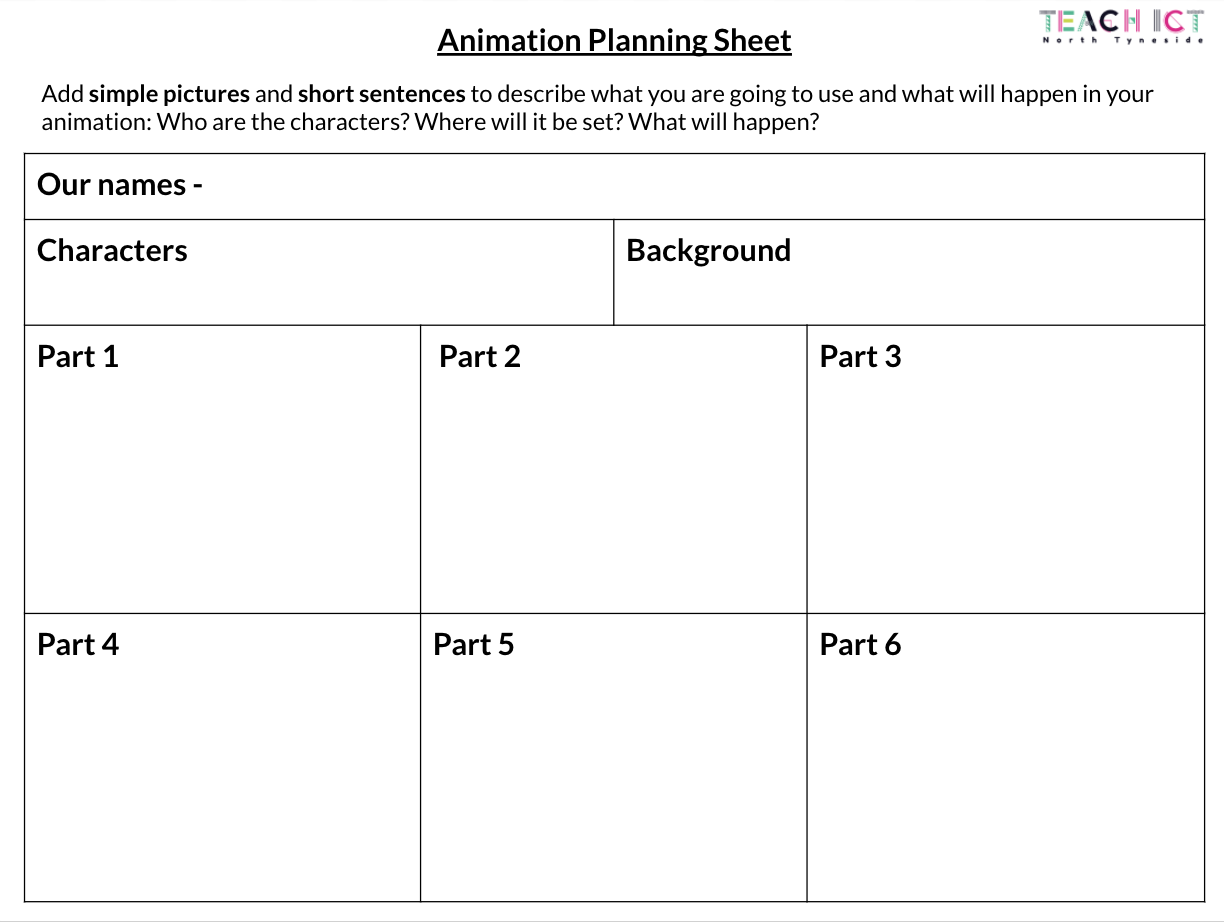
Have a look at the animation planning sheet. Explain that the children will be working with a partner/group to create their own stop frame animation story with figures. This week they will need to plan their scene, their characters and what is going to happen using the planning sheet.
Animations turn out better with a good plan, this doesn’t need to be very complicated, but it should contain some basics about what will happen in the beginning, middle and end of their animation, where characters start and finish each section and what they do. They might not use all 6 parts on the planning sheet but it should show the main things that are going to happen and perhaps quick plans of where characters should be.
Discuss some ideas as a class, especially if you are creating animations on a particular class topic or theme, which key elements should we include? What might not be possible?
Main task
The children should then discuss and complete their animation planning sheet as a group.
Then they can begin their animation by capturing 3 empty frames of just the background - NO CHARACTERS. Then use their planning sheet to remind them what will happen in their animation. Begin bringing in their first character, taking 1 frame for each movement, and then continuing their story with very small movements.
More animating tips
- Characters must (generally) appear from the edges and walk/move into the shot. They should not just be placed into the middle of the shot or they will just appear from nowhere! (unless this is the effect you want to achieve).
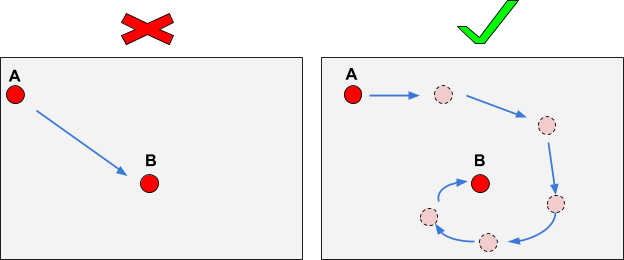
- Remember, characters do not just have to move in straight lines, curve their movements and send them round in circles to lengthen the animation. For example, don’t just go from A to B, go via C, D, E, F and G to get there!
- Chase scenes also look much better when using this technique, make one character follow another round in circles, leave the scene on one side of the screen, take a few empty frames, and then reappear again (as if they have been chasing off camera) one behind the other.
- Characters can stand still sometimes, take a few frames with them in the same position before they move again to achieve this.
- Characters can look around, leave them in the same place but just rotate them to face one way, then another, but remember to turn them in small steps!
- If you have poseable characters, you can make use of this by moving their limbs a little bit at a time, be really careful to not move where they are standing as you do this.
- Move more than one character at a time, but make sure both move in small steps.
- Don’t capture frames when someone’s hand is still in shot! (These can be removed later but it’s better to not have them in the first place.)
As they work, just move round and check they are being careful, sticking to small movements and working well as a team. Keep referring them back to their plan if needed.
Plenary
Ensure they save and export their work at the end and then crack out some popcorn and enjoy their animations! Ask the class to provide some feedback each time. Was your animation smooth? Did you move your characters in small steps? Could you have improved anything?

Also ask the students, did you work well as a team? Did everyone get a chance to do all the different jobs? Did you stick to your animation plan? Would you have done anything differently?
Animation Examples
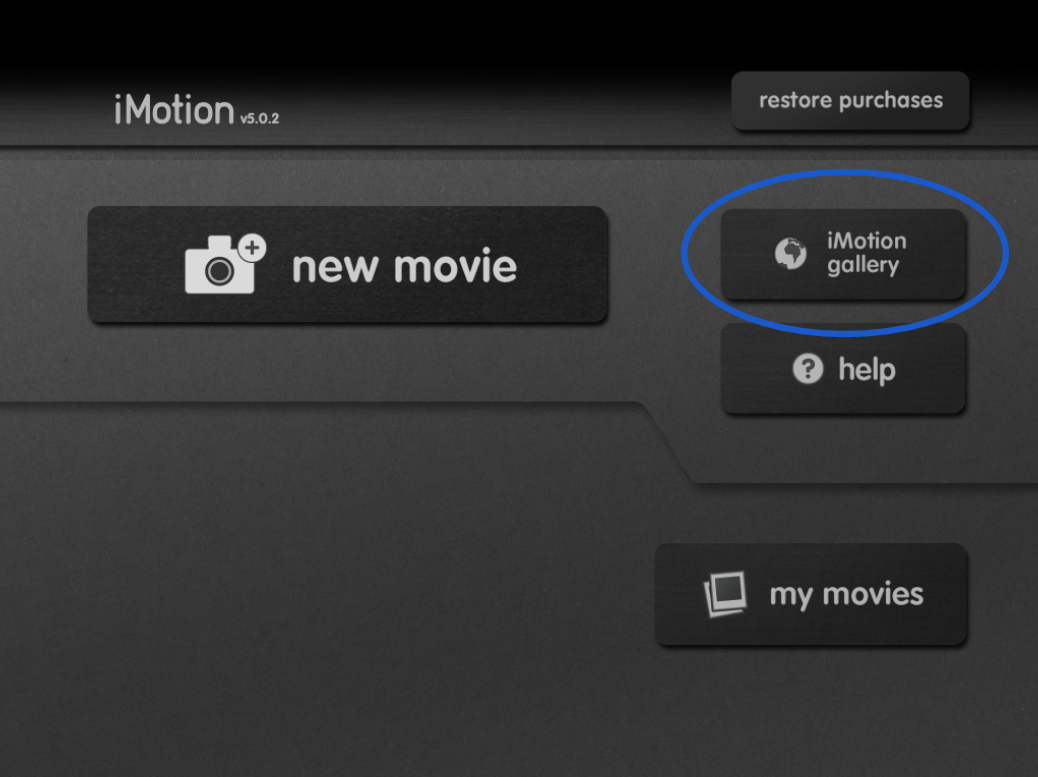
You can find lots of great examples of animations created with iMotion in the app by clicking on iMotion Gallery from the homepage or by going to their Youtube channel.