
Building Furniture
3D Design - Lesson 2
Objectives
- Create detailed 3D models of furniture
- Use the referencing tools in Sketchup to help keep elements in proportion
- Use a range of simple drawing tools in Sketchup
- Apply colour and materials to a 3D model
Lesson Resources
- Lesson Slides
- Sketchup Fundamentals learning centre - tutorial videos - Log in to access the free learning content.
Lesson 1 - Getting Started With Sketchup
Lesson 2 - Building Furniture
Lessons 3 & 4 - Building Houses
Lessons 5 & 6 - Topic linked design
Introduction
Recap last week’s lesson and the things they learned about using Sketchup.
- What do the coloured lines tell us?
- How do you orbit your model?
- How do you push/pull a shape?
- How can you line features up?
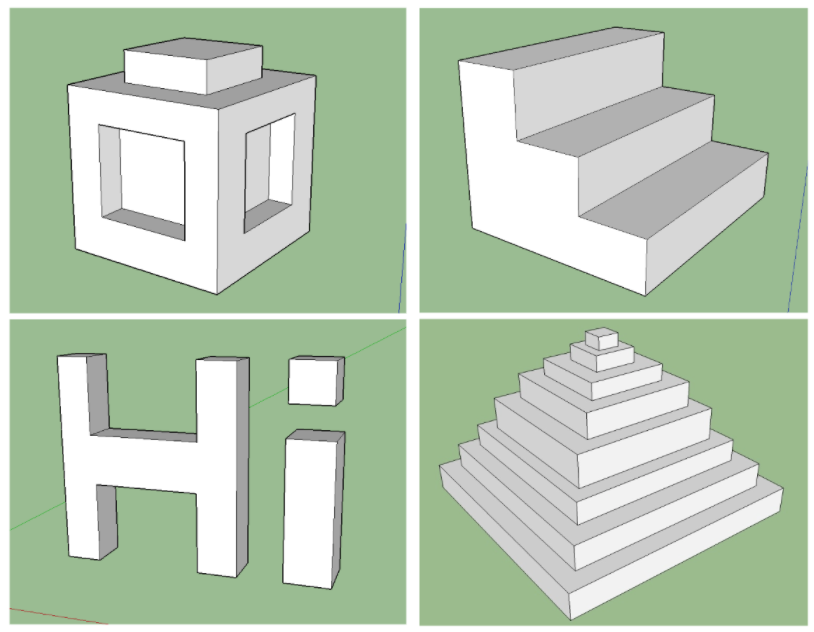
In the last lesson we also looked at these shapes, had a go at drawing them, and then considered the best method for creating each one, in particular, where to start.
Build a chair
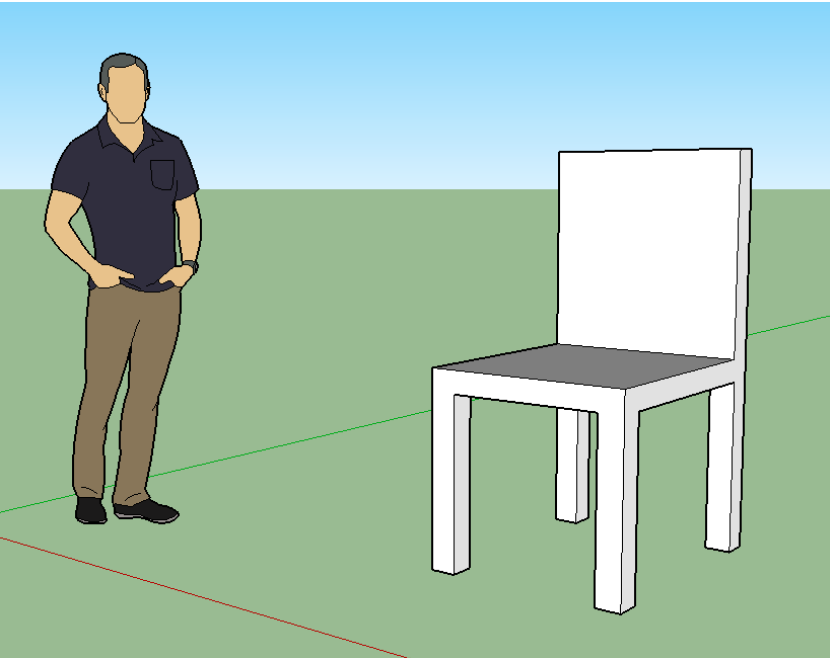
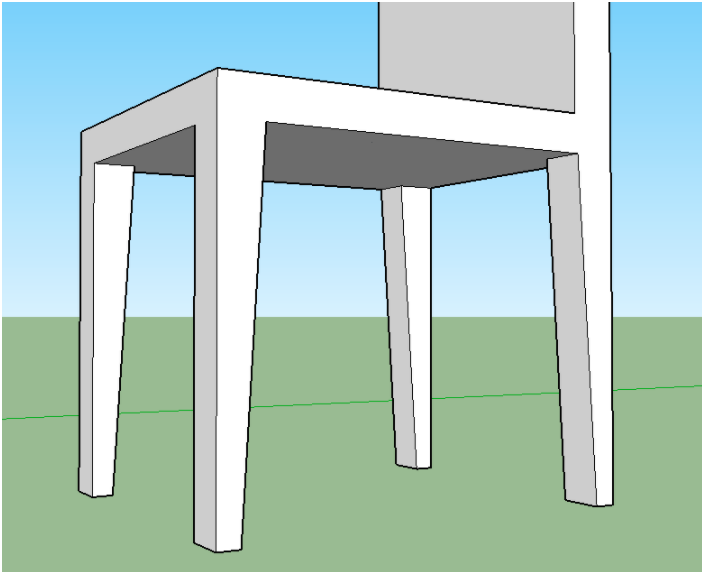
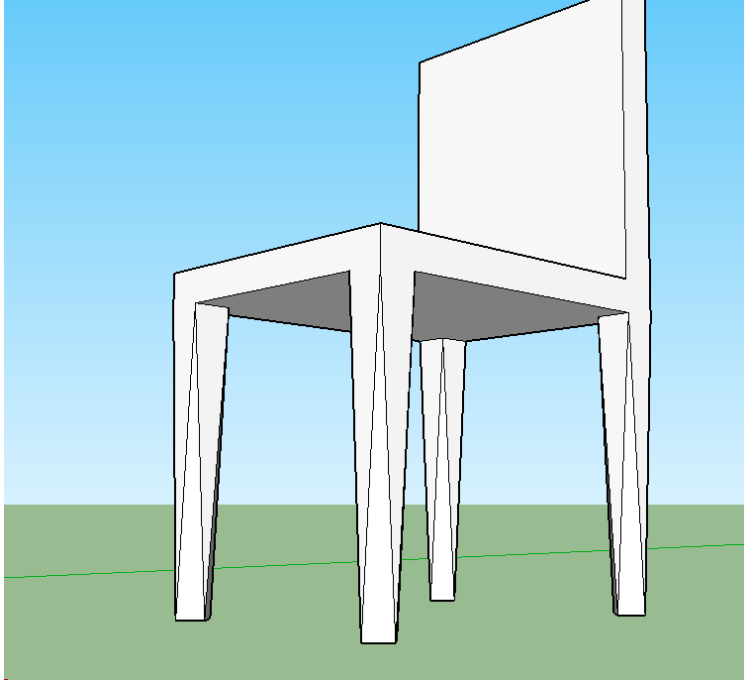
In this lesson we’re going to continue that thinking. Tell the students that their first challenge today is to draw this chair, again, like the shapes in the last lesson, they can only use the rectangle and push/pull tools for this, but where will you start?!
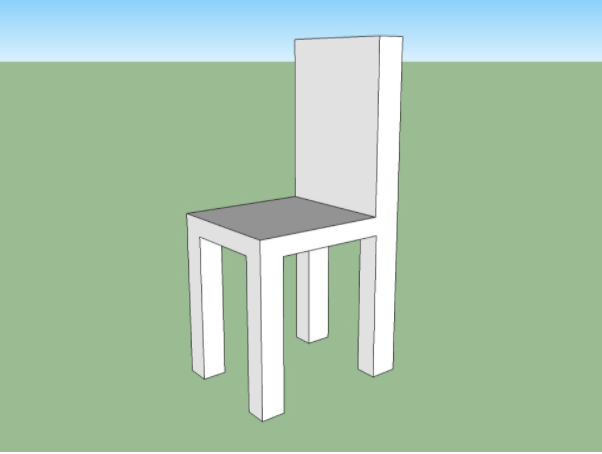
We can divide the chair into three elements, the legs, the seat and the back. Ask the students which part would you start with? Take a show of hands for the three mentioned elements and offer no feedback at this point. Invite them to have a go with whichever starting point and method they think is best.
Give them 5/10 minutes to have a go. Check their approaches as they work and try and take note of any problems they are having for each of the starting points. Which attempts are working out better? Where did those students start? Is there a pattern?
After their initial attempts are mostly complete (or they have reached maximum frustration levels!) stop the class and discuss how things went. Where did you all choose to start? Did anything make this method difficult? Why?
Many students choose to start with the legs of the chair, presumably because they are used to building things like LEGO from the bottom up, as discussed in lesson 1. However, the legs are probably the worst place to start this model. Starting with the legs creates many problems such as getting the four legs in line, even with each other, the same height, and then trying to add the seat on top of them. It can all be done, but it’s not easy, and there are certainly better ways to do it.
The seat is probably the best part to draw first. Here’s one way to create the chair:
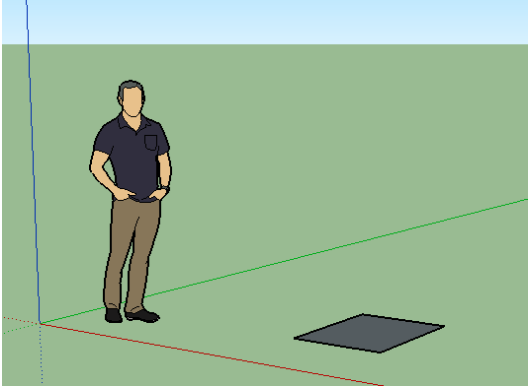
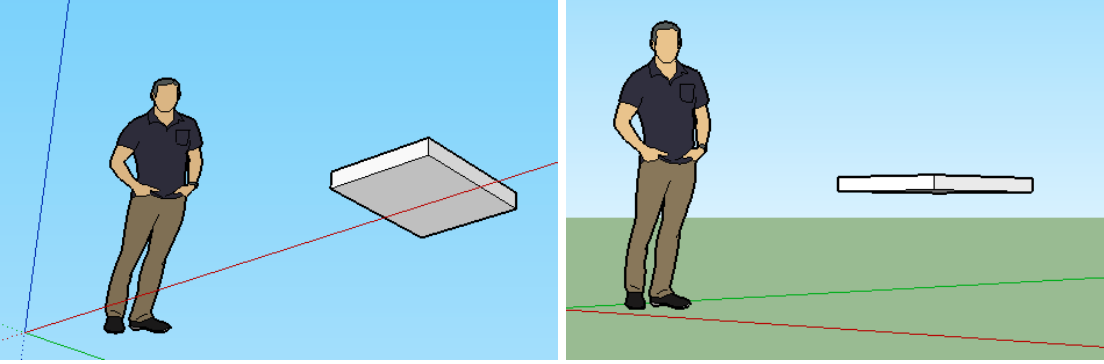
1. Draw a small square on the floor for the seat of the chair. Use the figure standing at the axis to estimate a sensible size for this.
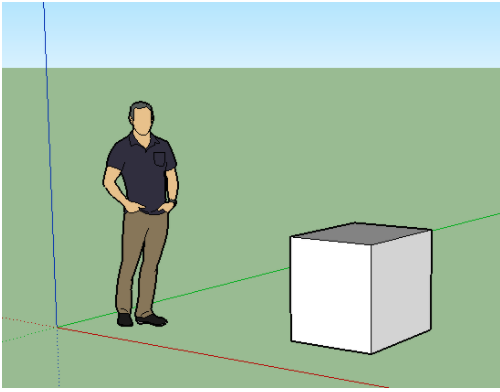
2. Pull the square up to roughly the waist height of the figure.
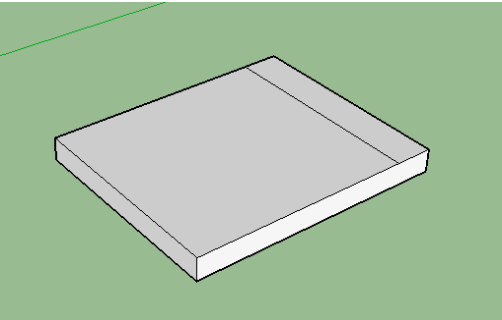
3. Orbit the camera so you are looking up at the base of the cuboid and push the base up to create a thin cuboid which will be the chair’s seat.
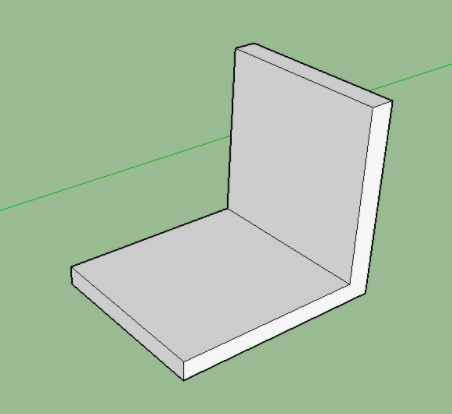
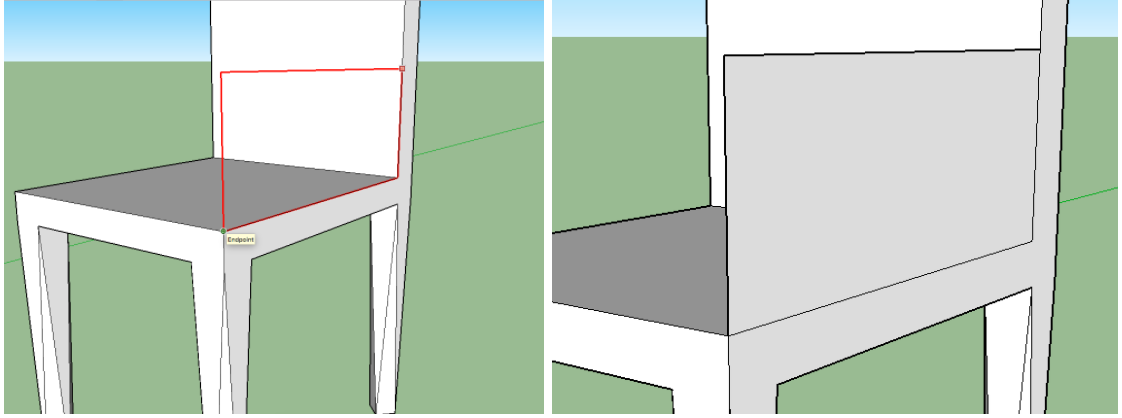
4. Rotate the camera again so you can see the top of the seat cuboid and, starting at one of the back corners, draw another thin rectangle the full width of the seat.
5. Pull this rectangle up to become the back of the chair.
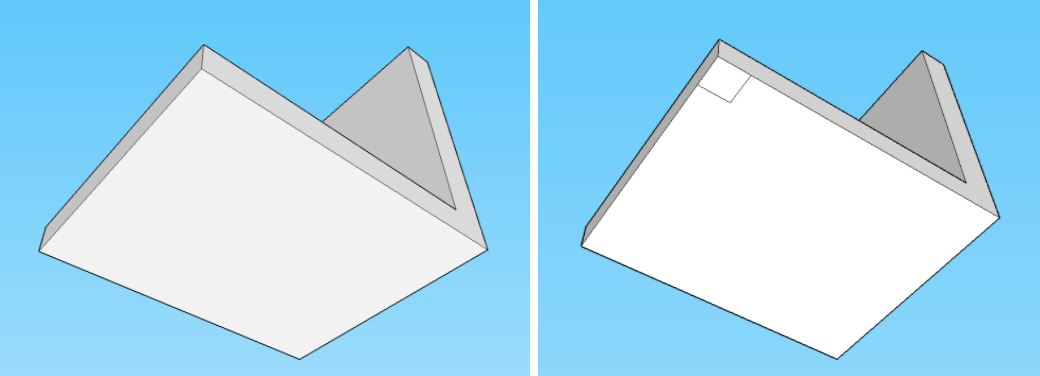
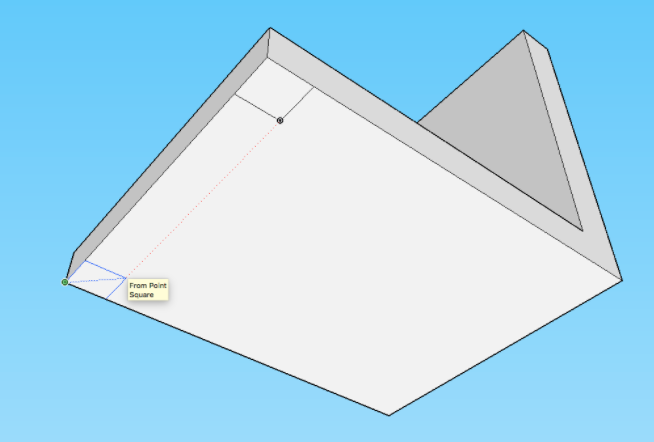
6. Rotate to see the base of the seat and zoom in close next. Draw a square in one of the corners, starting from the corner. This will become a chair leg.
7. Go to the next corner of the base and draw another square. As you draw the square, take your cursor across to the first square you drew to reference it’s size, then go back to the new corner and you’ll the dotted reference line showing you are in line. This will keep your chair legs even.
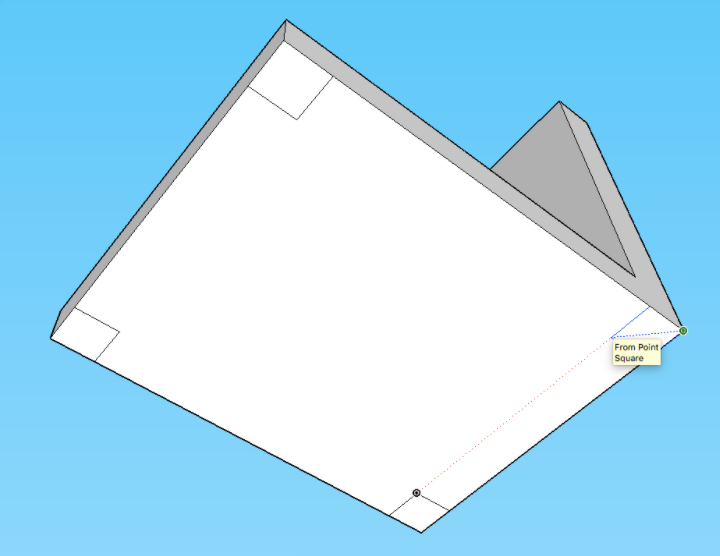
8. Repeat this for the other two empty corners, again using referencing to make sure the legs all align.
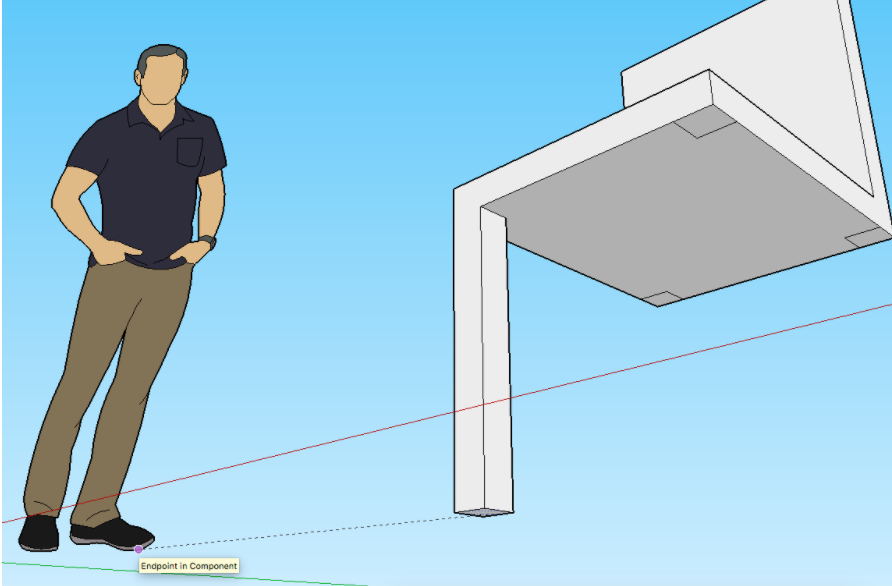
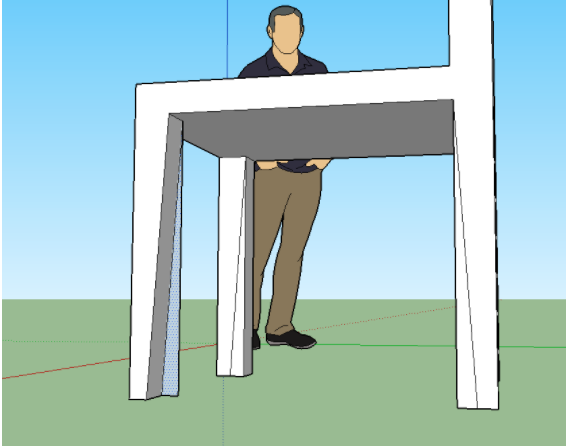
9. When all four squares are drawn, pull one of them down to the floor, you can reference the base of the figure’s foot to work out where that is.
10. Repeat this for the other legs, this time referencing the length of the first leg to quickly and easily ensure they are all the same length.
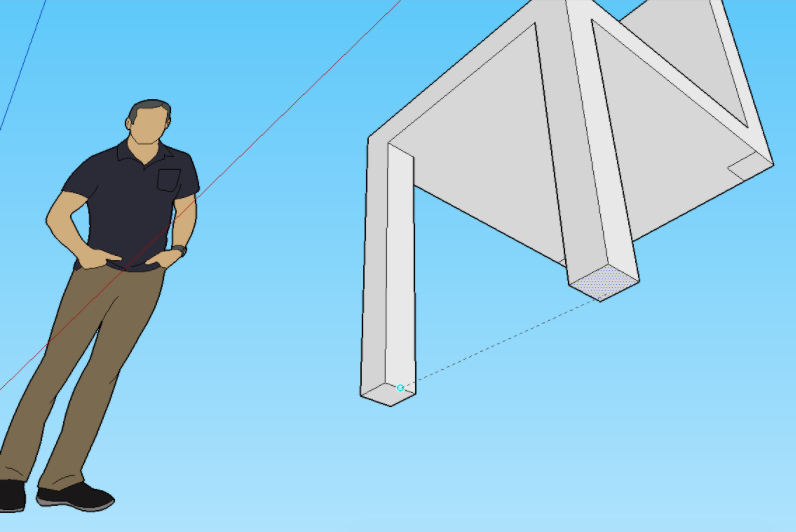
11. When all four are done your basic chair is complete.
Ask the students to have another go (if needed) using this method to see if they can improve on their first attempt.
Improving your chair
Next, show how the chair can be made to look more interesting and elaborate. Here’s some ideas of things that can be added or done to it, but they can design their own version.
Shaping the legs
Give a more interesting shape to your chair legs with these methods.
1. Turn the camera to look at the side of a leg. Use the straight line pencil tool to draw a line from the top of the leg to the bottom middle of the leg as shown. Look for the bright blue dot that tells you you are at the midpoint.
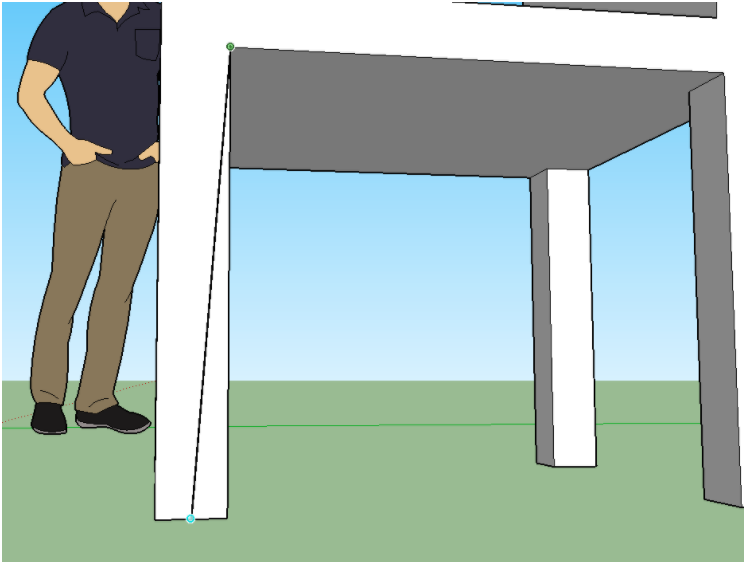
2. Repeat this on the other legs so all the diagonal lines are on the inside.
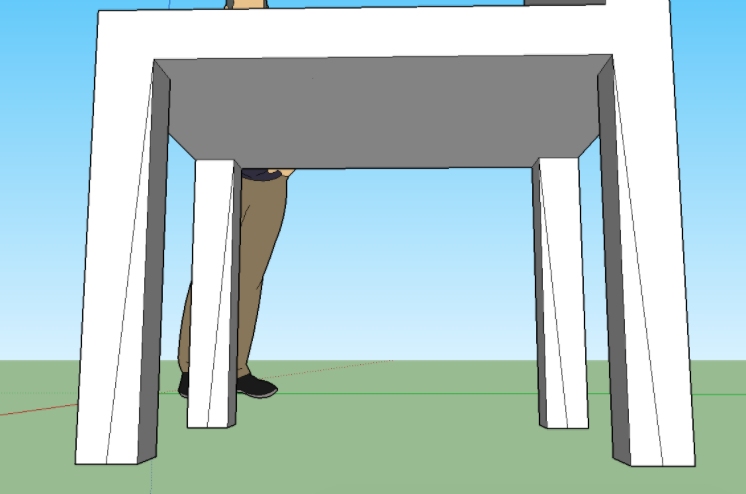
3. Push the section created away until it reaches the back edge of the leg, release to delete that section.
4. Repeat for the other legs.
Or something even more elaborate!
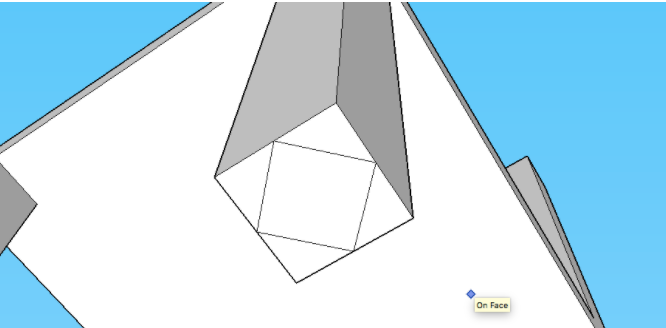
1. Draw a square on the bottom of the chair leg where each corner goes from the midpoint of the leg’s base, as shown below.
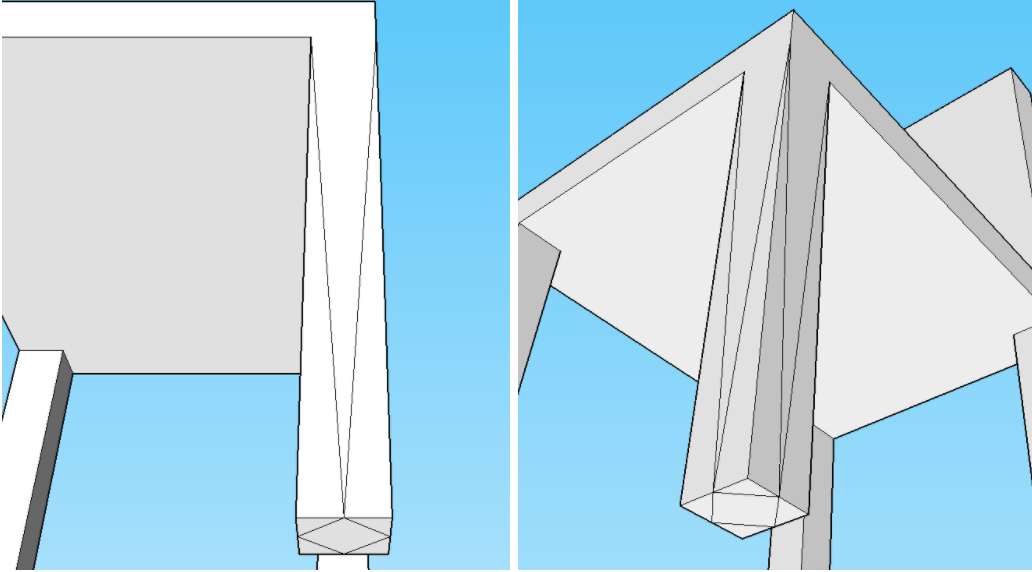
2. Use the pencil tool to draw two lines up the side of the leg from the corner of the new square you have just drawn to the top corners of the leg. Repeat this on each side of the leg.
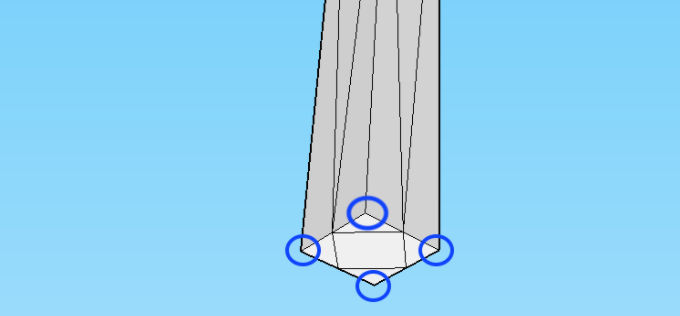
3. Use the eraser tool and click on the four corners as shown, this will delete the connecting edges and leave you with nice diagonally angled shaping to your legs.
4. Repeat on the other legs.
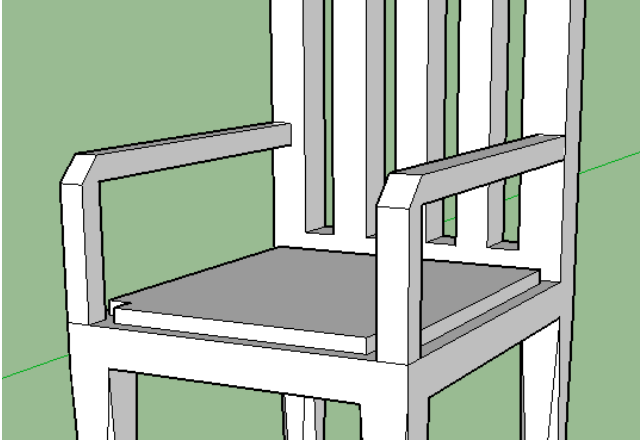
Add arms to your chair
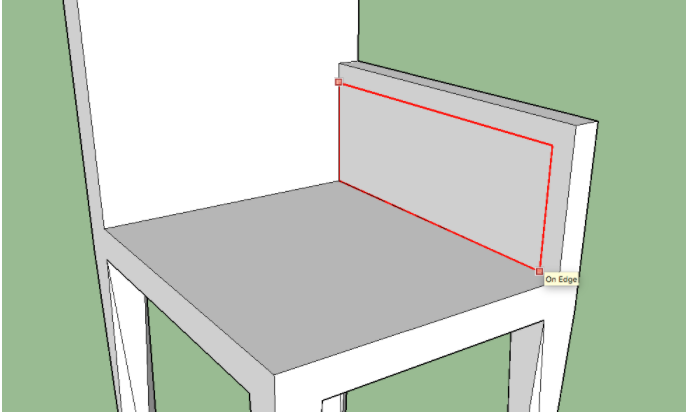
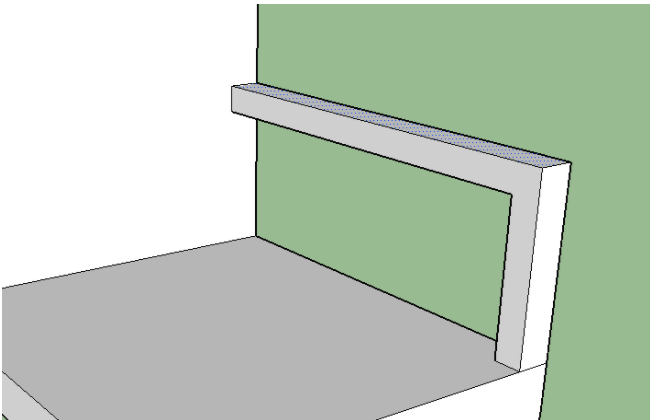
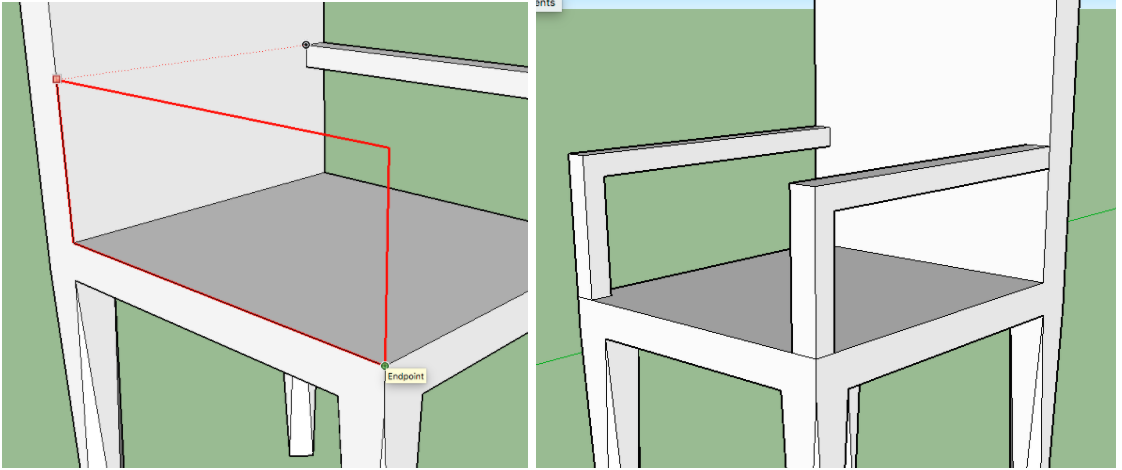
1. Draw a rectangle from the front right corner of the chair’s seat to the back of the chair at a height appropriate for an arm rest.
2. Rotate the camera to see the opposite side of this rectangle and pull it towards you a small distance.
3. Draw another rectangle on this surface, starting at the bottom left corner but leaving an even gap at the top and on the right of the rectangle.
4. Push the smaller rectangle through to cut it away.
5. Repeat this on the other side of the chair, using referencing to match the height of the arm.
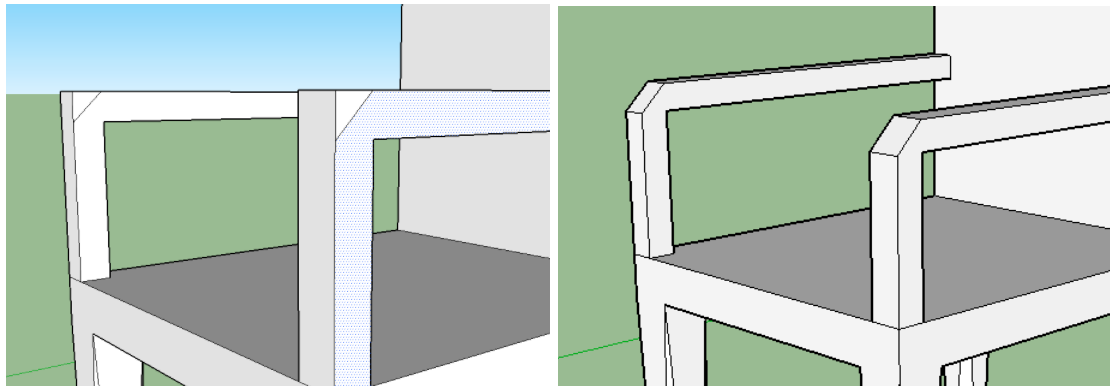
6. Finer details can be added if wanted, such as shaping the corners of the arms. Draw a diagonal line at the corner for this and push it through to remove the section.
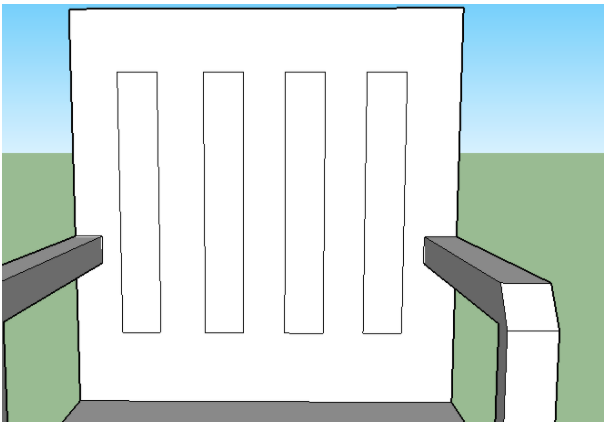
The seat’s back
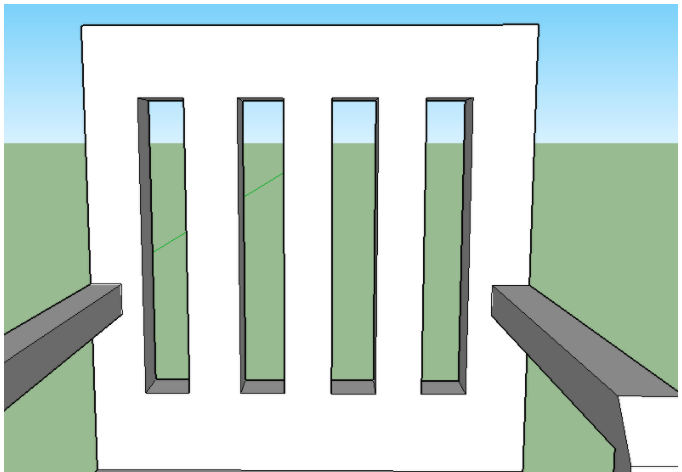
You may wish to add some details or holes to the back of the seat. This is easy to do.
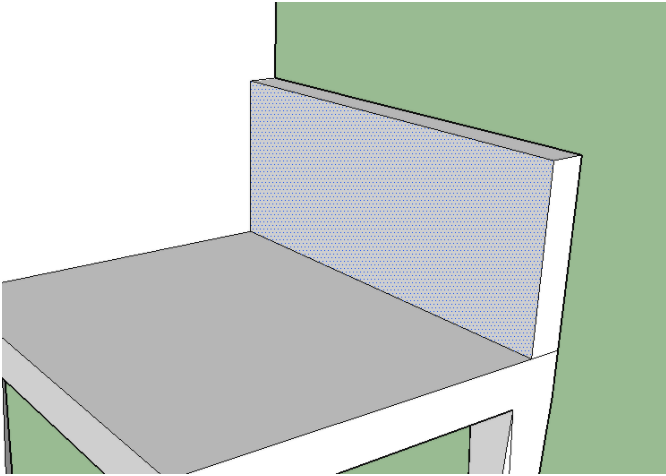
1. Draw a rectangle on the back of the seat. Click it using the select tool and copy the shape by pressing Ctrl+C together on your keyboard. Then paste a copy of that by pressing Ctrl+V together and move the copy into position with your mouse. Click to drop it in place, paste more copies as required to fill the space available.
2. Use push/pull to push each hole through to cut them out. This can sometimes be tricky because of the small space. Zoom in closer if you have trouble and just gently move the mouse until you see the speckled back surface that tells you you are at the back. Undo (Ctrl+Z) if it doesn’t work and try again.
3. Again, you can add shaping by cutting off corners as shown earlier and pushing them through.

Add a cushion
1. Use the offset tool and click on the base of your chair.

Move the mouse and see how Sketchup creates a copy of the outline shape of that surface but lets you control the new size of the copy to make smaller or larger offset version of the original shape.
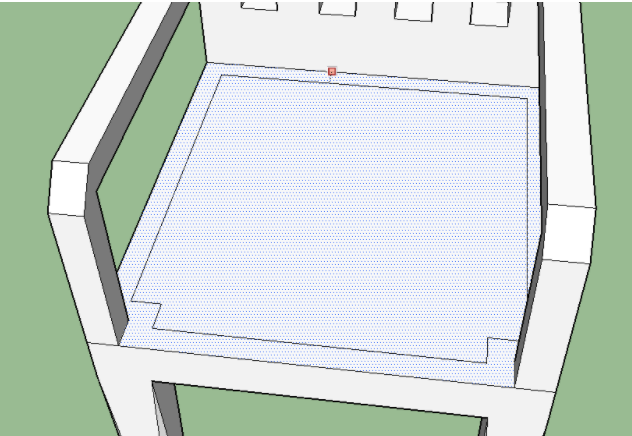
2. Pull the new, smaller version of the shape up a small amount.
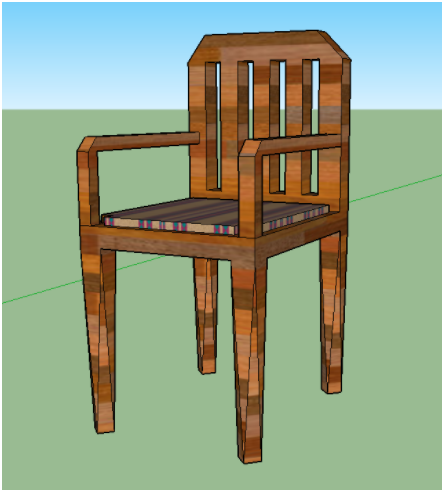
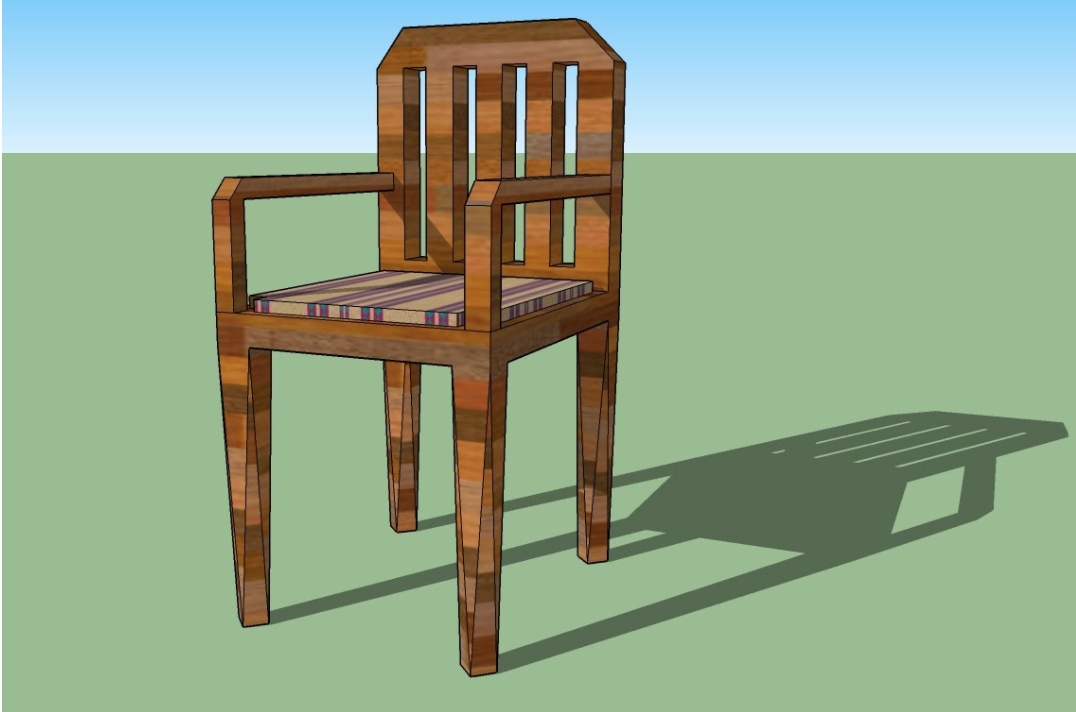
Add colour and materials to your chair
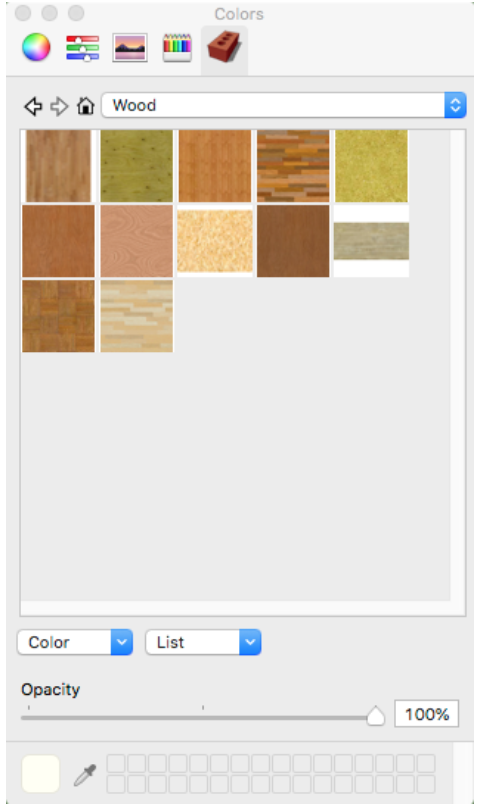
Select the paint tool from the toolbar and explore the many possibilities Sketchup give us from the drop down menu in the paint tool. You can find normal colours but also a wide range of materials and textures to add to your models.

In the web-based version, click the paint can and then choose your colours or materials on the right of the screen by clicking the search icon.
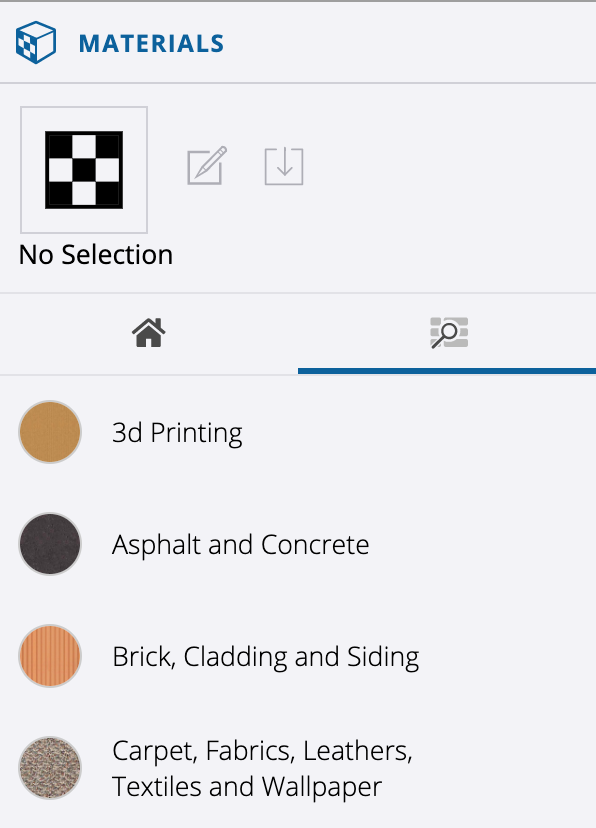
In our example we have gone to the Wood section.
Just click on your model’s surface to paint them one at a time, or, to save time, hold down Ctrl or Shift and click and all the surface will be coloured.
You can then add colour or patterns to your cushion (the carpet, fabrics and textiles category is good for this).
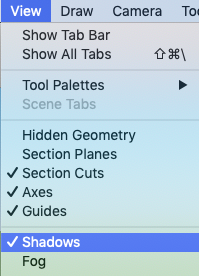
Finally, go to the View menu and tick the Shadows option to give your model a shadow and some added realism!
In the web-based version, click the glasses icon on the right-hand tool bar, then scroll down slightly until you see the Shadows option.
![]()
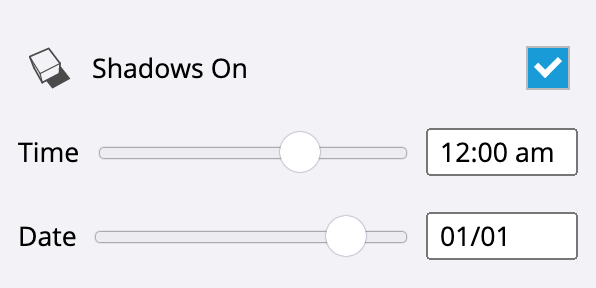
You can even adjust how the shadow falls by changing time and date with the sliders. This option is found in Window > Shadows in the desk-based version.
Save your work as a Sketchup model file (File > Save as) and/or an image file. If you’d like to display their work this option is best (File > Export as > 2D graphic). Position the model in the centre of the screen and zoom in so if fills the screen before doing this.
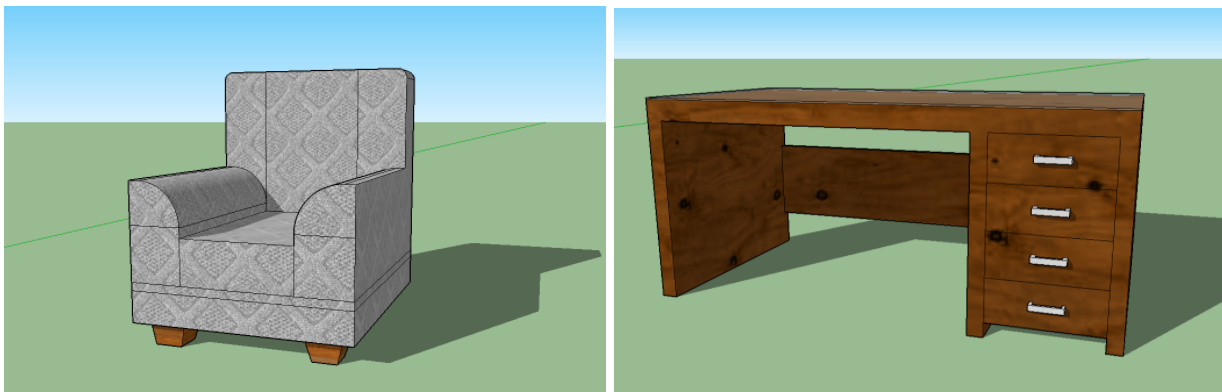
The students may want to apply some of the same principles and have a go at other types of chairs such as an armchair, sofa or throne. Or other types of furniture like a dinner table, coffee table, desk or bed.
Plenary
Review the students’ work. If they were able to save their work to your shared area, display a few examples for the class to see on the big screen.
- What tools and techniques do you think they have used?
- What has been a success?
- Is there anything they could improve?
Then ask them to consider their own work:
- What things are you still finding difficult with Sketchup?
- What do you feel you got better at this week?
- What would you still like to be able to do that you can’t yet?