
Coordinates and Looks
Animation with Scratch - Lesson 1
Objectives
- Design and write a simple program for an on-screen sprite to create simple movements.
- Use logical reasoning to explain how a simple algorithm works
- Solve programming problems by decomposing them into smaller parts
- Detect and correct errors in algorithms and programs
Lesson Resources
Lesson 1 - Coordinates and Looks
Lesson 2 - Broadcasting
Lesson 3 - Planning the Presentation
Lesson 4 - Building the presentations
Lesson 5 - Introducing interactive elements
Introduction
This unit contains guidance for using Scratch 3.0 which was released in January 2019. Scratch can be used online at scratch.mit.edu. An offline version can also be downloaded for free HERE if you would like it installed on your network.
Everything included is also possible with previous versions of Scratch although you may find there are some layout and feature differences with older versions.
You can set up a Scratch Teacher Account which provides educators with additional features to manage student participation on Scratch, including the ability to create student accounts, organise student projects into studios, and monitor student comments.
Scratch is a project of the Scratch Foundation, in collaboration with the Lifelong Kindergarten Group at the MIT Media Lab.
Versions of Scratch
Scratch 1.4 - Released July 2009
Offline only. The version most schools began using as they adopted teaching and learning with Scratch.
Other previous versions were available.
Newer Scratch projects are not backwards compatible with this version, but files from v1.4 will open with newer versions of Scratch.
Scratch 2.0 - Released May 2013
Online editor was released for the first time. Offline editor was also made available later.
Lots of new features made available. Online community and sharing of projects became much easier.
Older Scratch projects can be opened in Scratch 2.0
Scratch 3.0 - Released Jan 2019
New Online editor that has been completely rewritten in HTML5 to make it compatible with all modern web browsers on most devices.
Scratch 2.0 projects will be compatible with Scratch 3.0
Offline editors available for some platforms on launch. iOS and Android versions to follow.
Cross curricular links and animation examples
This unit really can be applied to any curriculum subject, topic or theme. Have a look at these animations examples made using Scratch:
Presentations
Story telling
Getting started
Recap what they know about Scratch and what they have made with it in the past (if anything)
Explain that they are going to create an animated presentation with Scratch that should be fully automated and able to be used without the presenter/creator being there.
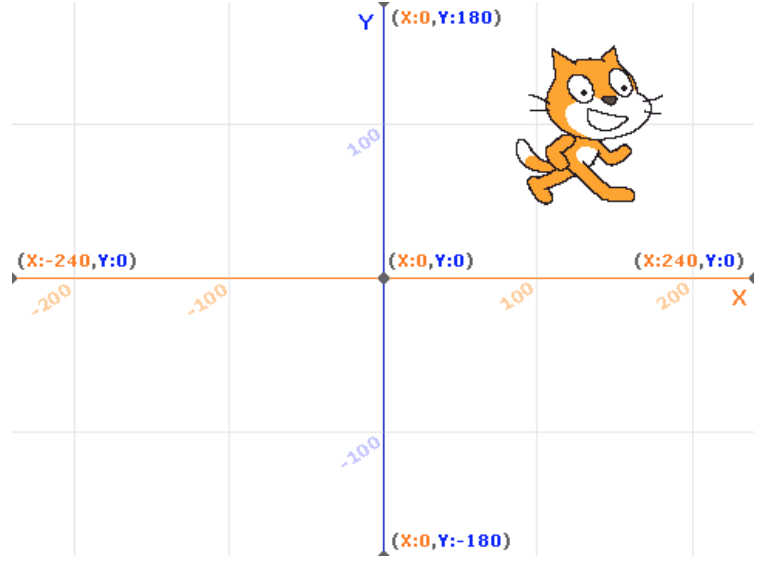
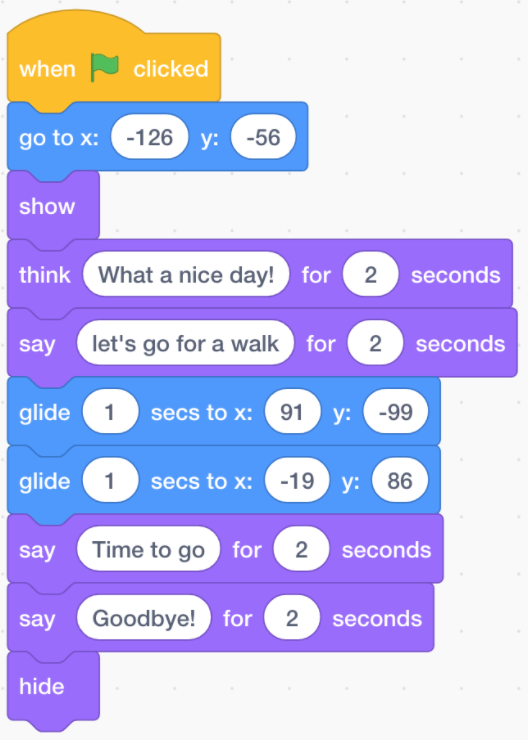
Coordinates
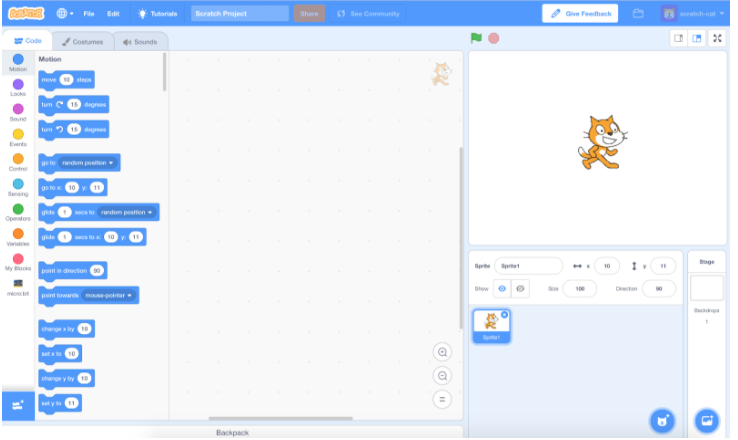
Begin by looking at coordinates; how to position a character and make them move using the ‘go to’ and ‘glide’ blocks:
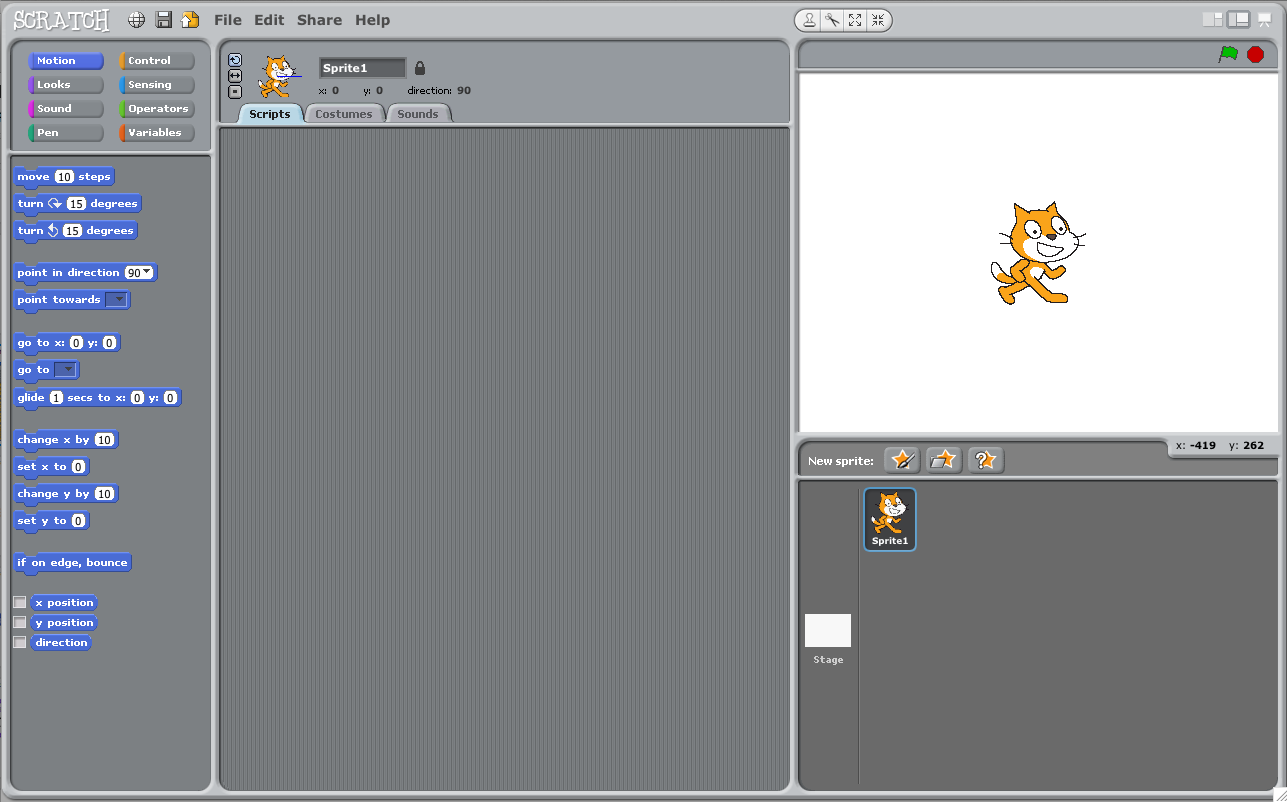
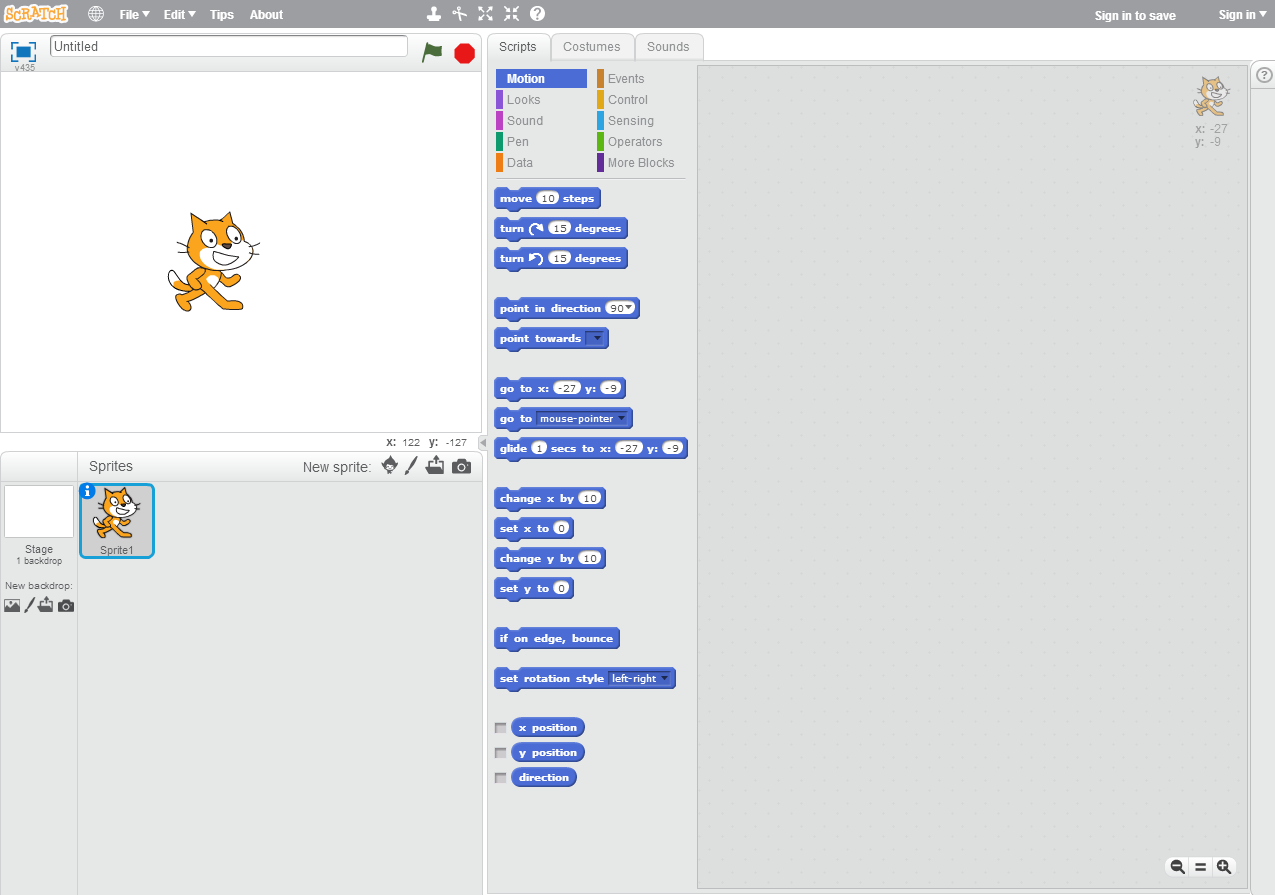
Scratch uses a four-way coordinate grid to allow you to describe the position and movement of sprites with an X and Y coordinate. This shows how the grid works on the Scratch screen, although it is never visible on screen. Note that some numbers are negative which is a really important thing for students to get used to.
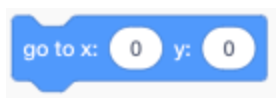
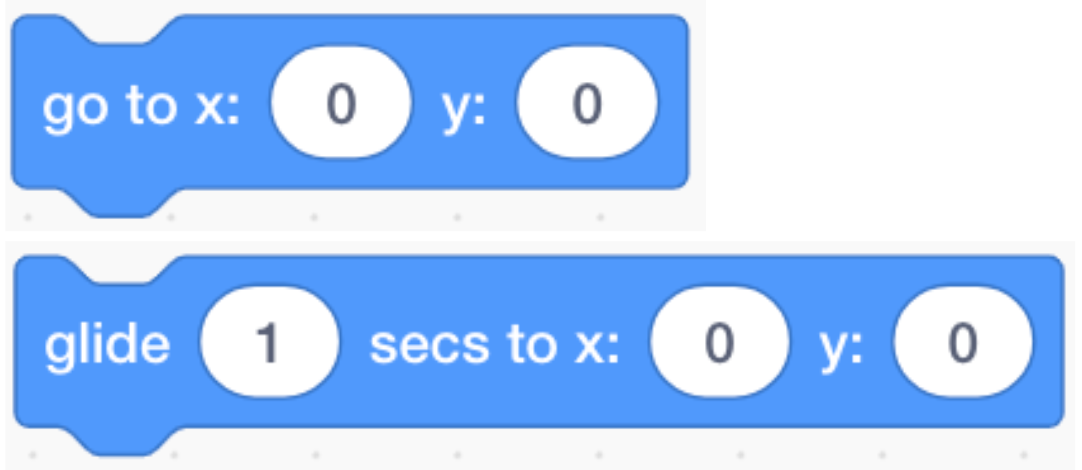
The ‘go to’ block makes your sprite jump immediately to the coordinate you type into the boxes.
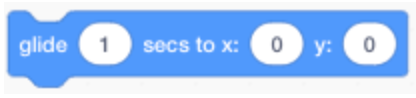
The ‘glide’ block makes your sprite slide across the screen to the coordinate you type in the boxes. You can control the speed of the glide by altering the number of seconds in the first box.
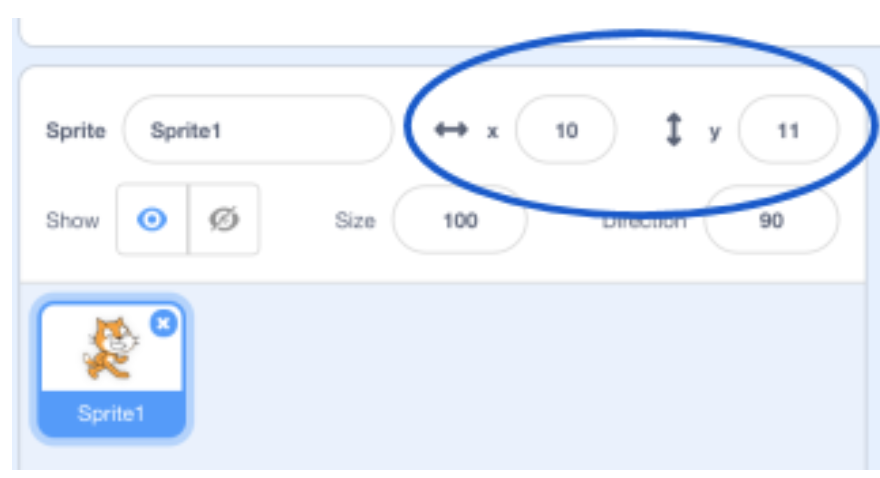
You can see the coordinates of your sprite under the stage. When you select any sprite you can see it’s X and Y position (and other information about it) in the box above the thumbnail
Ask the students to experiment making their sprites move with both the ‘go to’ and ‘glide’ blocks, trying out and getting comfortable with using the coordinates.
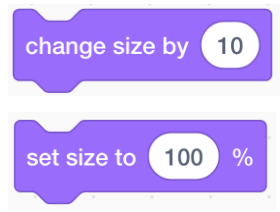
Looks
Next, introduce some of the key ‘Looks’ blocks they will use in their presentation:
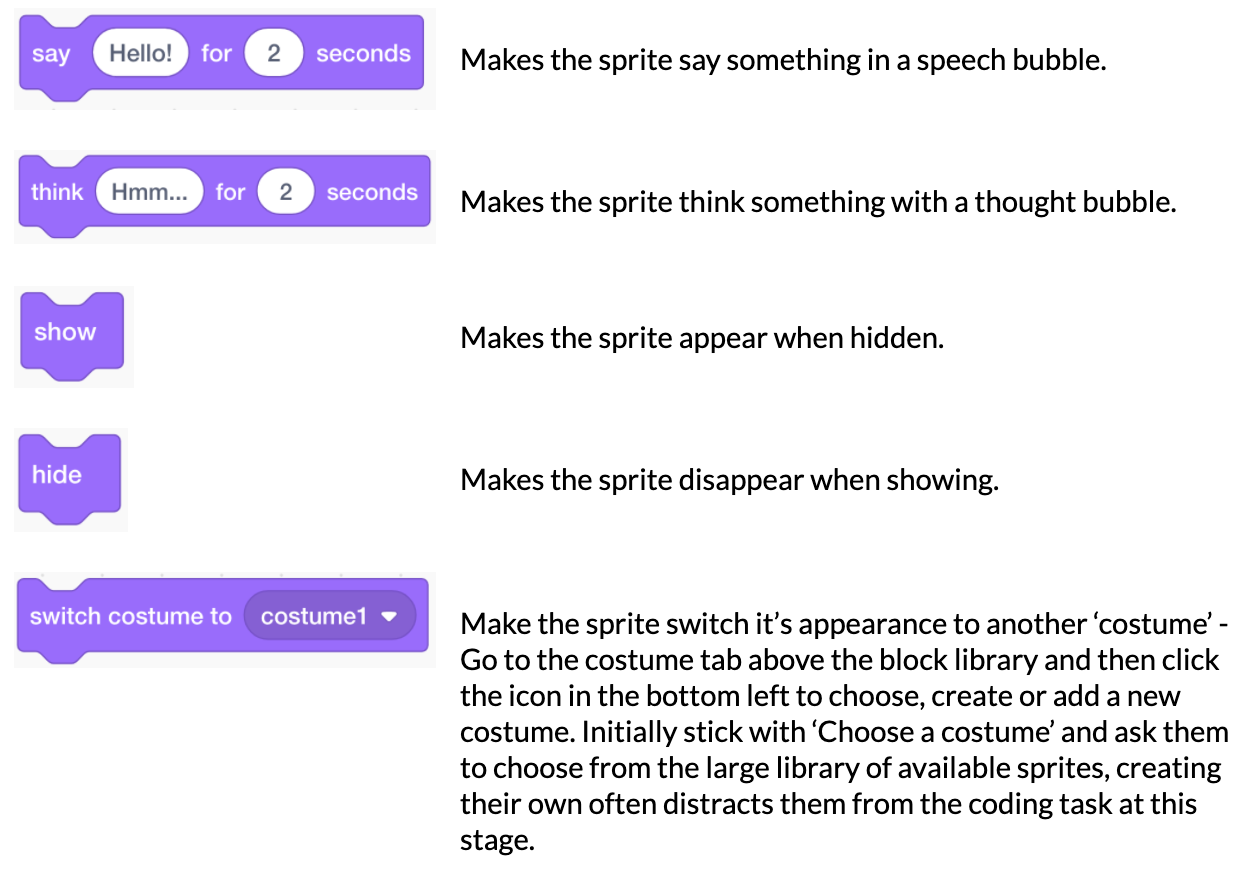
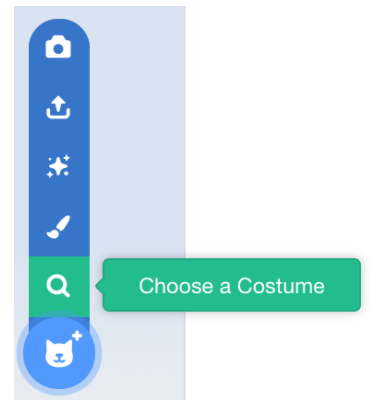
Ask them to experiment by adding ‘Looks’ blocks to the ‘go to’ and ‘glide’ blocks, for example:
Also encourage them to add a ‘When the green flag is clicked’ block at the top of their stack (found in the Events category) as a starter block.
Give children plenty of time to experiment with these kinds of blocks ensuring they have tried them all.
When they are getting familiar with the blocks encourage them to tidy up their page and get rid of any messy, unused code.
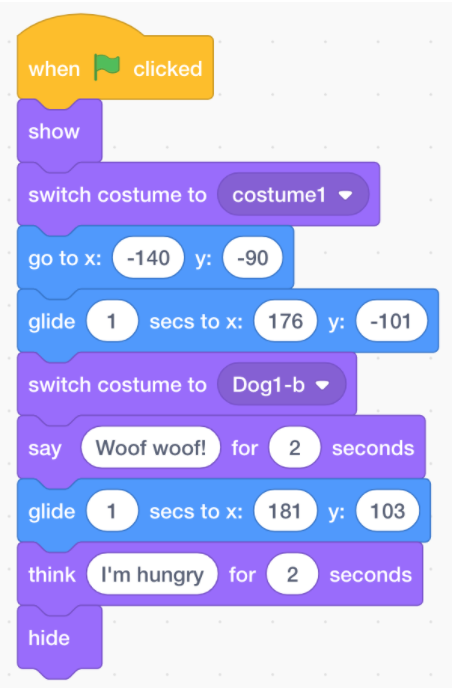
Then ask them to think out what they want to happen first and then try and make it happen. They can try this example first and then try their own by jotting down a short series of actions as a list on a whiteboard or paper and then try to code it:
Ask - Can you:
- Make the cat start in the bottom left,
- move to the bottom right,
- turn into a dog,
- say ‘Woof woof’,
- move to the top right,
- think ‘I’m hungry’
- and then disappear?
Solution:
The dog costume needs to be loaded in before this is possible
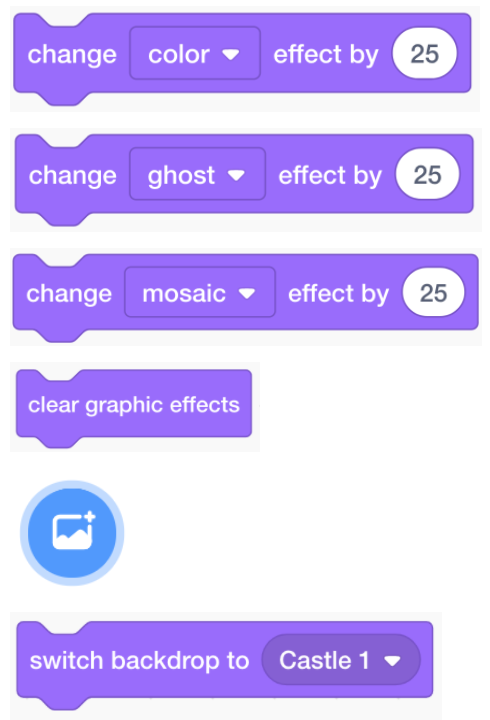
Finally ask them to explore the looks blocks further to see what else they can add to their animated sequences.
- What else can you find in the Looks category?
- Can you make your character get bigger, smaller or change the way it looks with special effects?
- Can you find how to remove all graphic effects?
- Can you work out how to add a new background, and how to change between backgrounds with your code?
Saving
Depending on whether you are using the desktop or online versions of Scratch 3, saving may be slightly different.
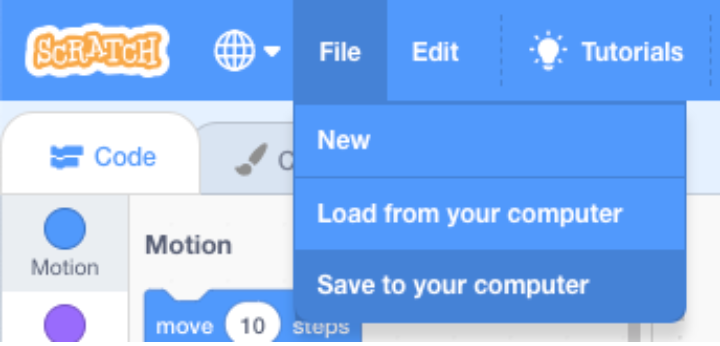
Offline working
In the offline desktop version saving is very simple. Just go to File > Save to your computer and browse to wherever you would like to save your work, name your file appropriately and click Save.
Online working - with a Scratch account
This is really easy as Scratch autosaves for you! You can be really sure the save is up to date by clicking the ‘Save now’ button in the top right of the screen near your username:

Or by clicking File > Save. Then just log out of your account at the end of the lesson.
Online working - without a Scratch account
Using the online version can make things slightly trickier if you’re not signed into a Scratch account.
When you save your work, most web browsers instantly download the file by default to the downloads folder on your computer. The problem with this is that access to this folder is sometimes blocked for students on school networks, and also it doesn’t give you the opportunity to name your work when saving.
Solutions to this are:
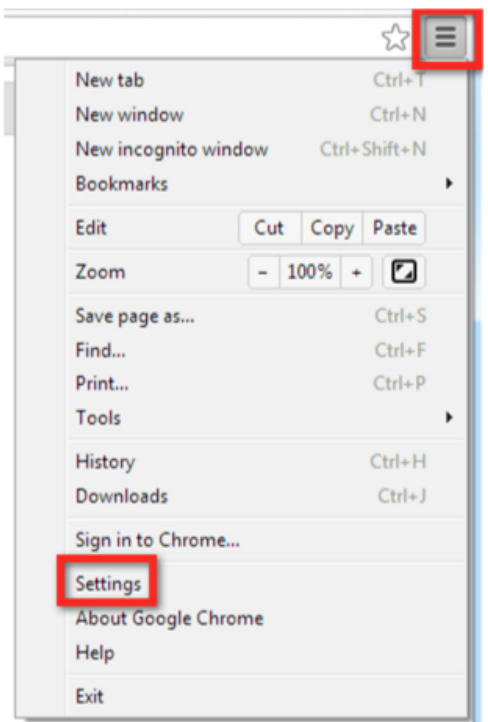
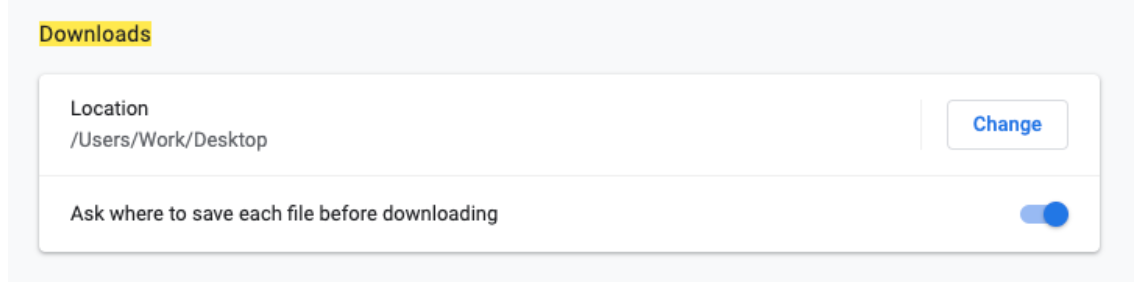
Option 1 - Ask your technician to adjust the allowed settings for your browser so files are not saved automatically to the downloads folder. In Google Chrome, go to Settings, search for Downloads and scroll down until you see the options below. Turn on the Switch for the option ‘Ask where to save each file before downloading’. This will allow students to browse for a folder and name their work.
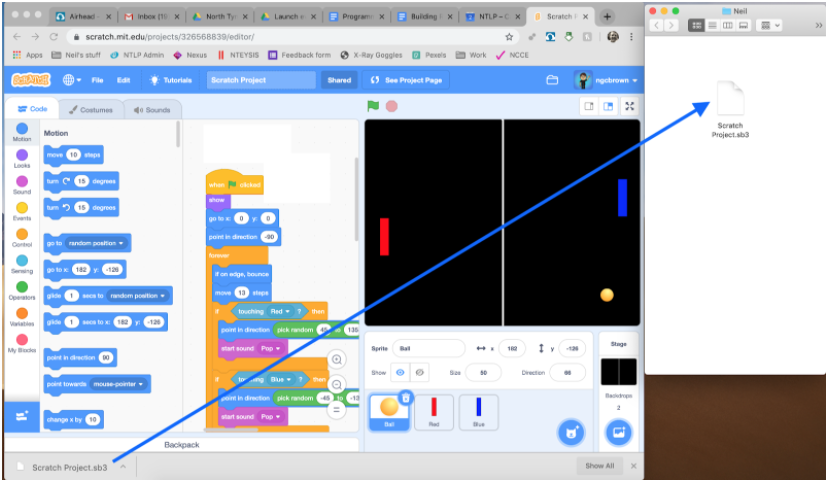
Option 2 - If this isn’t possible we would advise setting up a class folder on your shared area for the students to save into. Within that, create another named folder for each student.
Ask the students to minimise their browser window and browse for and open their named folder. This is usually available from the File browser tool or Start > Computer and then finding the folder on your network. Resize the window so it’s not full screen. Open your browser window again and resize that so that both windows are visible at the same time.
Then save your work in Scratch from the File menu > Save to your computer.
When the file downloads it should also be visible at the bottom of the screen. You can drag and drop it from there to the named folder at the side of the screen. Their work is then saved and in their named folder ready for the next lesson. If you still want to rename the file, a single click on the name of the file in the folder should let you edit it or right click and choose rename.
Plenary
Review the things covered today and the objectives of the lesson:
- How did we get our sprites to move?
- What are coordinates?
- What do costumes do to our sprite?
- What did you do when something didn’t work today?
- How did you fix your code?