Collecting games: eating apples
Getting started with Kodu - Lesson 1
Objectives
- Create and refine sequences of commands to make a character move
- Use logical reasoning to debug algorithms
Lesson Resources
Lesson 1 - Collecting games: eating apples
Lesson 2 - Collecting games: Building your world
Lesson 3 - Collecting games: Baddies, challenges and evaluations
Lesson 4 - Beginning a racing game
Lesson 5 - Racing games: adding conditions
Lesson 6 - Racing games: Evaluating the game
Introduction
Kodu is a wonderful free tool from Microsoft. It lets you create amazing 3D games with visual programming language (in a similar way to Scratch). There are lots of ways to use Kodu in the classroom, and once the children are familiar with it you may wish to give them more freedom in the style and type of game they create. However, this unit of work is a nice introduction to Kodu which will take your students through making two different kinds of games over approximately six weeks.
- You can get Kodu for free from the Microsoft Download Centre HERE
- You can find out more about Kodu HERE

There are two sides to Kodu that students will need to familiarise themselves with; the programming side and the design or their world. This first project begins with introducing the programming side of things to the students first as they can very easily get carried away with the world-building tools and totally forget about the programming side, creating a beautiful looking game that doesn’t work. So our favoured approach is to begin just with the programming of characters and then later introduce the design tools.
You may wish to watch the ‘Introduction to Kodu’ video to introduce the basic concept of what the software is all about. What other programming experience do you have? They used things like Scratch, Scratch Jr, Logo, Bee-Bots and other programmable tools or apps.
Kodu uses visual programming but the layout and design of the software is quite different to other apps. The graphics and the world in which you create your games is 3D, which some may say makes it more visually engaging than Scratch, and some might prefer it for those reasons, but there are things that Scratch can do that Kodu can’t. In Kodu you are limited to the characters and props that are given to you, whereas you can design your own sprites and backgrounds with Scratch and create a much wider scope of projects.
A collecting game
Explain that we are going to be making a collecting game which will let us get to know some of the basics of Kodu while still making a great game. Open Kodu and begin a new world, discuss the mouse controls when on the ‘hand’ tool in editing mode.


- Left click lets you grab and move around the world,
- Right-click lets you orbit the camera view around your world
- Rolling the mouse wheel zooms in or out
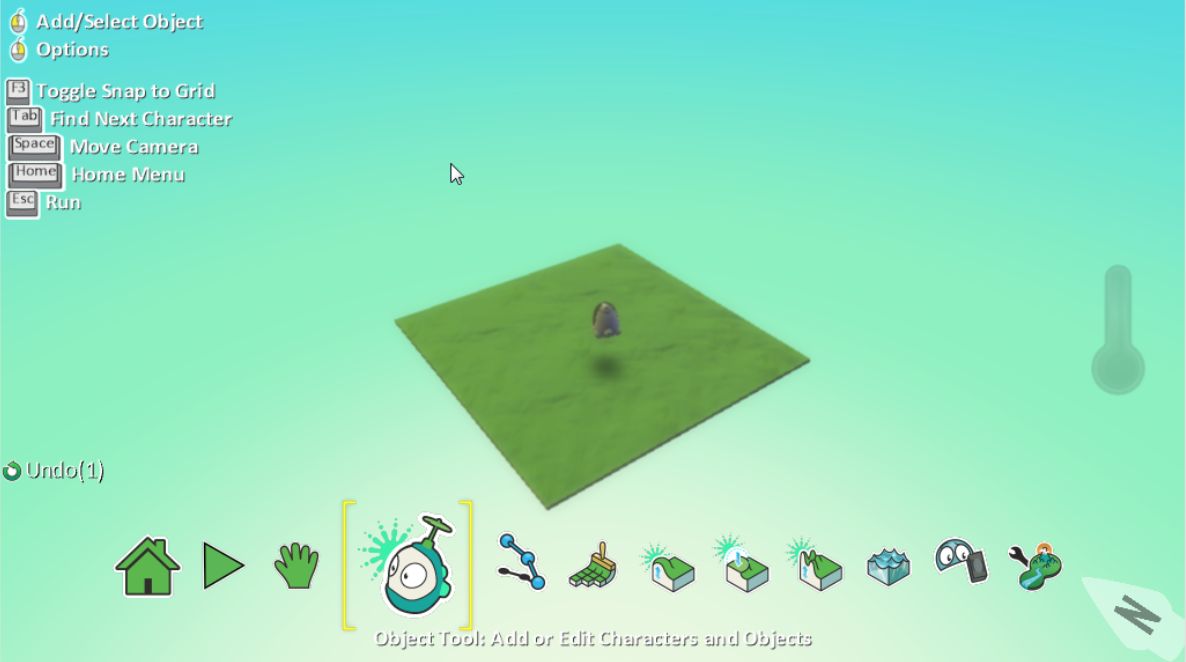
Tip - It’s worth noting that holding the spacebar at any time jumps from the tool you are using back to the hand tool, which can be really useful when building your world. There are other useful shortcuts which are displayed (but easily missed) on the screen in the top corner:
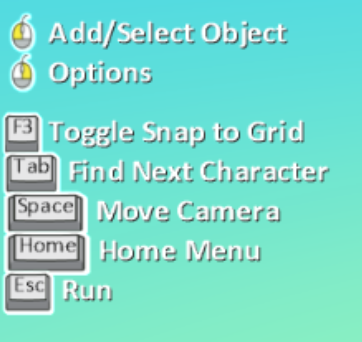
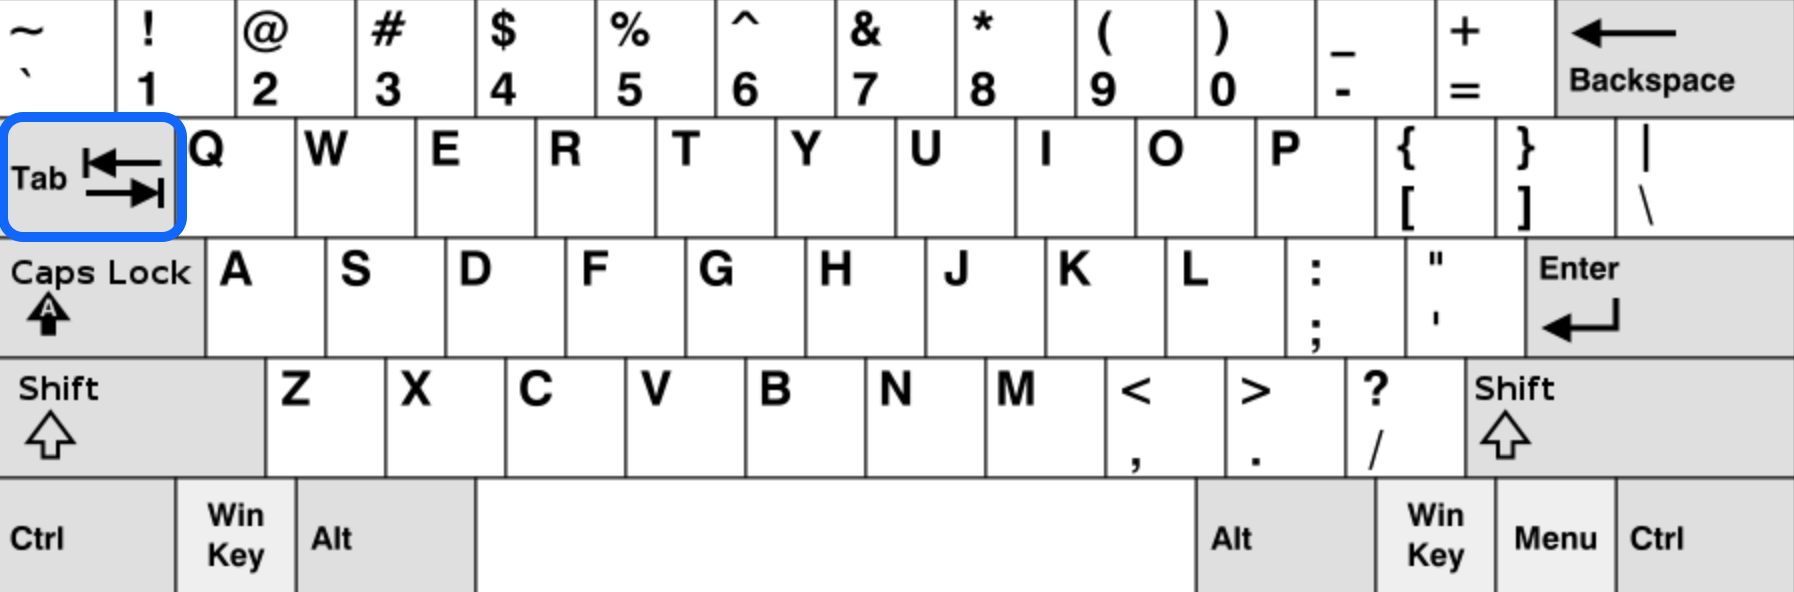
The Tab key is another worth mentioning; if the students zoom out too far or lose their world or characters, the Tab key jumps the camera back to the objects (characters or things like apples, trees etc) in their game, each tap of the key will scroll through the characters. Using this and then the zoom with the mouse wheel is often the easiest way to find their missing world and centre the camera on it again.
Next show the Object tool illustrated by the image of Kodu.

Click on the grass to demonstrate the wheel of options that Kodu give and explain that the whole program works in this way. If there is an arrow on the outside edge of a section it means there is more choice for that section. Click to the side to exit a menu and return to the level below.
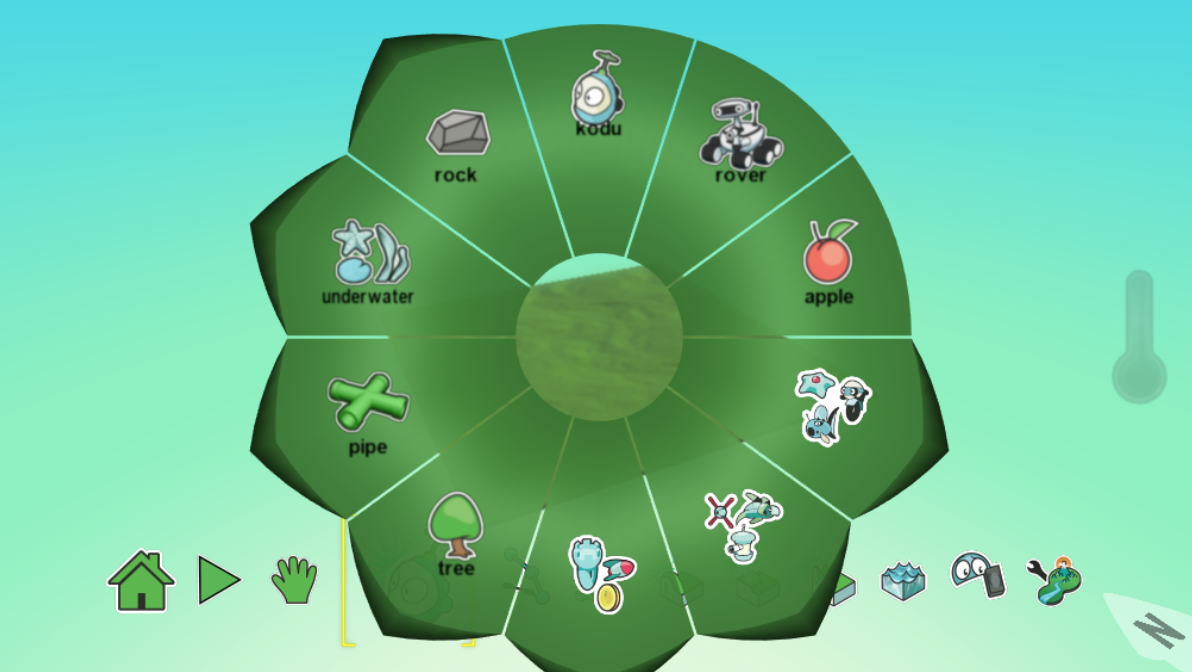
Choose a Kodu and add it to your world.
Show how right-clicking on the Kodu (only when using the object tool) gives you a menu of options such as change height (from the floor), size and rotate. But the key area to look at is Program.
You will always see the When and Do sections when you go to Program.

Ask the students:
- What do you think this means?
- What do you think we could add to each part?
- Can you give some examples of the type of thing that might work here (even if they are not familiar with the actual content of Kodu).
- Can you give examples of rules that are applied to characters in computer games using When and Do?
For example:
When: Your character falls onto spikes
Do: Your character dies
When: Your character collects a star
Do: Your character gets faster
When: You press the X button
Do: Your character shoots
When: You press the Y button
Do: Your car brakes
It’s all about cause and effect and rules that are created with the code. Each line of code can be considered an algorithm, and sometimes more than one line of code can make up an algorithm.
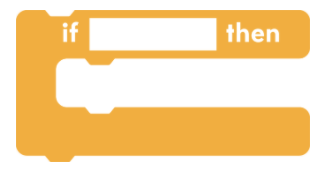
You can make links here to ‘if’ blocks in Scratch if they are familiar with that, as they also allow you to add rules, or conditions to the functions of a game. This concept in coding is know as selection - selecting what happens and when it should happen.
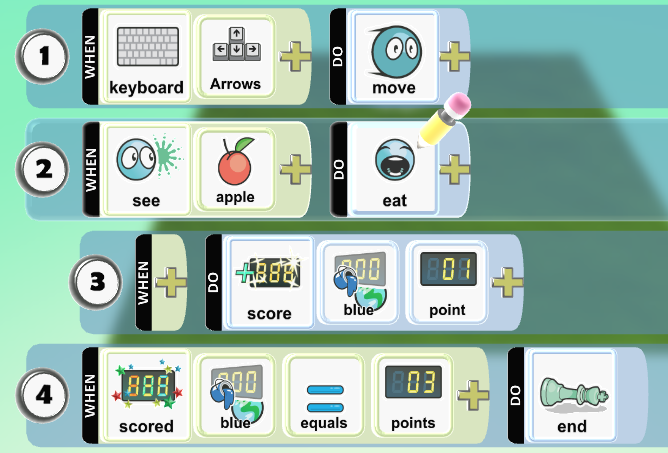
Explain that we want to make this character move so we can control it in our game. Click on When and discuss the options. Choose the keyboard. Do you think that on its own is enough information to make the character do what we want? Why? Establish that we need to specify which keys we are going to use and that if we click on the next + we then get a new wheel of options. Point out that the second wheel of choices is dictated by your first tile (i.e. if you choose the keyboard first you’ll get different options on the second wheel to if you choose the mouse). Add the arrow keys to the when section, then move over to the do part. What shall we make it do? Move!
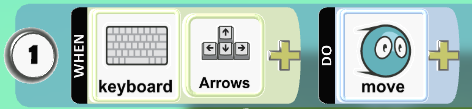
Show how to exit building mode and get into the game mode to test your algorithm. Press the Escape key once to exit the wheel and then again to play your game. Try out the arrow keys and get the Kodu character moving.
Next add five apples to the world and then return to your Kodu and program it again. Show how we can use the bump tile to allow collision detection when two or more sprites touch. What shall we make it do when it bumps the apples? 'Eat' will make the apples disappear when touched.
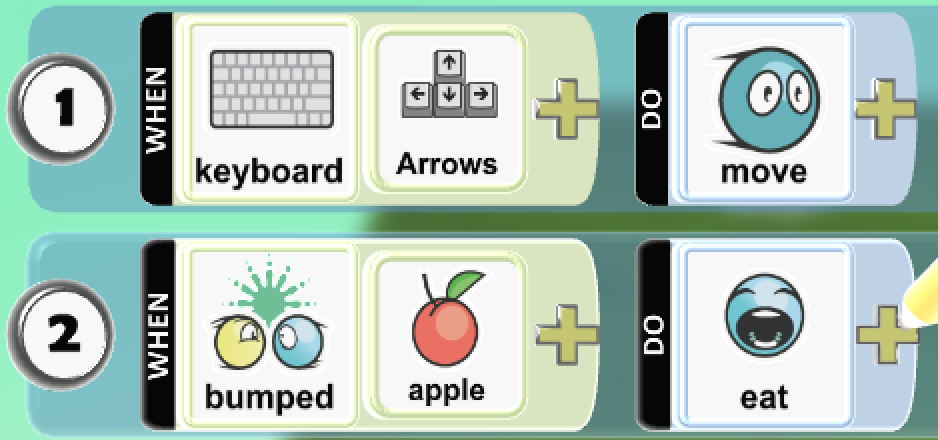
Ask them to add all this to their games and test this out.
Next add a second Kodu character and change its colour so they can be told apart. Explain that this will be a computer-controlled opponent that is also going to eat the apples, our game is going to be about which Kodu gets the most apples.
Go to the programming for the second Kodu, what do you think will go in the 'When' section this time if we are not going to control it? Using ‘See’ tells the Kodu to look around it for an object or character (which you must specify). In the Do section tell it to move towards that object (the apple here) when it sees it. Also, add the same code as the first Kodu to make it also eat apples when it bumps them:
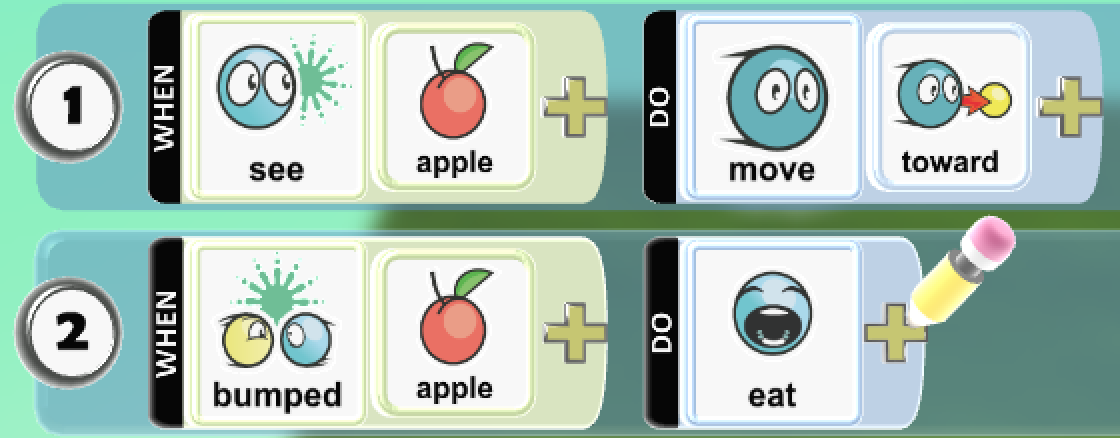
What do you think would happen if you forgot to add the apple tile to row 2? Not including the apple tile would mean that this Kodu would eat anything it bumps, including other characters!
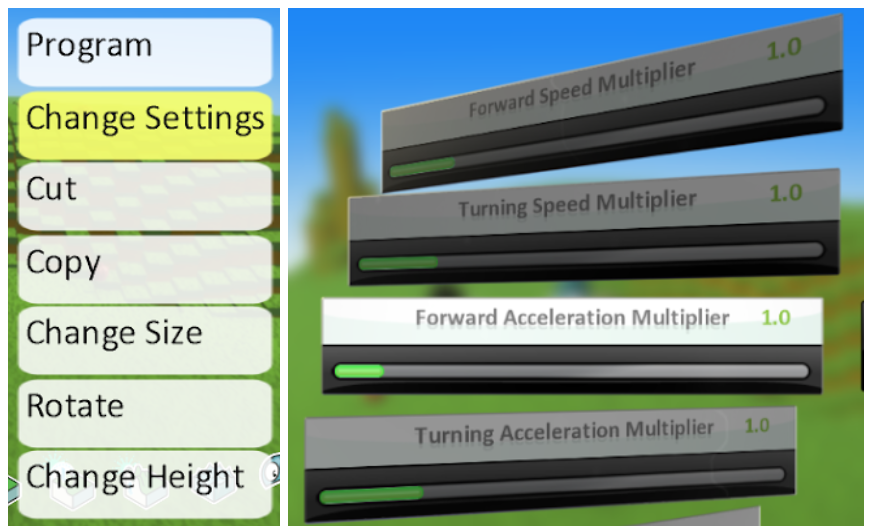
At this point the students might want to speed up the Kodus to make the game a bit more exciting! The speed of individual characters can be managed by right-clicking them and going to Change Settings. The top four settings control the straight line and turning speed and acceleration.
Ask the students"
- What is the difference between speed and acceleration?
- Should there be a difference between the speed of our character and the one the computer controls?
- Why?
With both Kodu characters going after the apples there is now an element of competition, but at the moment there is no obvious way to tell if you win or lose. Adding a scoring system is the next step and solves this issue. Both characters need similar code to give them points when they eat the apples.
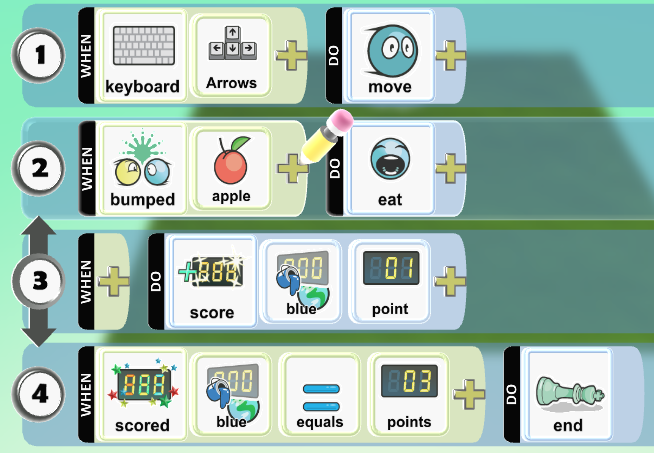
The code below shows you how to add scoring for the character you control. Row 3 is indented (just click on the 3 and drag it to the right) This means the row above it becomes the ‘when’, and for this reason, you don’t need a ‘when’ on row 3. So when the Kodu eats an apple 1 blue point is added to its score. The colour, blue in this case, should match the colour of the Kodu.
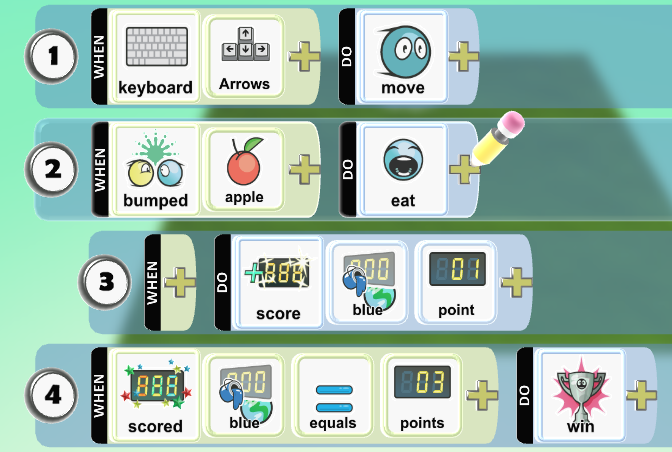
Row 4 measures who the winner is. It says when the blue score is equal to 3 points, you win. The = option can be found in the 'compare' section. 3 is the correct number to use as there are five apples so 3 apples will always be enough to win. Ensure the students understand that they need to know how many apples they have and that they have an odd number of apples, discuss;
- Why is it important that you have an odd number of apples?
- If I had seven apples in my game what number would I need to use on row 4?
- What about if I had eleven apples in my game?
If there isn’t the number you need (e.g. 7 for a game with 13 apples) then make up the number with two or more tiles, e.g a 3 and a 4 tile.
The code for the computer-controlled characters scoring is slightly different. Challenge the students to work out the differences for themselves and add the code for both Kodus.
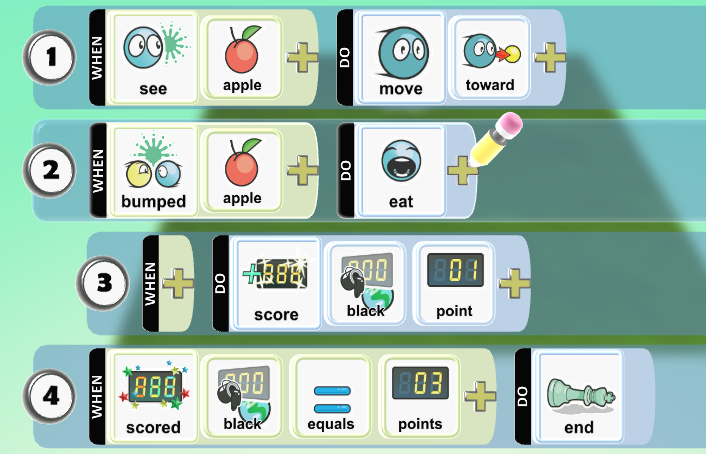
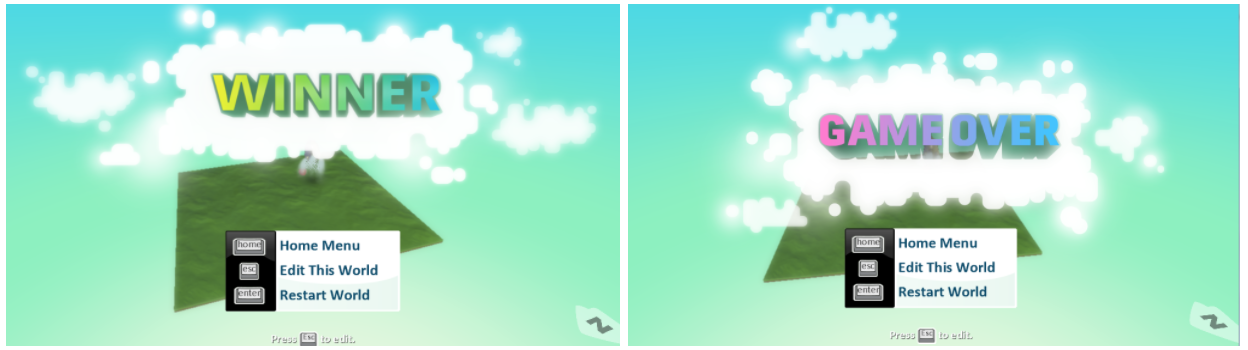
Discuss the differences at the end and why they are needed. The colour should match the second Kodu’s colour and the final tile should be ‘end’ instead of ‘win’ which will give a ‘game over’ message instead of ‘winner’:
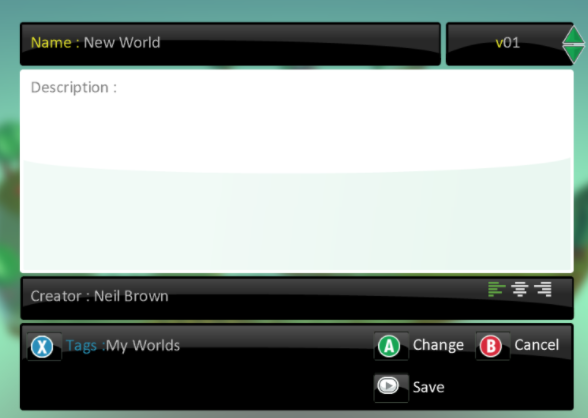
Get them to save their games by going to the house icon on the left of the toolbar and ‘Save my world’. The ‘name’ section is the name of the game, the ‘creator’ is the child’s name.
Plenary
At the end of the lesson review the game so far and how it works. Debug any errors the have with them. You may wish to add some deliberate mistakes to your own code and ask them to discuss and debug it together.
Try these deliberate mistakes and see if they can fix them:
Don’t indent line 3 of the code (the score will fly up as there is no ‘when’, which means ‘always do it’). This will result in an instant ‘Winner’ or ‘Game over’ message appearing (depending on which character you do it on).
Put when See apple eat it (instead of bump). Your character will eat apples and score points just by looking at them, so again you’ll get an instant ‘Winner’ or ‘Game over’ message appearing (depending on which character you do it on).