
Collecting games: Baddies, challenges and evaluations
Getting started with Kodu - Lesson 3
Objectives
- Design programs with sequence and selection that accomplish specific goals
- Work with variables for scoring systems
- Use logical reasoning to debug algorithms
Lesson Resources
Lesson 1 - Collecting games: eating apples
Lesson 2 - Collecting games: Building your world
Lesson 3 - Collecting games: Baddies, challenges and evaluations
Lesson 4 - Beginning a racing game
Lesson 5 - Racing games: adding conditions
Lesson 6 - Racing games: Evaluating the game
Introduction
Lesson 3 should complete their collecting games. In this session we can look at adding baddies to their world to make their games harder and also setting them some challenges of other things they might add, this may be something to target to your more able student to try and achieve independently or with a partner.
Recap last week and what each of the world building tools do.
- Which one adds land?
- How do I create a hill?
- How do I add or remove water?
They may have made their apples bigger and spread them out in the last lesson, but the may also want to add some more apples. This is easily done, just right-click an apple and choose copy, then right click on a new empty spot on the world and choose paste. This will save having to resize new apples and the pasted versions will be the same size as the one you copy. Ask the students - But if we add more apples, what will we have to change in our code?
In lesson 1 we created the code which set the number of points needed to win on line 4.
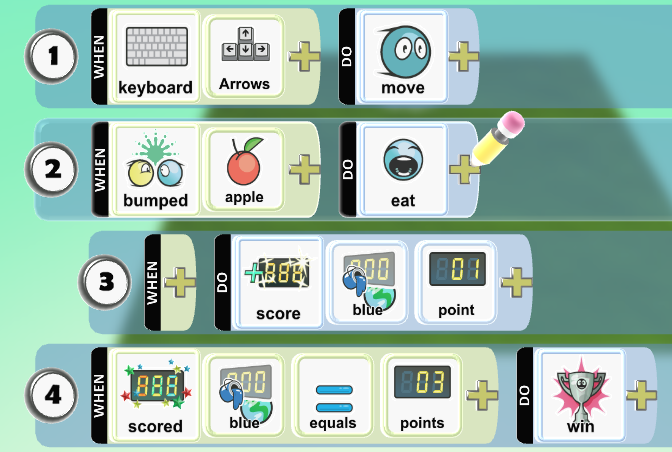
This was fine for five apples but will need changing if we add more apples. Remind them to keep count of how many apples they add and to make sure it remains an odd number so someone can always win. This will also need changing for both Kodu characters.
Alternatively, you can just add lots of apples and still say the winner is the first to collect any ten of them.
Give the students some time to return to their games and test it, then consider making these changes as well as continuing to tweak settings such as character speed now the world is bigger. Ask them to think back to the feedback they got from their classmate at the end of the last lesson and consider any changes that might need to be made.
Baddies
Cannons
There are lots of ways to create baddies in the game that will make it harder. Some of these are demonstrated in the tutorial videos, so watch them for a detailed run through of how to create and code them. But here’s a brief overview of two great ones to introduce students to first:
The cannon can be added to fire missiles around your world to make life collecting apples that bit harder.
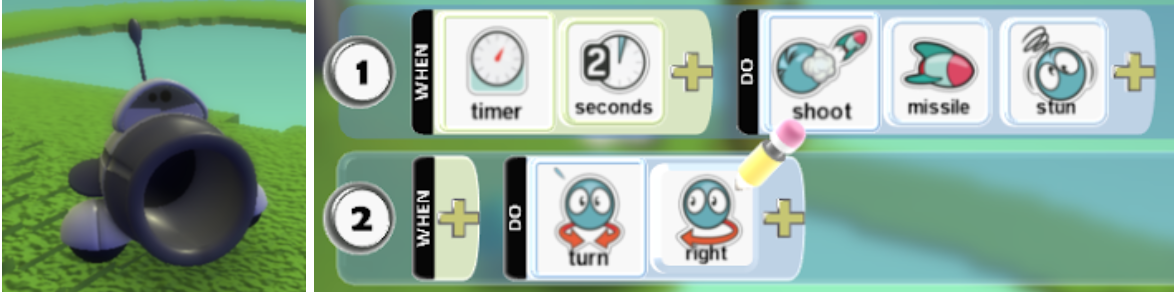
The first line of code uses the timer function in the when, and in this example it is set on every two seconds, the do is to shoot a missile, the combat option (after you’ve added the missile) lets you decide how much damage a hit from this missile will do, you can choose from stun, knockout, vanish or boom! This example just uses a stun so your character is not out of the game with a hit, they merely are stunned for a short time to give the opponent an advantage. Line 2 of the code leaves out the when and just tells it to always rotate to the right.
Once you have tested your cannon you can right-click it and copy it (or Ctrl+C) and right-click somewhere else on the land to paste it (or Ctrl+V) to create lots of cannons that will all behave in the same way.
Flying saucers
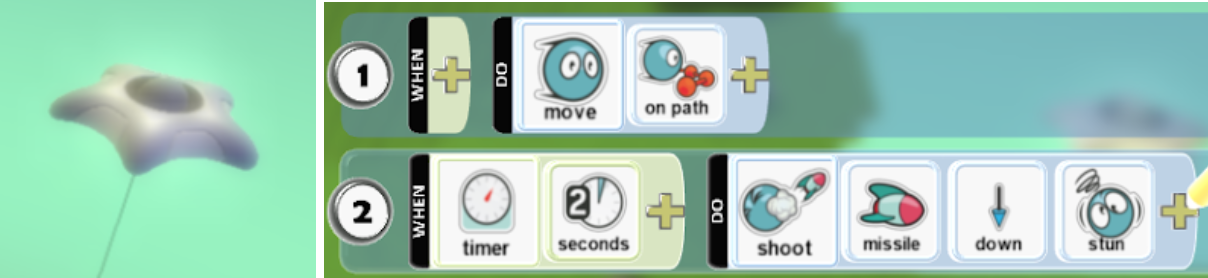
The flying saucer is another nice baddie option. Getting it to shoot is pretty much the same as the cannon, with the addition of a direction in the do section. Without the down arrow it will fire missiles forwards, and as the saucer flies higher in the sky, they will go over the heads of the other characters and not be much of a danger. Row 1 dictates the movement of the saucer. Again, there is no when so it always moves on a path. The next step is to add the path!
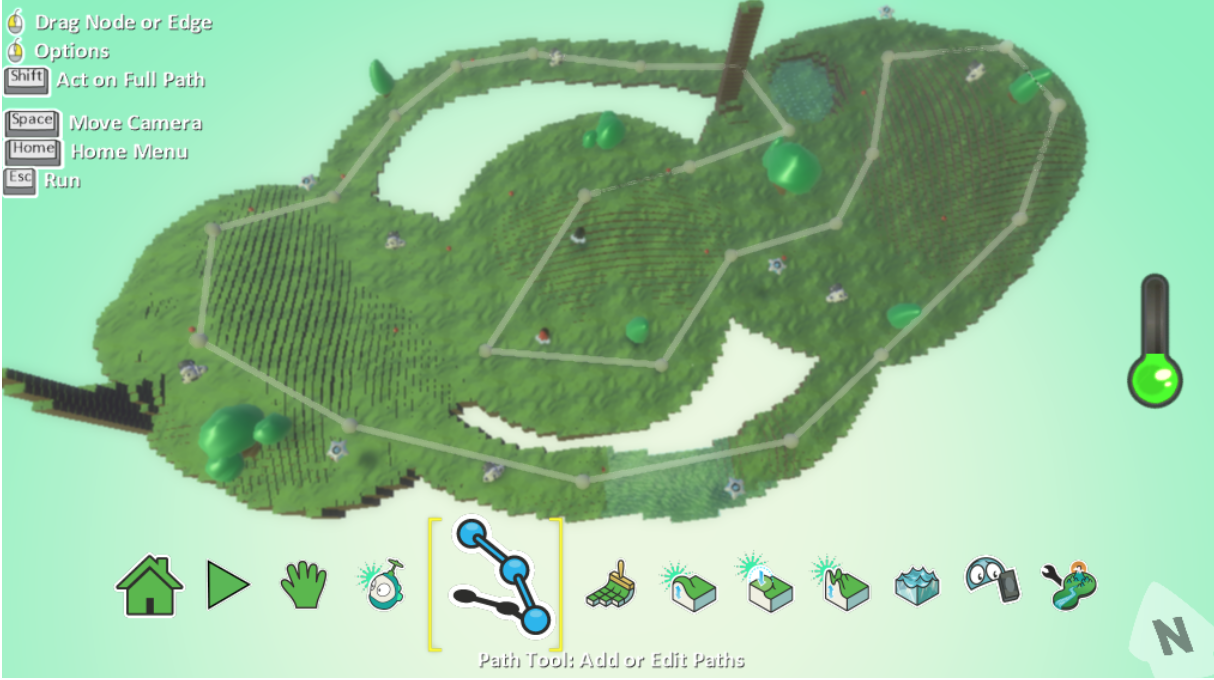
The path tool is the blue connected dots.

This lets you plot a path on your world which you can tell characters to follow. The path becomes invisible once the game starts, so it’s a great way to accurately control their movements or give the illusion of random movement for baddies.
Every time you click it adds a sphere (a point at which you can bend the path), the image below shows a path that has been joined up to create a circuit (double click on a sphere to join up a path to another). Use the spacebar to jump to the hand tool and move the camera around as you plot your path. A bit like adding the land, it’s easier to zoom out a bit and look down from above when creating a path. Right click the spheres to delete them, hold shift when you do this to select the whole path (if the students get it a big tangle and need to delete the whole thing) before deleting.
When you start the game the saucer will jump straight to the path and follow it, you don’t need to place it right on it. Like the cannon, you can copy and paste the saucers so you have several flying round.
Give the students some time to experiment with adding these baddies or something similar using the techniques you’ve shown.
Challenges
Finally, if time you can set the students these challenges to take their game a bit further, can you work out how to add any of the following features to your game?
1. Give your character the ability to shoot missiles (when you press the spacebar):
Lots of other things can be set to work with a key press too, explore that actions available in the Do section to get some ideas.

2. Make your character die if you touch water.
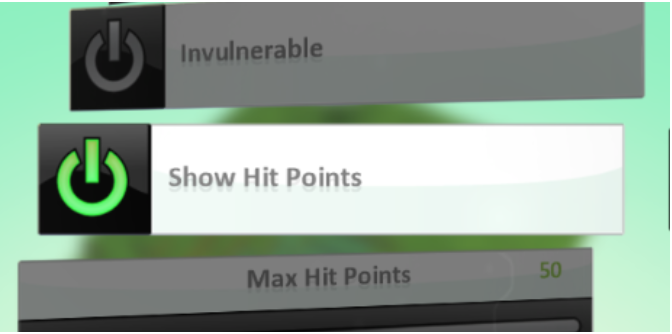
For gradual damage to health when on water:
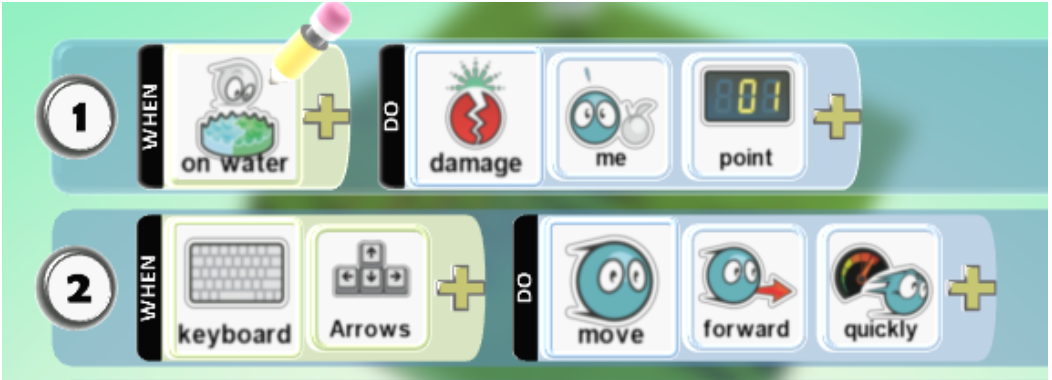
Turn on ‘Show hit points’ in the character settings if using this approach so they can see their health bar.
Or, for a more instant destruction:
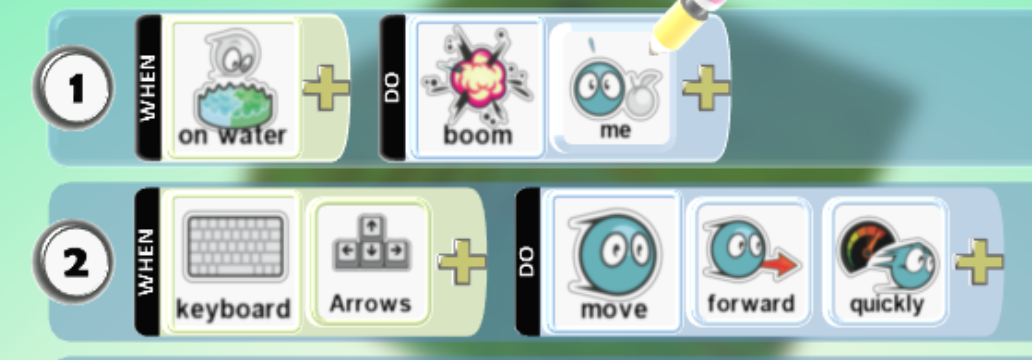
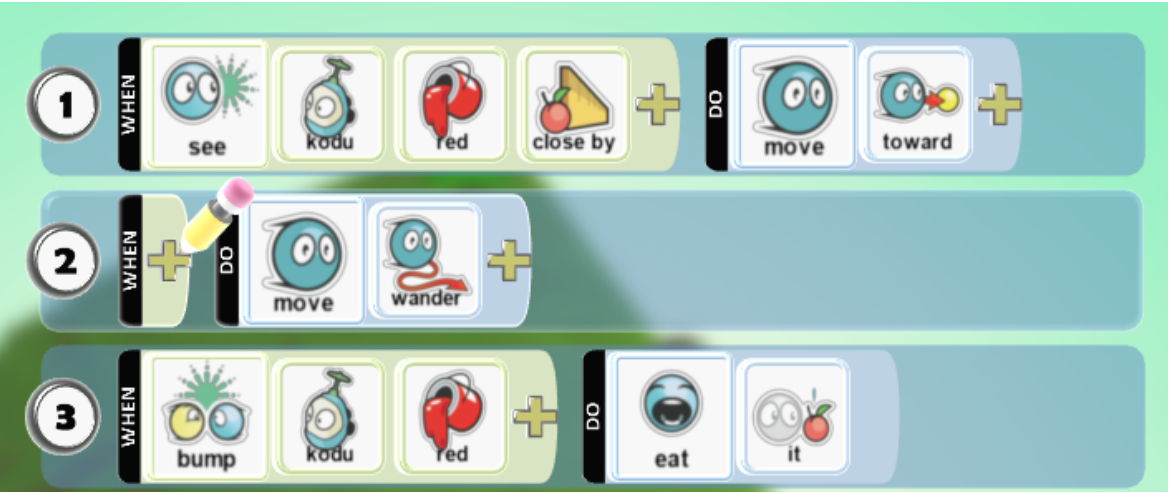
3. Add a big baddie that roams the world and eats you if you get too close.
There can be several variations on this code depending on exactly how you want the baddie to behave, but here’s one way to do it:
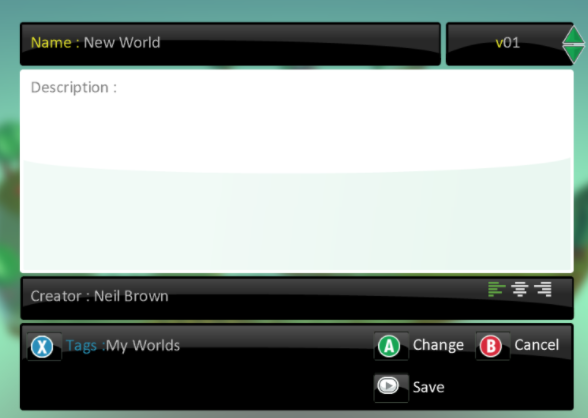
Ask the students to save their work at the end of the lesson. Create a new iteration of the game by changing the V number in the top right of the save box.
Evaluating the game
Ask the students to recap the processes they have gone through and what they have learned over the last few weeks in making their first Kodu game. What were the most important elements for making it a successful game?
We are now going to establish and agree a set of criteria for evaluating these games. Ask -
- What sort of categories should we rate the game on?
- What should it contain?
- What shouldn’t it contain?
- How can we decide if it’s a good game?
Establish that when companies create any game in the real world it is created for a particular audience, it might not always be the game maker’s favourite game, and it is the game player’s opinion that matters the most. If they don’t like it, if it’s too easy, or too hard they won't play it.
Draw up a class set of criteria that can be used for student peer assessment. Here are some suggestions for things you may want to include in your list:
Coding
- Characters - Do they do what they are supposed to do? Are the controls correct? Could anything be improved in how they work?
- Game systems - Have they got a working scoring system? Does it declare a win/loss?
Game environment
- Does it look good? Why?
- Does the world work for this game? Why?
- Are there any parts that are inaccessible or cause problems?
- Does anything need to be changed or improved?
-
Playability
- Is the game fun to play?
- Is it too easy, too hard or just the right level of challenge?
- Do you want to play the game again?
- Have they added anything extra to make the game even better?
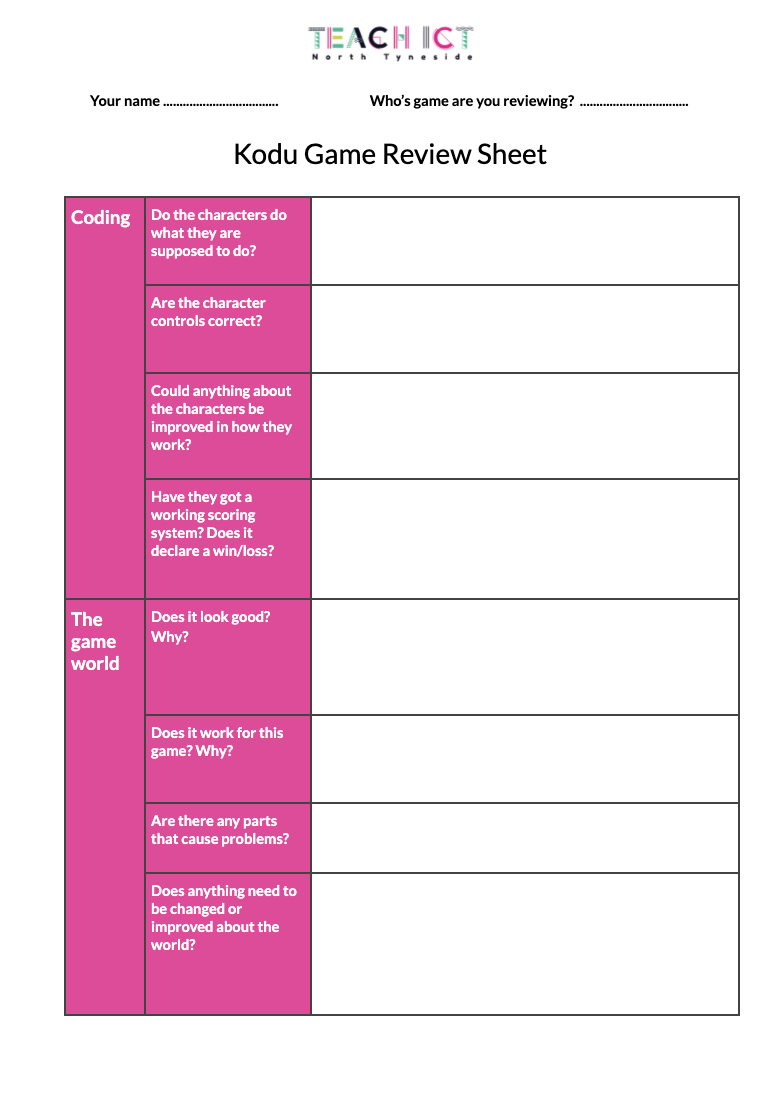
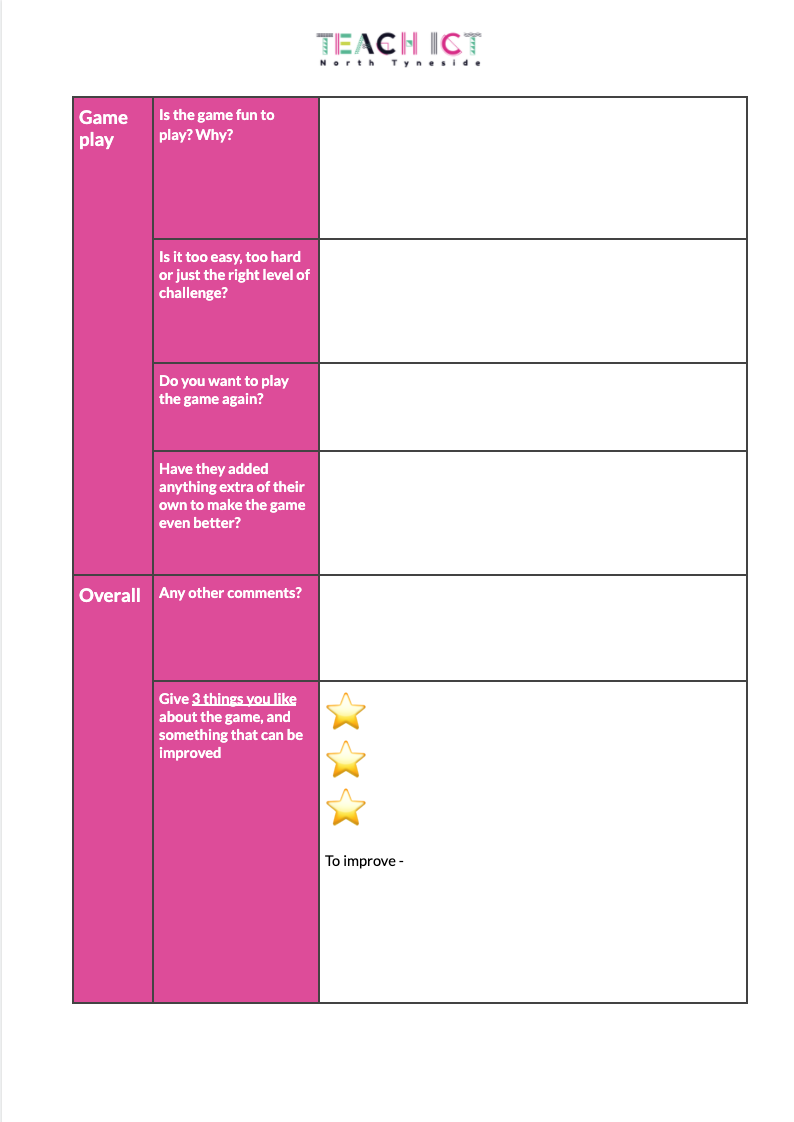
This list has been turned into our own game review sheet, which you can find HERE. You can use this with your students or ask them to create their own using their own list of criteria and this blank version HERE.
Ask the students to carry out a review of a partner’s game and then feedback to them.
At the end ask some students to share some of the feedback they received. Was it useful and constructive? How did they feel about their final work and the project?