
Racing games: adding conditions
Getting started with Kodu - Lesson 5
Objectives
- Plan and design a 3D game environment
- Create and refine sequences of commands to make a character move
- Use logical reasoning to debug algorithms
Lesson Resources
Lesson 1 - Collecting games: eating apples
Lesson 2 - Collecting games: Building your world
Lesson 3 - Collecting games: Baddies, challenges and evaluations
Lesson 4 - Beginning a racing game
Lesson 5 - Racing games: adding conditions
Lesson 6 - Racing games: Evaluating the game
Introduction
Review last week’s lesson and discuss what the key objectives for this game are (an A to B racer against an opponent.)
Last week we designed and tested the track and adjusted some of the settings for our character. Ask -- What did we change and why?
Adding an opponent
The next steps are to add an opponent to race against. Add another Cycle character to the start of your track. This character is going to be AI controlled (artificial intelligence - not by us).

Ask - How do you think we can get it to navigate the twists and turns and race to the end of our track? How will it know which way to go, when to turn corners etc?
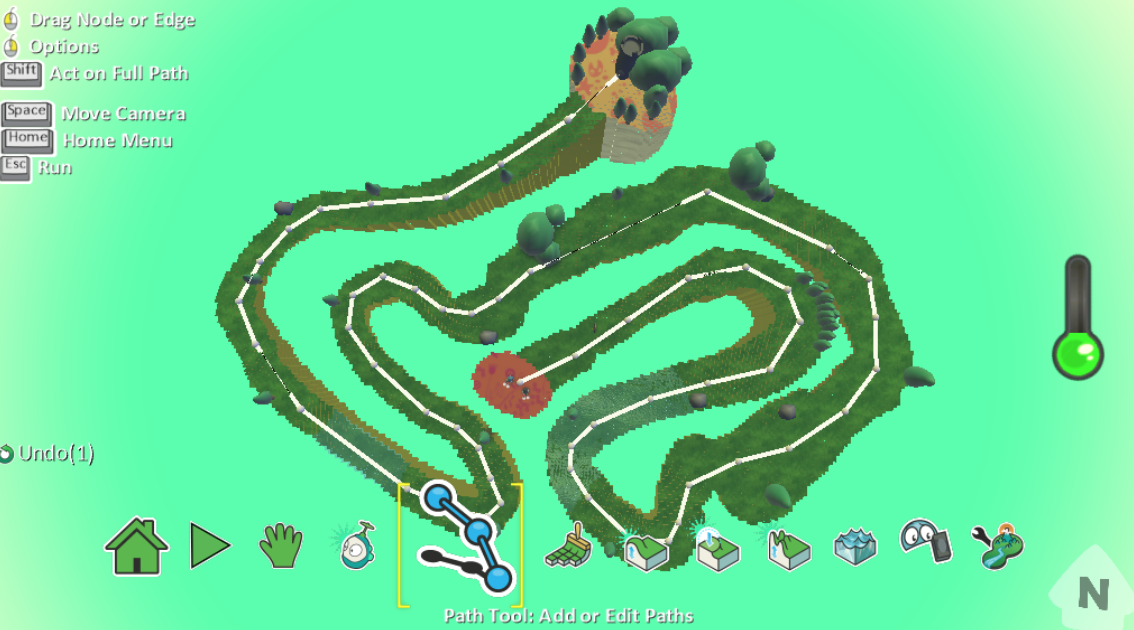
We will use the path tool for this as it lets us specify exactly where we want it to go.
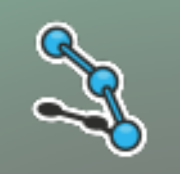
The path tool is the blue connected dots.
We used this for the flying saucer baddies in the collecting game, every time you click it adds a sphere (a point at which you can bend the path), the image below shows a path that has been created for the opponent to follow around the track. Use the spacebar to jump to the hand tool and move the camera around as you plot your path. A bit like adding the land, it’s easier to zoom out a bit and look down from above when creating a path. Right click the spheres to delete them, hold shift when you do this to select the whole path (if the students get it a big tangle and need to delete the whole thing) before deleting.
Demonstrate adding a path to the track, beginning at the start line and finishing at the end point of your track.
Adding the path is often where some students will get stuck. Common mistakes are not sticking to the centre of the track, or cutting corners (which will result in the character getting stuck at the edge of the track as it tries to follow the path.) Students also sometimes add sections of path that are not connected to the rest of it, characters will not jump from one path to another so they are then stuck where one path ends.
Encourage them to separate the nodes as much as they can while still keeping the corners of the the path rounded and smooth, not square. For example, if you have a long straight section of track, one node at each end of the straight will do just fine, you don’t need five connected nodes down the straight.
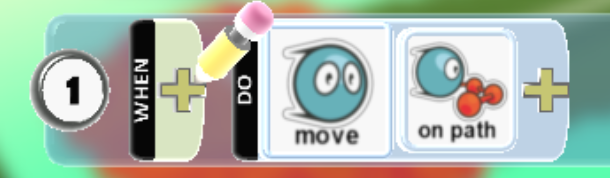
Once you think your path looks okay, it’s really important to test it out. Go to the programming for the opponent racer and add the simple code below. Leaving the when empty means that it will always try to follow the path which will make sure it begins straight away when the race starts and won’t stop.
Drive around the track with your own character following (not racing) the AI character to ensure it can get around the track smoothly. If it gets stuck anywhere you may need to adjust the nodes in your track (return to the path tool and then just drag them along the line) or add or remove nodes if needed. Remember if a path is just too much of a mess to fix, hold the shift key and click on one of the nodes and it will select the whole path, you can then right click it and delete it.
Winning and losing
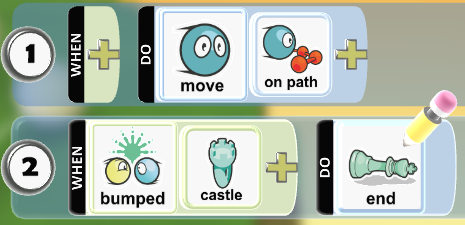
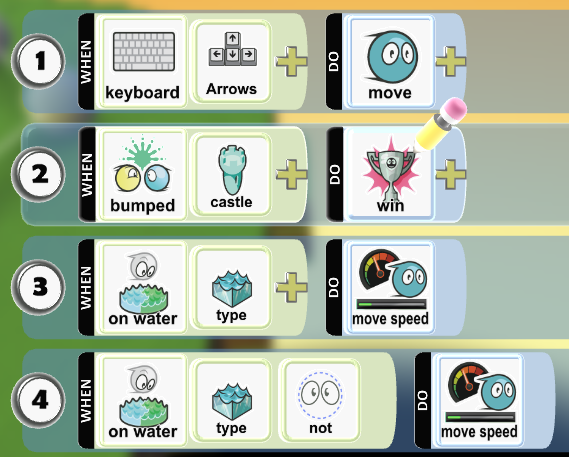
Adding the code to win or lose the race is pretty simple, it makes use of an object added to the end of the track (in this case a castle). For our character we simply add when you bump the castle we win, for our AI character the win is replaced by ‘end’. The same effect can be achieved with different flooring types if you don’t want an object at the end of your track. You can add When: On Land > Type (choose the flooring for your finish line) Do: Win
Your character:

The AI controlled character:
Get the children to swap places with a partner and properly test each other’s games and consider the following important things:
- Can you drive around your track smoothly?
- Can your opponent make it round the track smoothly?
- Are your character’s forward and tuning speeds correct?
- Are the AI character’s forward and tuning speeds correct? This contributes massively to the difficulty of the game. If it’s too slow the game will be too easy, too fast and you’ll never win either. Encourage the children to make their game challenging but achievable if the player drives well.
- Do you get a win / lose message at the end of the game?
From this point ask the children what else we could add to this game to make it more interesting, what bonus features can you think of? Can you work out how to add and code them?
Bonus features
Here are some ideas for bonus features you can add to your racing games. You can show these to your students or let them come up with their own:
Making water slow you down
This code make the water slow you down by setting the move speed to 1.5 when you are touching the water. Similar effects can be used for different land types. What else could happen when you touch them? The effect is reversed (on row 4) when you are not touching water so your speed goes back to normal (about 3.5).
- The On water tile can be found in the More section of the first wheel when you click When
- Move speed can be found in the Settings section of Do
Baddies

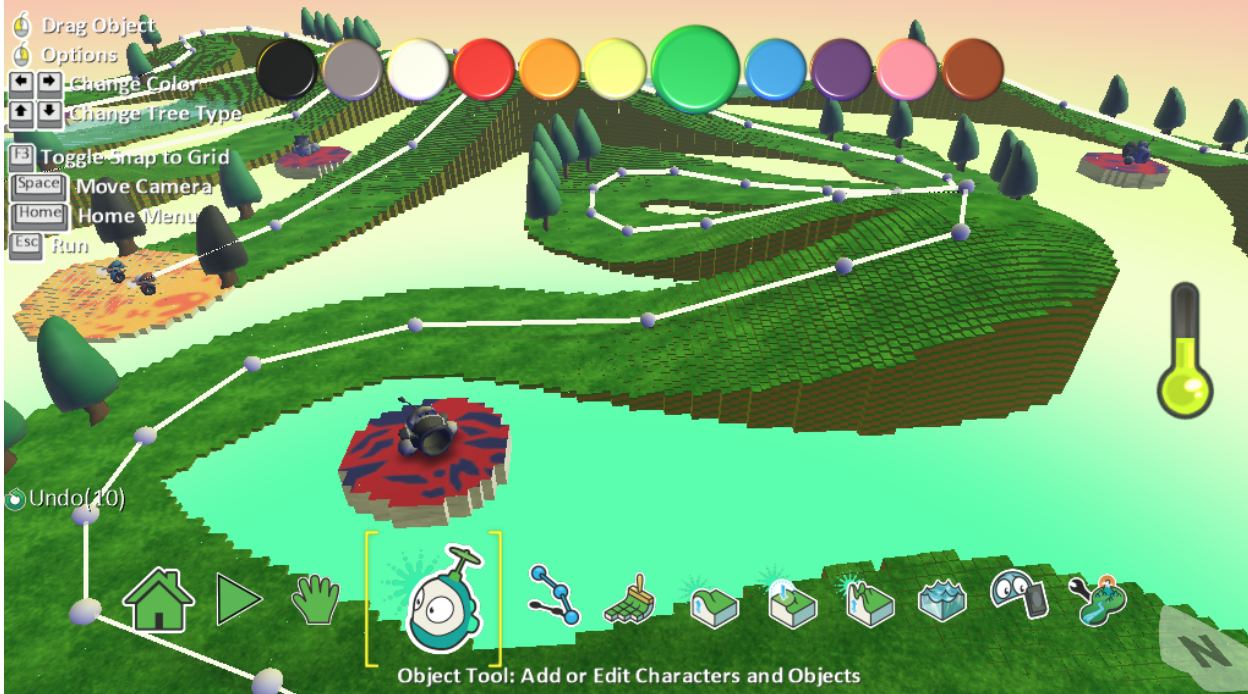
The cannon can be added to fire missiles around your world and stop you in your tracks when you’re racing by. You can place these on their own little islands away from the track (see image below) and make them rotate while they fire.
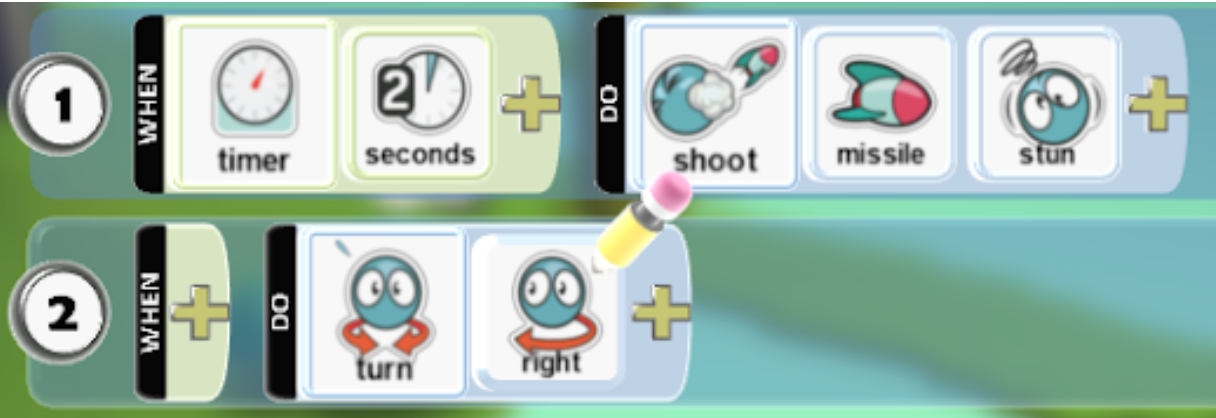
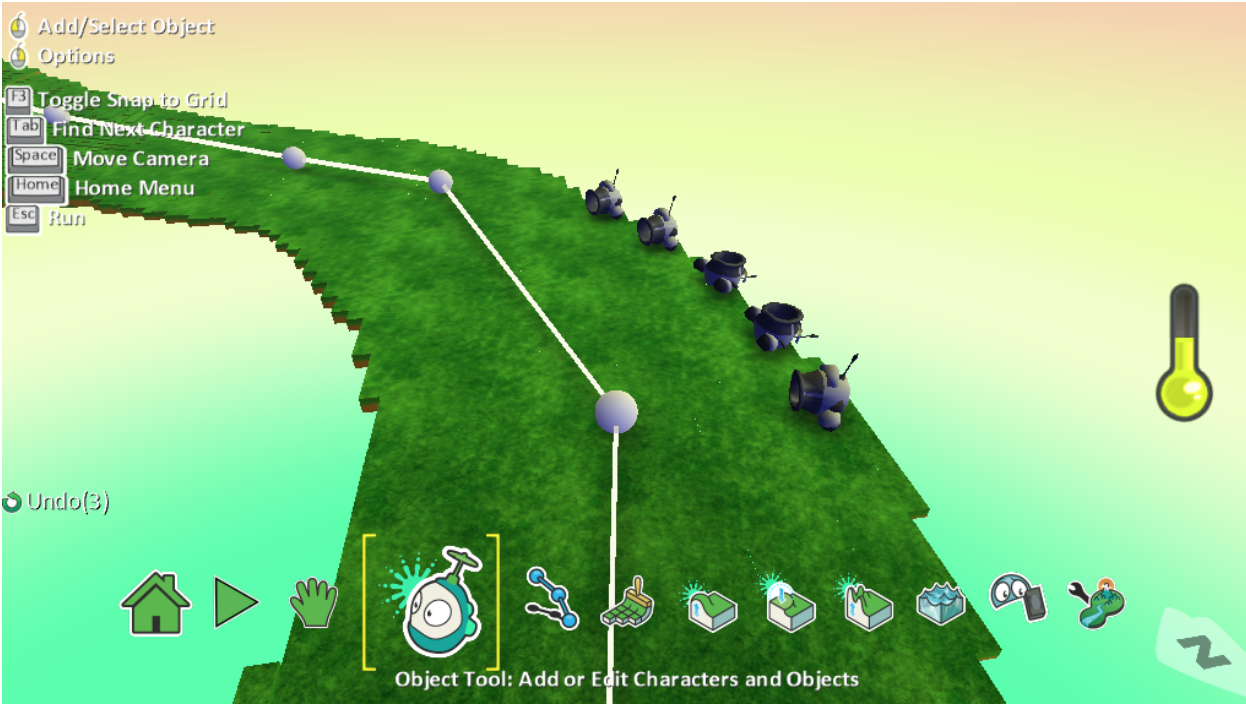
Or why not try a row of several cannons at the side of the track on a straight. If they are rotated (by right-clicking on the cannon when on the character tool > choose rotate) to face across the track and then not programmed to turn, this creates an exciting danger zone to pass through on your track (see image below). You can even vary the fire time on each cannon by changing the timer code (number of seconds).

Collecting bonus items
There are lots of different items that you can use to be collectable objects in Kodu, but you need to consider what is the point of collecting the items? The aim of this game is winning the race, so items to collect really need to be an optional extra.
This code below shows how you can make an object give you power ups for a short time, in this case collecting a star lets you shoot missiles for five seconds before the power is taken away from you.
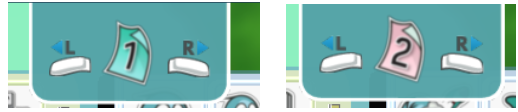
This uses a concept that we haven’t seen yet; pages. You can have multiple pages of code for characters that can run at different times. At the top of the screen, when you are in the programming screen for any character, you will see the page number (always 1 at the beginning). If you click on the ‘R’ button it will move to the right to page 2, then clicking the ‘L’ will take you back to page 1. You can always create and scroll through your pages with these buttons.
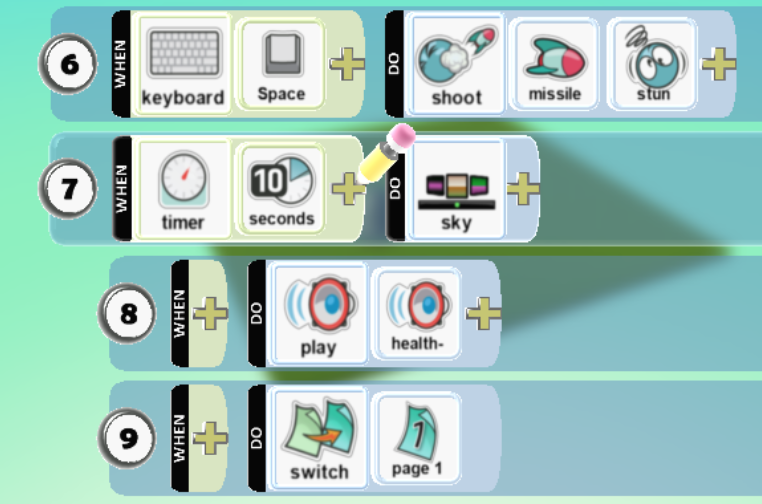
In this example, Page 1 has our normal controls that we have coded so far. However, on row 7 we have added WHEN: bump a star, DO: eat (the star) and then indented below (so they happen at the same time) three other actions:
- Change the sky colour - this gives the player some immediate feedback that something has happened or changed
- Play a sound - Again this gives some feedback to the player of a power-up
- Switch to page 2 (make sure this one is last or the others won’t work)
Page 1:
We want the code on page 2 to be generally the same as page 1, but with some small additions.
To save adding all the code again from page 1 to page 2, you can right click on the page 1 icon at the top of the screen and copy the page, then move to page 2 and right click on the page icon again to paste in the copied content. Delete the content we just added to Row 7 on page 2 as that doesn’t need to apply here.
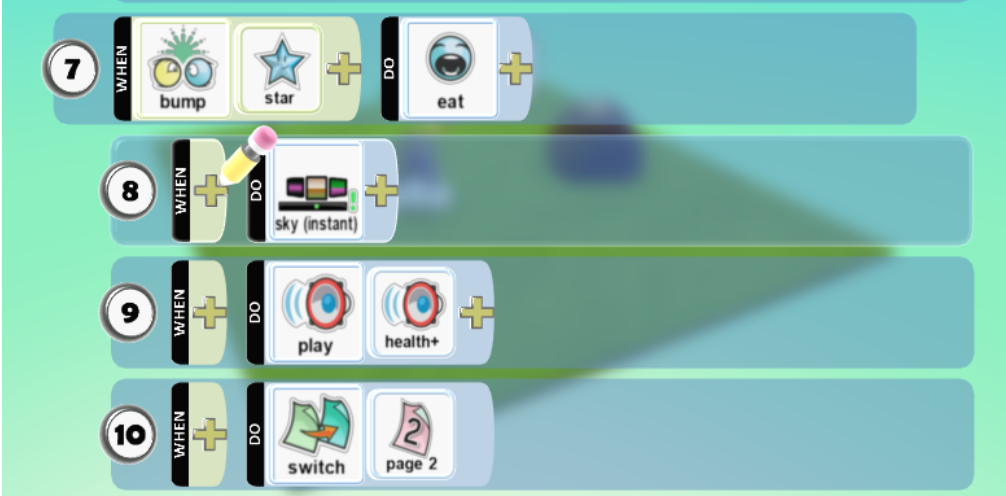
Page 2:
New things need to happen on page 2 though, or there’s no point in having it. On Row 6 below we’ve added the ability to shoot stun missiles when you press the spacebar, this can help you get the upper hand on your opponent when racing. But this is a power up, and power-ups don’t usually last forever in games, so on Row 7 a timer has been added. After ten seconds three things happen:
- The sky changes back to its original colour - this gives the player feedback that things are back to normal and that the power up has ended.
- A noise plays - More feedback that the power up is over
- The page switches back to page 1 - Which means everything new that we added to page 2 stops working until they collect another star (like above, add this part last or the other bits don’t work).
If you go on to add other bonus features after you have created a second page, don’t forget to add the code to both pages!
Adding health / damage to your vehicle
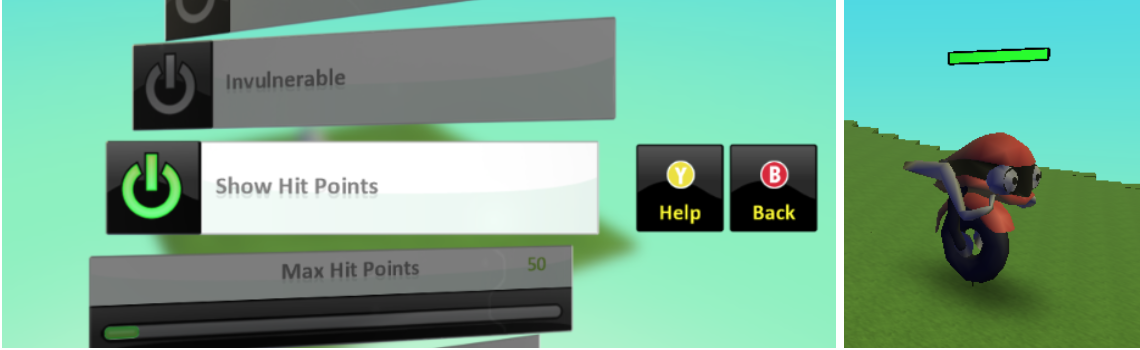
If you want to add the feature of health or damage to your game you first need to turn this feature on in the settings menu for your character; ‘Show hit points’ which will make a green bar appear above your character.
This can be used if you want to add difficulty to your game as rocks, trees, objects and enemies can all be set to take away health if you collide with them, meaning your game player needs to drive a bit more carefully to get through the race.
The coding for losing health is relatively straight forward, just replace the rock tile with whatever you want to use, or repeat this line of code with different objects if you want several things to damage your character.

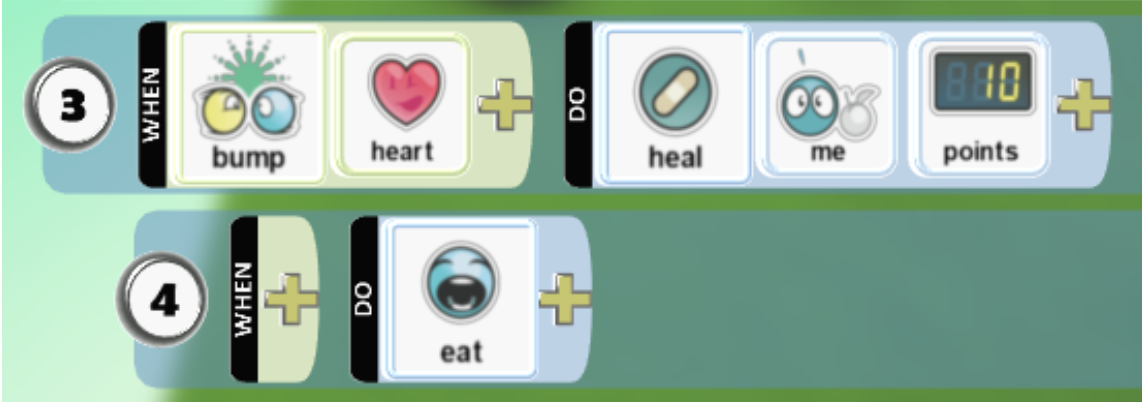
You may also want to give your player the chance to get back that health and heal themselves, here’s how. Choose an object to have healing powers and add it (or a few) to your game, we’re using a heart in this example. Bumping it restores some health and also eats it so it disappears and can’t be used again until the game re-starts. Note that row 4 is indented it happens at the same time as row 3 when the heart is bumped.
Plenary
In the final lesson of this unit students will fully evaluate the finished games, but at the end of the lesson discuss with the students what they have added and especially if they've had their own ideas for features and how they've gone about coding the solutions.