
AI Machine Learning
Micro:bit Mastery - Lesson 3
Objectives
- Understand and explain what Machine Learning is
- Train a machine learning model with data and test its accuracy
- Apply a machine learning model to make a smart fitness tracking device.
Lesson Resources
- Lesson Slides
- BBC micro:bits (minimum 1:2 students)
- micro USB cables to connect micro:bits to computers
- 1 computer per micro:bit
- micro:bit Next Gen accessories for turning your micro:bit into a wearable device (or some thick rubber bands)
Lesson 1 - Conditions, variable and random outputs
Lesson 2 - Dig into the data
Lesson 3 - AI Machine Learning
Lesson 4 - Radio coded messages
Lesson 5 - More secure messaging
Lesson 6 - A smart light switch
Before you start
Before you begin, please read these important notes:
- This unit of work was created and added to our scheme in autumn 2025.
- It has been designed to follow on from our unit of work: Getting Started with the BBC micro:bit, which has been updated and moved to the Year 4 section in our scheme of work.
- If your students are new to a BBC micro:bit, we would recommend beginning with the ‘Getting Started’ unit, instead of these lesson.
- If your class have covered that unit already, or are quite experienced with using a micro:bit, go ahead and dive in to this unit, and have fun!
Micro:bit classroom

We would recommend delivering your lessons using the micro:bit classroom feature on microbit.org. This is very simple to use and gives really useful classroom management options for your lesson, such as:
- being able to send code to your students,
- view and edit their code from your screen,
- freeze their screens when you need their attention
- download a report of the lesson, including images of their screens
- save the entire session and resume it at a later date
All without the hassle of having to create student accounts. No usernames and passwords are needed.
You can find out more and watch a introduction video at microbit.org/teach/teaching-tools
You can get started with a lesson at classroom.microbit.org
Students will work in pairs in this lesson, so you may want to consider and organise that before the lesson.
Introduction - what is machine learning?
Most students will have heard of AI, but not all AI is the same. Most AI systems rely on machine learning. Ask the students what they understand this to mean.
Machine learning is a form of artificial intelligence (AI) where computers can learn from data provided to them by people. Computers can use what they learn to make decisions.
Show this excellent video from code.org, which explains how machine learning works.
Following that, the students can have a go at training their own machine learning model with this activity at code.org. There is a short URL on the lesson slides to make it easier for the students to go straight to the activity on their device.
They should go to tinyurl.com/machinelearning31 and complete steps 2, 3 and 4
Machine learning is only as good and as reliable as the data that we feed into the machine. This second video explains how important this is, and the dangers of bias in AI systems.
Micro:bit machine learning
in our last project, we used data collection and analysis to turn our micro:bit into a pedometer.
Now we are going to make it even smarter and use machine learning to turn it into a smart fitness tracker that can time how long we do different activities. This is done with micro:bit Create AI.
Here's an intro to the project (0:00 to 1:14)
Ask the class to go to microbit.org/ai and open the AI activity timer project.

Scroll down to the Collect data samples section and click Open in micro:bit CreateAI


Measuring acceleration
Remember, the micro:bit can measure acceleration (movement) in 4 ways.
- acceleration on just the X axis
- acceleration on just the Y axis
- acceleration on just the Z axis
- overall acceleration in any direction (strength)

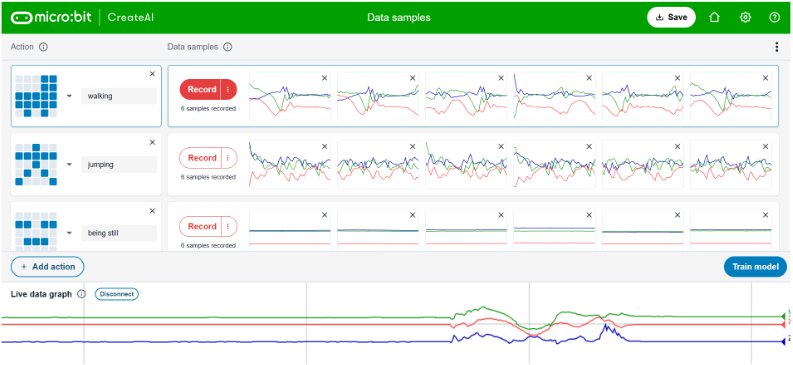
When you first open the project in micro:bit create AI you'll see this screen. It contains 18 samples of movement data from the accelerometer.
Each data sample is a line graph showing three coloured lines. These represent acceleration on the X, Y and Z axis.
3 activities are shown: walking, jumping and being still. There are 6 samples for each one.

We’ll add our own data to these sample later, but first, you need to connect your micro:bit to CreateAI.
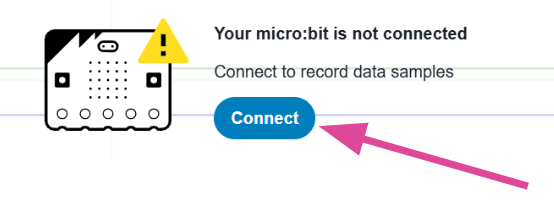
Connect your micro:bit
Guides for connecting your device will show on the screen when you click on the 'Connect' button. These steps are also displayed in the lesson slides (92-97) and a guide is also included in the section of the video on slide 91 (1:15 to 1:57). Two different methods are described for if your computer has Bluetooth or not.
Once connected, your micro:bit will provide live data from its accelerometer to micro:bit Create AI. You'll see the data represented as line graphs at the bottom of the screen. Ask the class to move their micro:bit around and see what happens. Can you get each coloured line to rise and fall?
Adding your own data
Now its time for the students to add their own data to the machine learning model. This is described in the section of the video on slide 99 (1:57 to 3:04). They'll need to attach the micro:bit to their ankle for it to track their body movements. You can use the rubber holders, velcro straps and battery packs that come with the micro:bit Next Gen class sets that many schools have. If you don't have these, you can simply tuck the micro:bit and battery pack into your sock.


This video show you how to put the parts together.
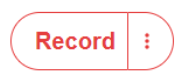
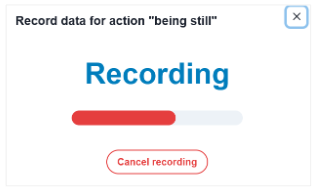
Now click the Record button on one of the movements.
Wait for the 3, 2, 1 countdown. When you see ‘Go’ perform the action immediately (you only have 1 second!)
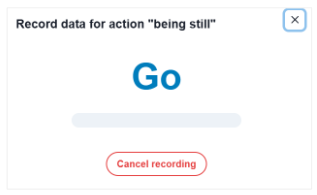
The data will be recorded automatically.
Training the machine learning model
We now have some data we can use to train the machine learning AI model. Show the section of the video (3:04 to 4:18) on slide 103. Click Train model and follow the steps shown.
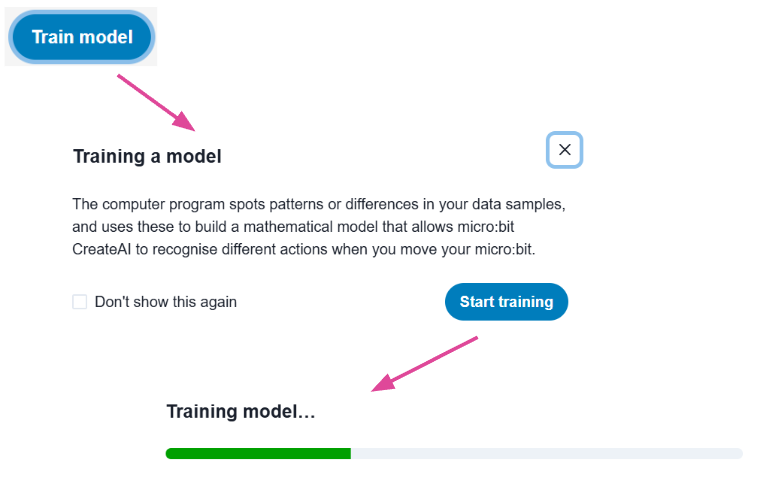
The AI model now looks at the live movement data it receives from the micro:bit's accelerometer and compares it to the samples we trained it on. It decides how closely the live data matches the trained data and then use that comparison to predict which action we are doing. You'll see it's prediction and how confident it is as a percentage.
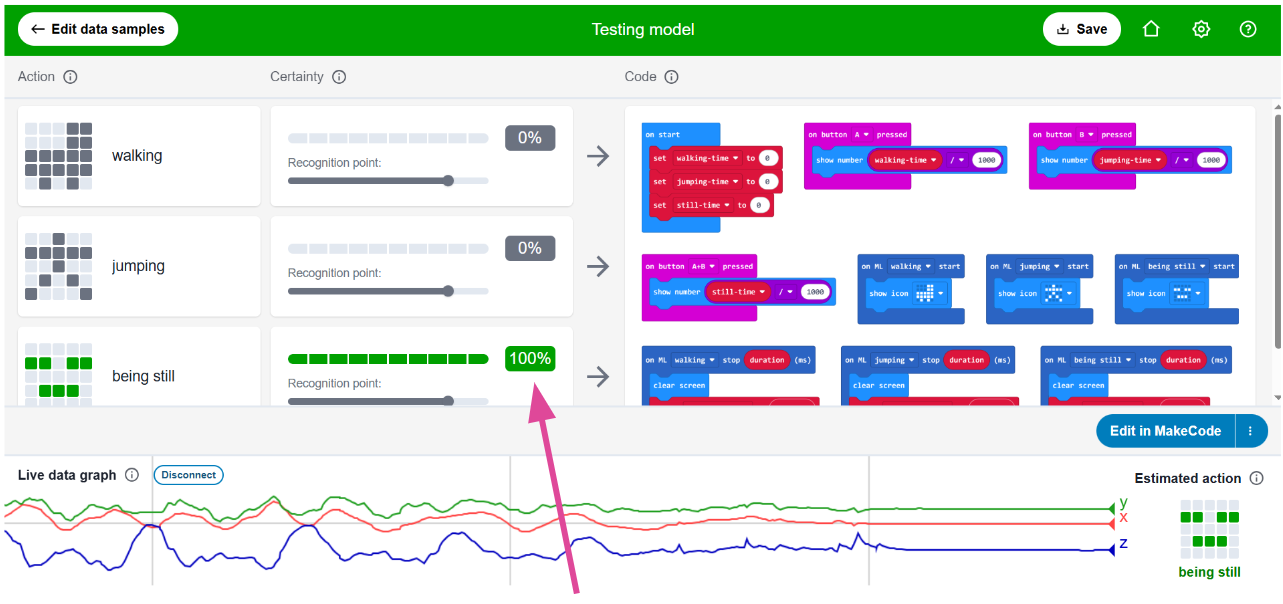
Its accuracy and reliability is based purely on the data we provide it with. The more samples it has to compare, the more reliable it will be.
Ask the students to click Edit data samples to return to the previous screen. From here they should add more data for each action. The fastest way to do this is to click the three dots next to the record button on each action and then record for 10 seconds. It is important that the students then perform the action for the whole 10 seconds it records for.

If the data that has been collected has any errors in it, the machine learning model won’t be as accurate. So once the students have added lots more data, ask them to go back and check that it is clean data. The video section on slide 108 explains this (5:09 to 5:44).
They should look for any data samples that look out of place and different to the rest of that data set. Delete them with the X on each data sample graph.

Adding the final code
Finally, the students need some code for the micro:bit to let it use the machine learning model and to turn the micro:bit into a smart activity timer. This is provided for them and explained in the section of the video on slide 110 (5:44 to the end). The students should:
- Use the code provided to turn your micro:bit into a smart activity timer.
- Test it out by attaching your micro:bit to your body and get moving.
- Consider if you need to add further data to the machine learning model, to improve its accuracy.
Some students might be able to improve the smart activity tracker by adding their own, new fitness action.
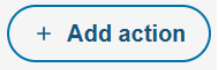
Step 1 - Add an action
Step 2 - Give it an icon

Step 3 - Record data samples for the action
Step 4 - Train the model and test out its accuracy

Step 5 - Add more data samples is needed.
Step 6 - Check for clean data.

Step 7 - Add to the code so your activity is timed (duplicate and edit the existing code to help you)
To finish
The students have learned about machine learning. What it is and how it can be used to help many people. But it's vital that we all help to ensure it is used well, and used for good. Watch this final video from code.org, which considers the social impacts of AI.
Ask the students to talk to a partner about their success with the projects today. Consider these questions:
- What is machine learning?
- How did you use it in today’s project?
- What are important factors to consider when training a machine learning model with data?
- What danger does human bias have to machine learning?
- Did your fitness tracker produce accurate results today?
Finish by revisiting the lesson objectives and asking students to consider their success and understanding. Invite any questions or requests for support if needed.