
More secure messaging
Micro:bit Mastery - Lesson 5
Objectives
- Understand, explain and use the radio function on a micro:bit to wirelessly transfer data.
- Understand and explain encryption of data.
- To send an encrypted message and decrypt a message you receive.
Lesson Resources
- Lesson Slides
- Message planning worksheet (1 per student)
- Create your own encryption worksheet (1 per student)
- BBC micro:bits (minimum 1:2 students)
- micro USB cables to connect micro:bits to computers
- 1 computer per micro:bit
Lesson 1 - Conditions, variable and random outputs
Lesson 2 - Dig into the data
Lesson 3 - AI Machine Learning
Lesson 4 - Radio coded messages
Lesson 5 - More secure messaging
Lesson 6 - A smart light switch
Before you start
Before you begin, please read these important notes:
- This unit of work was created and added to our scheme in autumn 2025.
- It has been designed to follow on from our unit of work: Getting Started with the BBC micro:bit, which has been updated and moved to the Year 4 section in our scheme of work.
- If your students are new to a BBC micro:bit, we would recommend beginning with the ‘Getting Started’ unit, instead of these lesson.
- If your class have covered that unit already, or are quite experienced with using a micro:bit, go ahead and dive in to this unit, and have fun!
Micro:bit classroom

We would recommend delivering your lessons using the micro:bit classroom feature on microbit.org. This is very simple to use and gives really useful classroom management options for your lesson, such as:
- being able to send code to your students,
- view and edit their code from your screen,
- freeze their screens when you need their attention
- download a report of the lesson, including images of their screens
- save the entire session and resume it at a later date
All without the hassle of having to create student accounts. No usernames and passwords are needed.
You can find out more and watch a introduction video at microbit.org/teach/teaching-tools
You can get started with a lesson at classroom.microbit.org
Students will work in pairs in this lesson, so you may want to consider and organise that before the lesson.
Introduction
In our last lesson we used the radio function to send an images and text message, but What were the security issues with our text messages? Anyone that was using the same radio group (channel) would also be able to see the message.
We used Morse code as a way of masking our messages, which was better than sending the message completely uncoded, but still not actually that secure. Anyone with knowledge of Morse code would still be able to decode our messages.
Morse code is an example of encoding our messages, but for a higher level of security we should encrypt our messages with a more secure system.
Show the class this video from code.org about encryption.
A more secure system
We need a more secure system where the keys and message kept are secret. Ask the class to to discuss this grid with a partner.
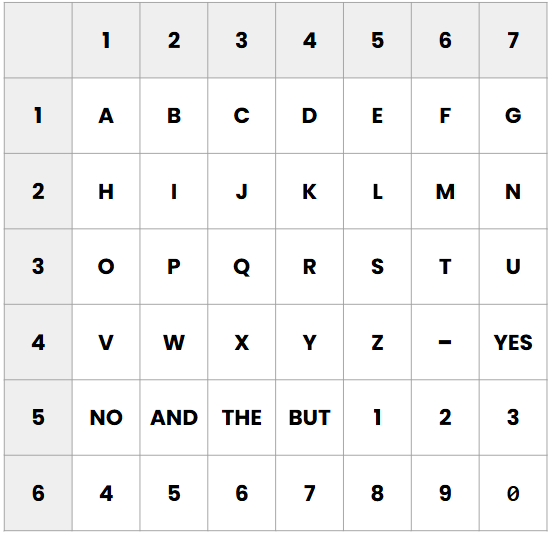
How could it be used to send coded messages with our micro:bits?
We can use a coordinate system to reference items on the key grid. Two numbers are all we need. Remind the students that the X (horizontal) number always comes before the Y (vertical) number.
E.g.
5,3 = S
1,3 = O
3,5 = The
If we know that each pair of numbers represents a square, we can send whole words as a sequence of numbers.
What does this say? 31134151
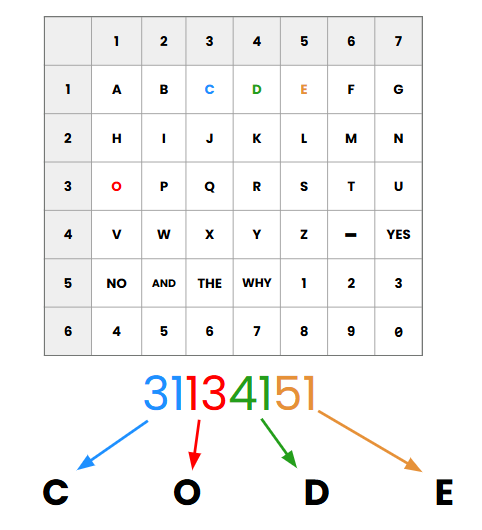
We’ve stripped away the commas and written it as one long chain of digits as this will be easier to send as a message. But its still easy to decode as we are always looking at pairs of numbers.
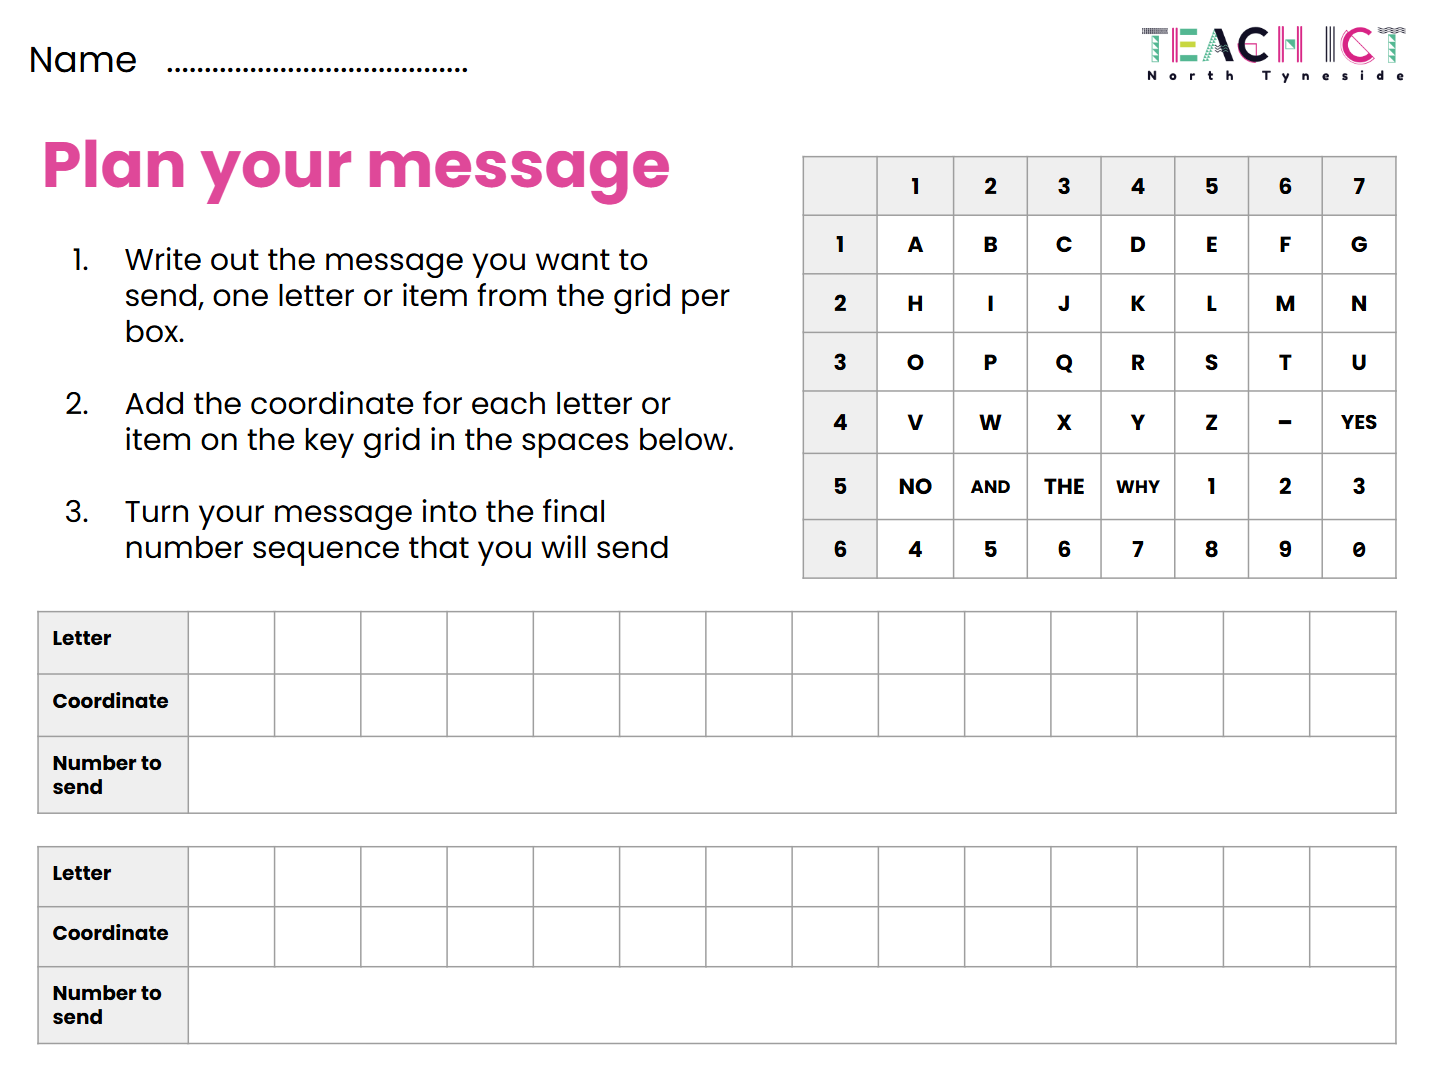
Here's how to turn your own message into a code number that could be sent in a message.
- Write out the message you want to send. Start with a short word or phrase.
- Turn your message into a number sequence by using the coordinate grid.

We've turned this into worksheet for the class to use. The first side is where you plan the message you want to SEND.
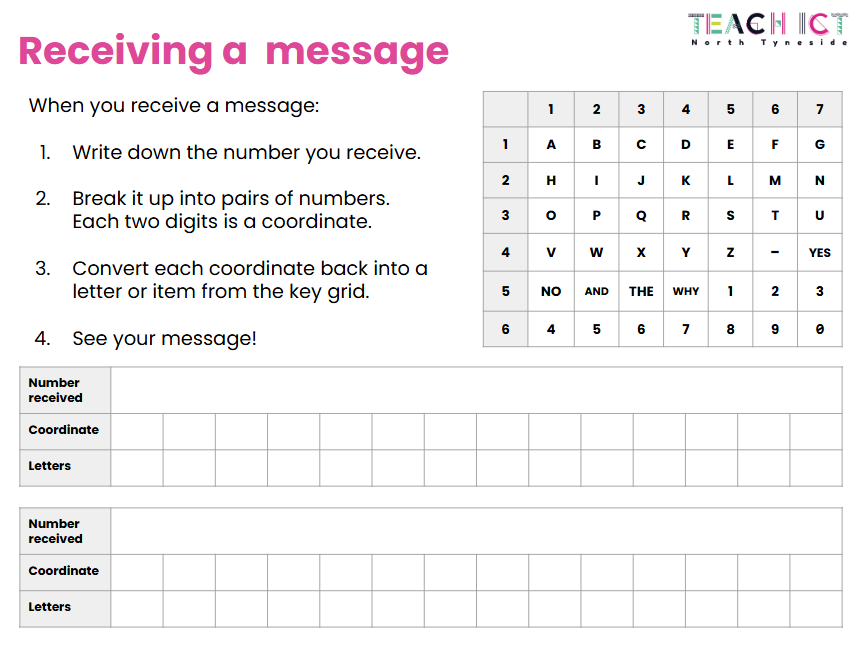
The back of the sheet is for when you RECEIVE a message.
The 'sending' code
Let's create the code to make it work. Start by setting your radio group. Assign a unique number to each pair in the class. Remember this:
- Can be anything from 0-255
- Must match your partner
- Should be unique in your classroom
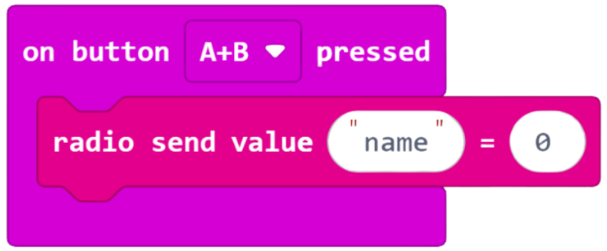
Create a variable called ‘message’. Set your message to the code number for your message that you are sending (no spaces or punctuation).

Ask the class - Can you add an easy way for the sender to check the number message, before it's sent?
This input with show string and the ‘message’ variable will show the coded message number every time we press the A button.

Now it’s time to send the message.
- We need another, different input to control when we send out message.
- The radio send value block lets us send two things as a radio message - a letter string and a number.
After encoding our message, the word string we add will be our second layer of security. It will act like a password. The receiver will need this to be able to see the message. You can type any password you like here
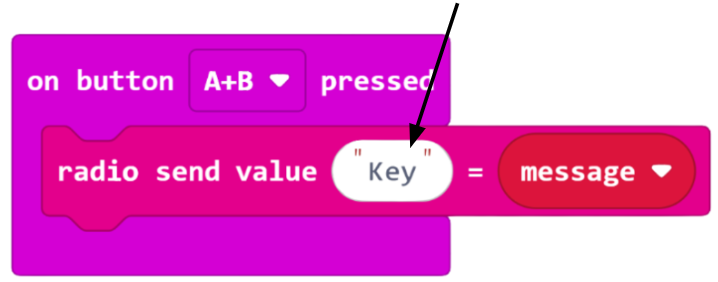
The number section is replaced by our ‘message’ variable. This is so the number you typed in at the start is sent by radio to your partner’s micro:bit.

The 'receiving' code
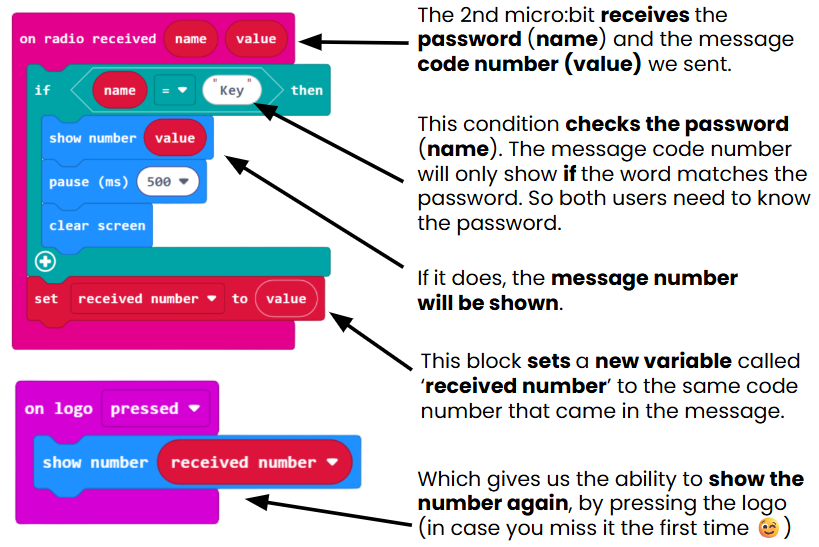
Both micro:bits need all of this code, so they can be both sender and receiver. Each time you want to send a new message:
- Add a new message number.
- Check your radio group matches your partner.
- Check you have the same password as your partner.
- Download the updated code to the sender microbit.
More secure?
Ask the class - How have we added layers of security to our message today?
- A different way of encoding our message
- Not a universal and publicly known code (like Morse code)
- A password in the code that the sender and receiver need to share.
These are all improvements, but let’s face it. Our code is still based on the standard English alphabet, so someone could still potentially spot the pattern and work it out. What could we do to this method to make it even more secure?

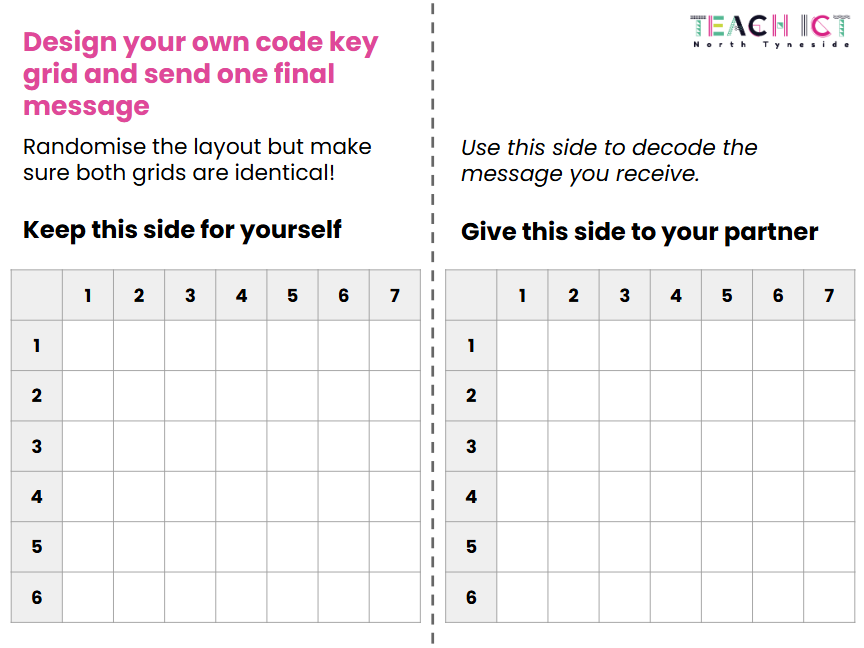
Randomising the layout of the key would make it much, harder for someone to crack our messages. As long as the sender and receiver have the same key grid it won’t be any harder to use but far more secure.
This worksheet is designed so that students can make their own version of the code grid. They should put exactly the same layout on both sides of the dotted line, and when complete, give the other side to their partner, so they share the same encryption and decryption key.
So how secure have we made things now? Well, our grid has 42 squares, so each square has 42 possibilities of the letter, number or shortcut word that could be in there. That means a person would need to try 1764 possibilities (42 x 42) to decode every square of our grid. So, it is more secure from humans as this would take a long time to manually check.
But a computer would have no trouble trying all these options very quickly, so, as mentioned in the video from code.org earlier, it's why such long encryption keys are needed in real digital systems. Remember, ‘to hard to crack’ just means it would take too long to try all the possible options, even with a super computer.
To finish
Ask the students to talk to a partner about their success with the projects today. Consider these questions:
- What is encryption?
- Why is it important?
- Can you think of a real digital service that would use encryption?
- Where did you use the following today:
- Inputs
- Outputs
- Conditions
- Variables
Finish by revisiting the lesson objectives and asking students to consider their success and understanding. Invite any questions or requests for support if needed.