
Refined photo editing
Digital Imagery: Patterns in Nature - Lesson 3
Objectives
- Use a lasso tool to select specific areas of an image.
- Use effects in photo-manipulation software to edit, change or enhance an image.
- Independently download and save images or video onto a computer.
- Independently upload images or video for use in editing software.
Lesson Resources
- Lesson Slides
- Pixlr E online editor
Lesson 1 - Repeating patterns
Lesson 2 - Symmetrical Patterns
Lesson 3 - Refined photo editing
Lessons 4 & 5 - Creating patterns from photos
Lesson 6 - Presenting their work
Introduction
So far we have used photos of nature to inspire our own drawings using the Purple Mash tools. In this lesson we are going to begin looking at how photos can be edited to create interesting effects and a different style of art.
The children may have heard of Photoshop which is a piece of software made by Adobe. It’s the market leader for photo editing, and is so synonymous with it that, a bit like Google (‘to Google’) with searching the web, it has now become a commonly used verb to describe editing a picture (‘to Photoshop’), even when the tool itself is not being used.
Lots of online tools now let you do similar things to Photoshop and are often free to use for the basic features, which is fine for what we need in these lessons. Services like Sumopaint (used in lesson 2) and Pixlr.com offer great tools that are relatively easy to use. In the following lessons we'll be using Pixlr.
Choose the Pixlr Editor tool from the homepage.

Explain that we are going to be taking one single image today and editing parts of it.
Choosing a good image is important for this activity. It needs to be a good quality image (not a small thumbnail) and close ups of the subject work best.
Sticking to the nature theme, it could be a flower, plant or animals. Creatures with a pattern on their body usually work well. If you don’t already have images saved from previous weeks, you can give the students time to find and save an appropriate image.
Choose open image and browse to find your saved image.
When it loads, if needed, use the zoom tool in the Navigate box to get a good fit on your screen. Zooming in closer can also make it easier to do fiddly detailed selections.

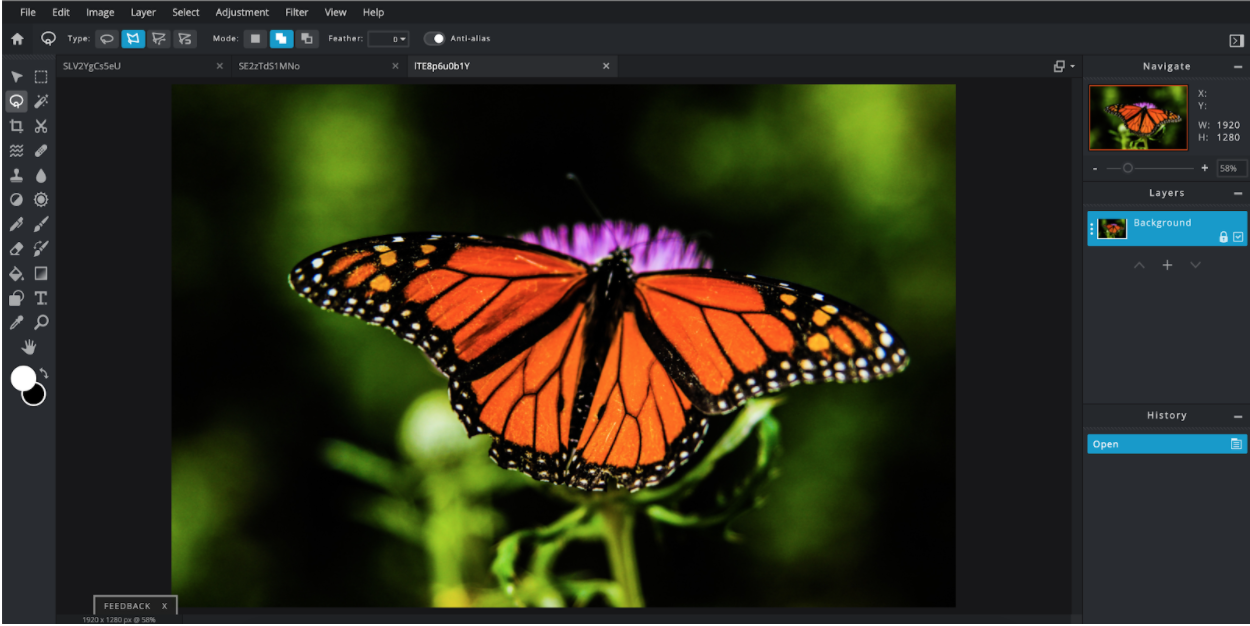
The key tool for this lesson is the Lasso tool. Explain that this tool lets us select part of an image and then do things to the section that we have selected. It’s a bit like word processing, where you highlight text and then apply effects to it, such as fonts, colours, italics etc.
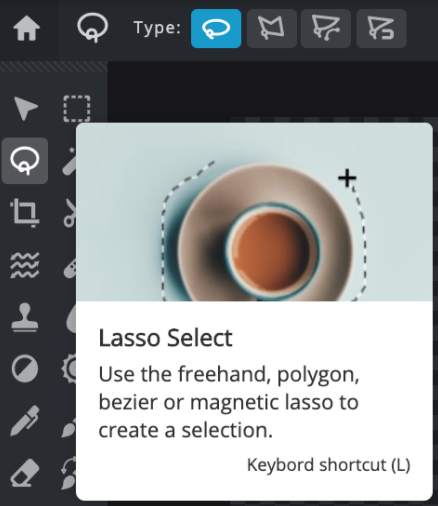
Select the lasso tool, and then choose the Polygon option
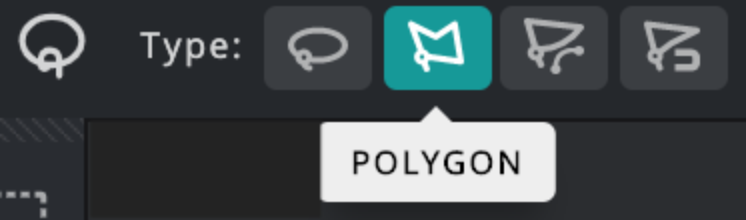
Select a small, colourful part of the image by carefully clicking around the section you want until you get right around. (it will turn into a dotted line). Avoid black or white areas of the image as they don’t give us any colour to alter.
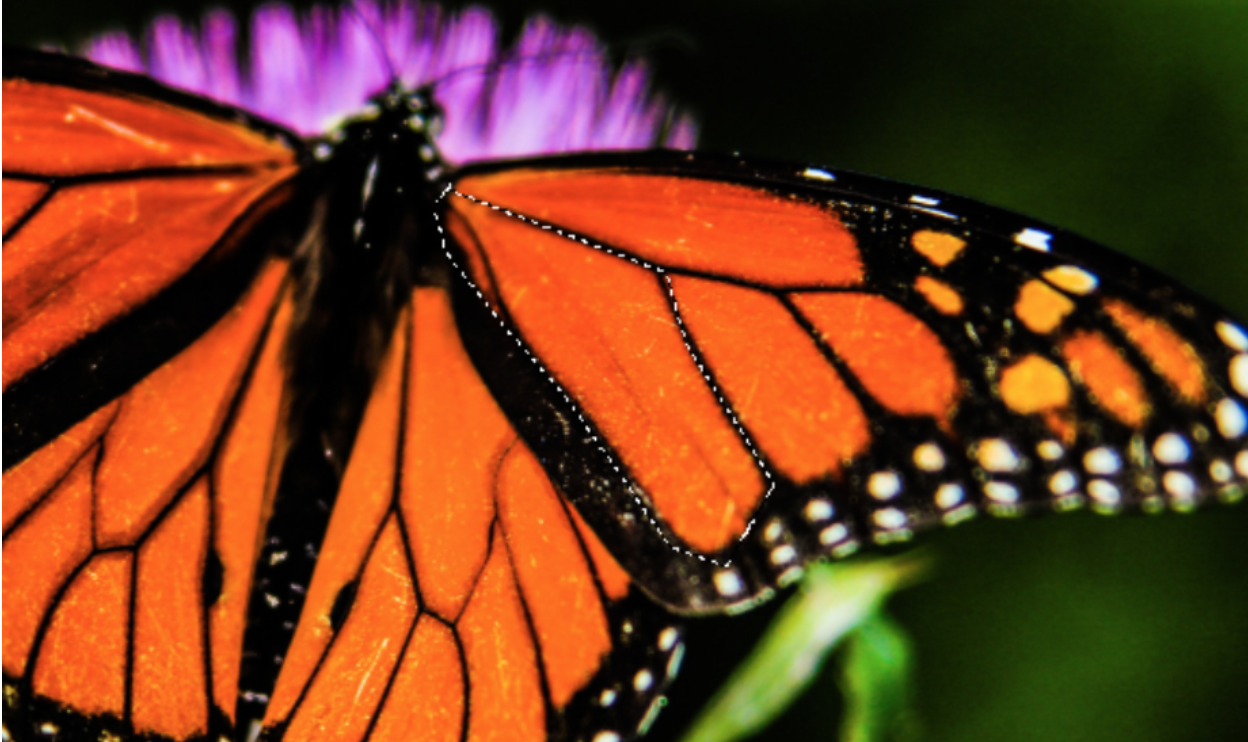
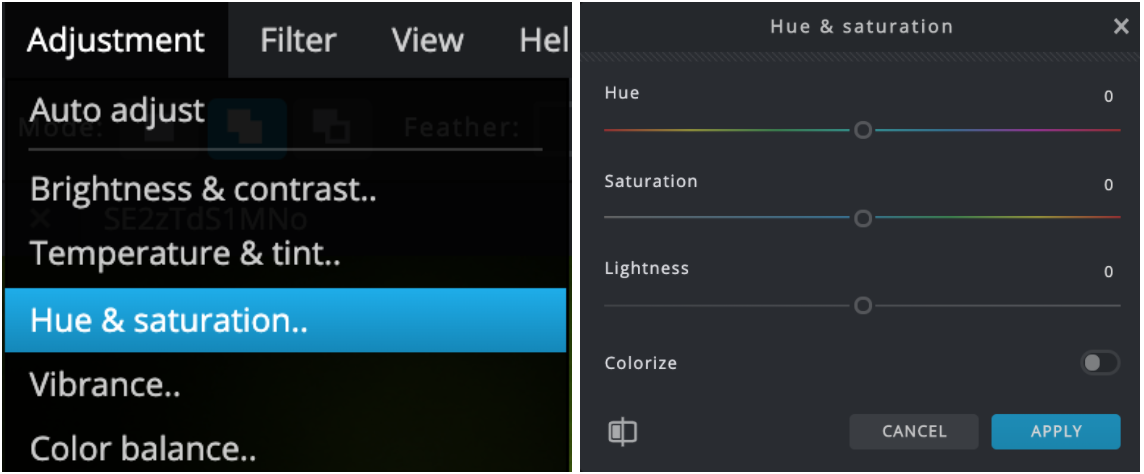
Next go to Adjustments > Hue and Saturation (Ctrl+U). Which will provide you with sliders that can be moved to change the colour of the selected area. Hue is the colour, saturation is how vivid the colour chosen is. (Tip - You can drag the box to the side if it's in the way - drag it from its title).
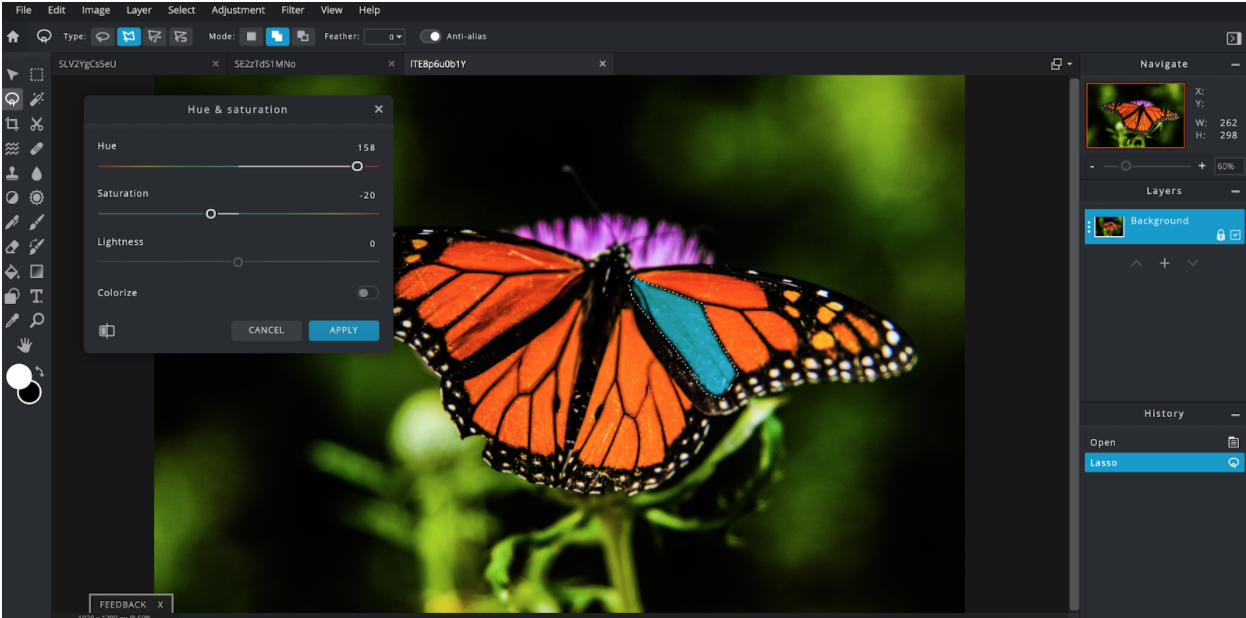
When the first section is complete, go to the Select menu and choose Deselect, to ensure no parts of the image have a dotted selection area around them. Go back to the lasso tool and select the next area you want to edit, then repeat the process above.
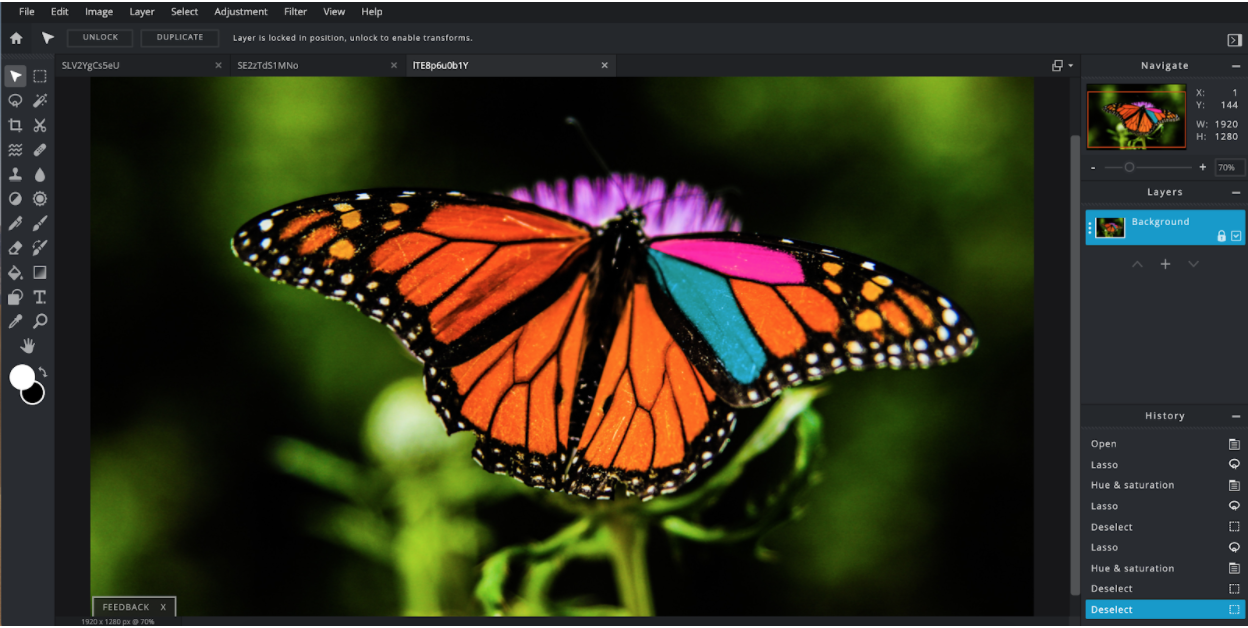
Encourage them to take their time with this, the best work is created when they are really careful with the lasso tool and stick very carefully to the edges of the area they are selecting, trying to get nice smooth curves (where appropriate) with lots of little clicks of the lasso tool.
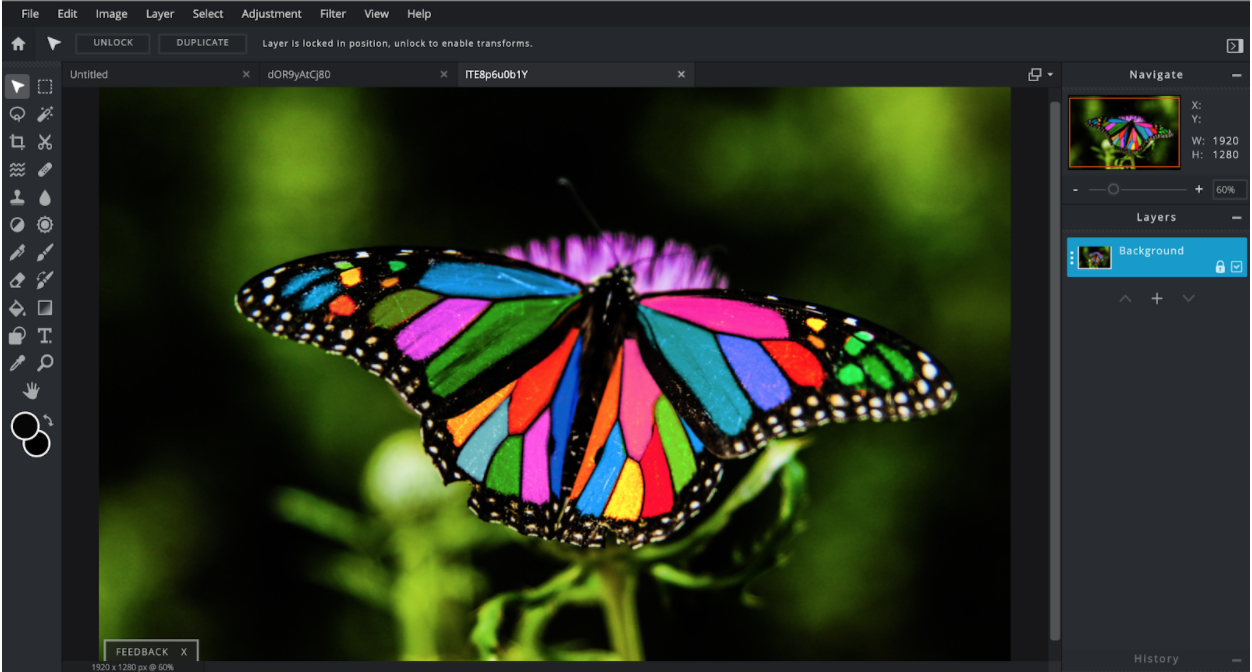
Don’t forget to make use of the zoom tool. Zooming in close often makes the selection part much easier.

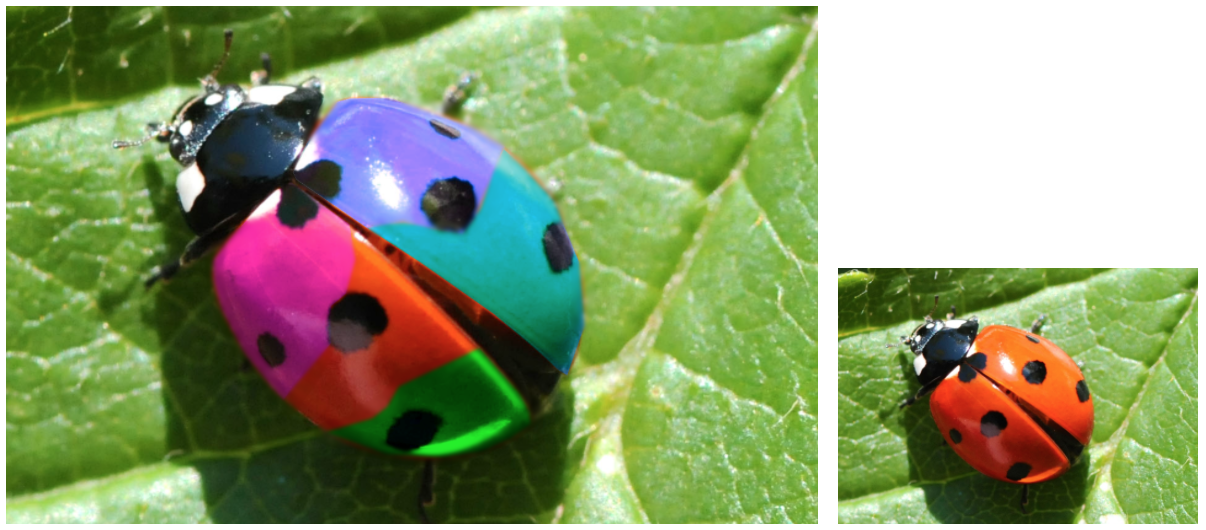
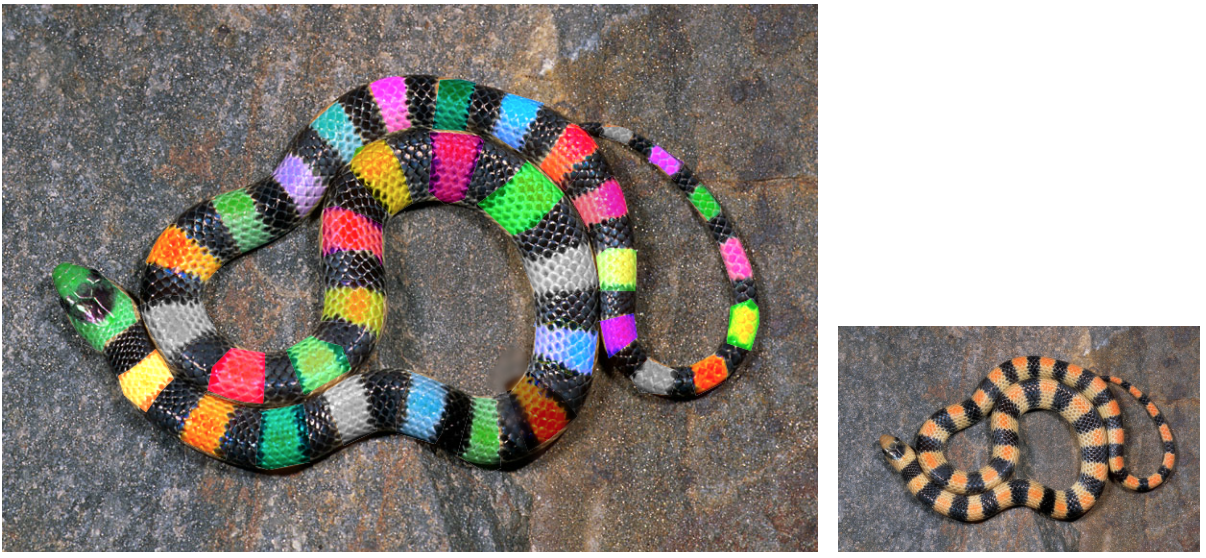
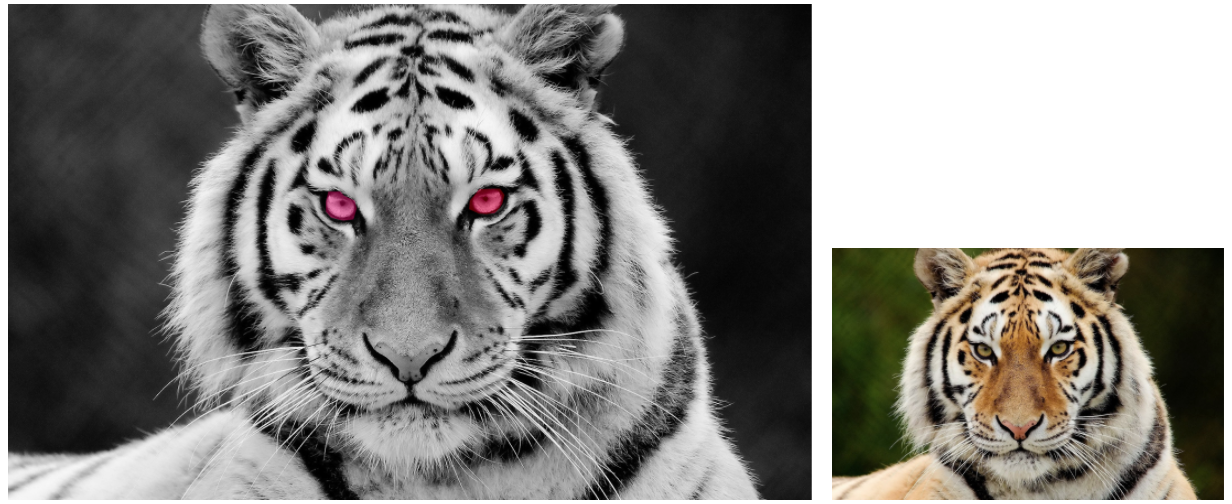
Here are some other examples created using this technique (alongside the original image). All are in the teacher’s presentation as well if you want to show them to your students.

Notice with the tiger images that you don’t always have to do a lot to an image to make it look effective, and sometimes taking colour out is as good as adding it.
As with all their other work, get the students to save as they go (as PNG images) into the folder they created in lesson 1. Click on File > Save.
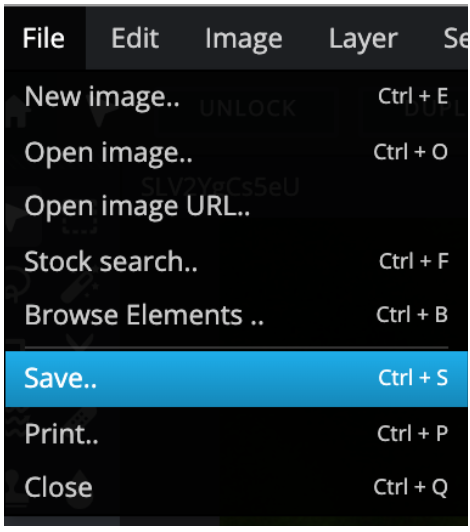
Choose PNG and give the file a new appropriate name before clicking Save as. This will then give you a browser window so you can save the image to a chosen place on your computer.
Plenary
Give the children time at the end to load up their favourite piece from the lesson and take a look at each other's work, giving appropriate feedback afterwards.
- Who has been really careful with the lasso tool?
- Who has had an original idea?
- Who has made especially good use of colour? Why?