
Conditions, variable and random outputs
Micro:bit Mastery - Lesson 1
Objectives
- Understand what conditional statements (selection) are, and why and when to use them in a program
- Understand what variables are and why and when to use them in a program.
- Learn how to create random outputs from a range of possibilities.
Lesson Resources
- Lesson Slides
- BBC micro:bits (minimum 1:2 students)
- micro USB cables to connect micro:bits to computers
- 1 computer per micro:bit
Lesson 1 - Conditions, variable and random outputs
Lesson 2 - Dig into the data
Lesson 3 - AI Machine Learning
Lesson 4 - Radio coded messages
Lesson 5 - More secure messaging
Lesson 6 - A smart light switch
Before you start
Before you begin, please read these important notes:
- This unit of work was created and added to our scheme in autumn 2025.
- It has been designed to follow on from our unit of work: Getting Started with the BBC micro:bit, which has been updated and moved to the Year 4 section in our scheme of work.
- If your students are new to a BBC micro:bit, we would recommend beginning with the ‘Getting Started’ unit, instead of these lesson.
- If your class have covered that unit already, or are quite experienced with using a micro:bit, go ahead and dive in to this unit, and have fun!
Micro:bit classroom

We would recommend delivering your lessons using the micro:bit classroom feature on microbit.org. This is very simple to use and gives really useful classroom management options for your lesson, such as:
- being able to send code to your students,
- view and edit their code from your screen,
- freeze their screens when you need their attention
- download a report of the lesson, including images of their screens
- save the entire session and resume it at a later date
All without the hassle of having to create student accounts. No usernames and passwords are needed.
You can find out more and watch a introduction video at microbit.org/teach/teaching-tools
You can get started with a lesson at classroom.microbit.org
Introduction
As students should already have some experience of using a micro:bit, begin by delving into what they can recall about the device itself, and projects they have completed.
Ask them to take a look at it with a partner, and discuss:
- What is it?
- What can it do?
- What features does it have?
- What projects have you completed?
This video gives a lovely intro to the device and its key features
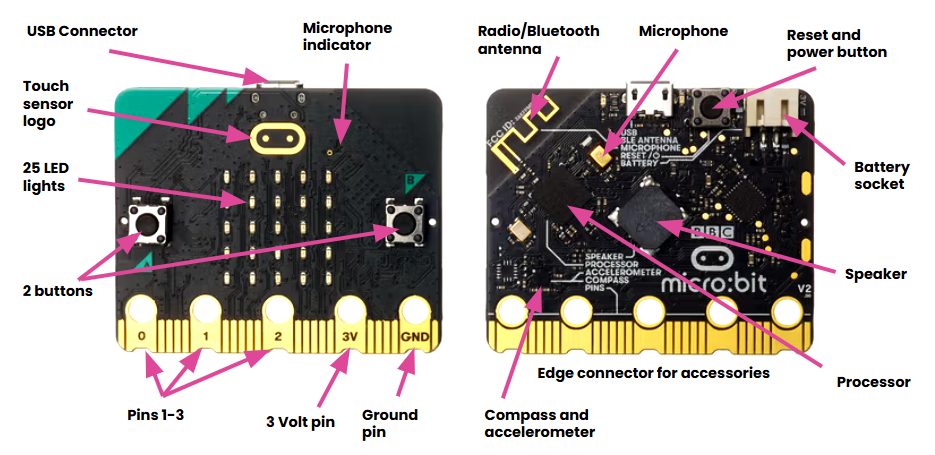
And this labelled diagram is available in the slides to talk through afterwards.
Remind them of the key messages for using their micro:bit safely:
- Handle your micro:bit with care.
- Keep your hands dry
- Keep liquids away from the micro:bit and computer
- Avoid generating static electricity - you can discharge any static from your body by touching a metal object like a chair or table leg.
- Check your micro:bit for damage
- Tell your teacher if the micro:bit gets hot as they are designed to run cold.
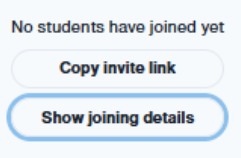
Then direct them to join your micro:bit classroom by displaying your joining information on the screen or by sharing this with them in another way, if needed. You can use the button below or click Invite on the micro:bit classroom teacher screen.
Once they have joined the class, they need to connect their micro:bit to their device browser by clicking the 3 dots next to the download button in the MakeCode editor, then select Connect Device and following the on-screen instructions.

Starter challenges
To get started, ask them to independently have a go at these four challenges and demonstrate to a partner how they did it. They should all be things they have done before if they have completed our 'Getting Started with a BBC micro:bit' unit:
- Repeatedly show a happy face and then a sad face on the LEDs.
- Give a ‘3, 2, 1, Go!’ countdown on the LEDs.
- Make three different images appear by pressing different buttons on the micro:bit.
- Make three more images appear using other inputs on the micro:bit.
Ask for feedback from the class for each challenge and how they completed it. Example solutions are provided in the lesson slides.
Conditions / Selection
Another concept they should have some familiarity with, is conditions. They should have used these before with a micro:bit or other coding lessons using things like Scratch.
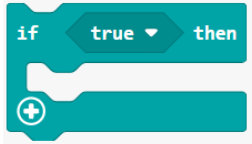
The ‘If > Then’ block is an example of a boolean condition. This means that is has 2 possible outcomes. The condition is TRUE or the condition is FALSE. This is also referred to as selection in the National Curriculum - selecting what happens and when it happens.
Students will be familiar with the concept of conditionals in their daily lives!
Ask - Have you ever heard your parents or carers say...?
- “If you clean your room, you can go out with your friends.”
- “If your homework is done, you can play video games.”
- “If you do your chores all week, you get your pocket money, else you are grounded.”
They are also the backbone of what makes all games and apps work. For example:
- “If Mario lands on the spikes, you lose a life.”
- “If your lives reach 0 the game ends.”
- “If a user clicks the printer button, the print options open in a window.”
- “If a user clicks the X the window will close.”
If you want some other code to run when a condition is FALSE, you put it in an additional block area called else.
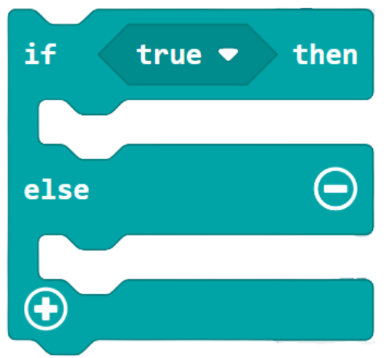
IF (condition is met), THEN (action performed), ELSE (different action performed).
Example:
IF it is snowing, THEN wear wellies, ELSE wear trainers.
We can demonstrate how and when conditions are used by playing a little game. If you have space you can do this with the whole class, otherwise select a few students to demonstrate.
Tell the students that they will be acting out some conditionals as though they are a computer program. Each student will perform a action if the condition is met. Then have the students line up at one side of the room.
Reveal and read out each statement from the lesson slides, one at a time. After each statement, give those taking part (or the rest of the class) time to consider what the condition is and how they should react:
- If you have eaten fruit today, then take 1 step forward.
- If you have the letter ‘e’ in your first name, then take 3 steps forward.
- If you have a brother, then take 1 step forward, else take 2 steps forward.
- If you’ve had your birthday this year then take 2 steps forward, else take 2 steps backwards.
- If you play an instrument take 5 steps forward, else take 1 steps backward.
Who has moved the furthest?
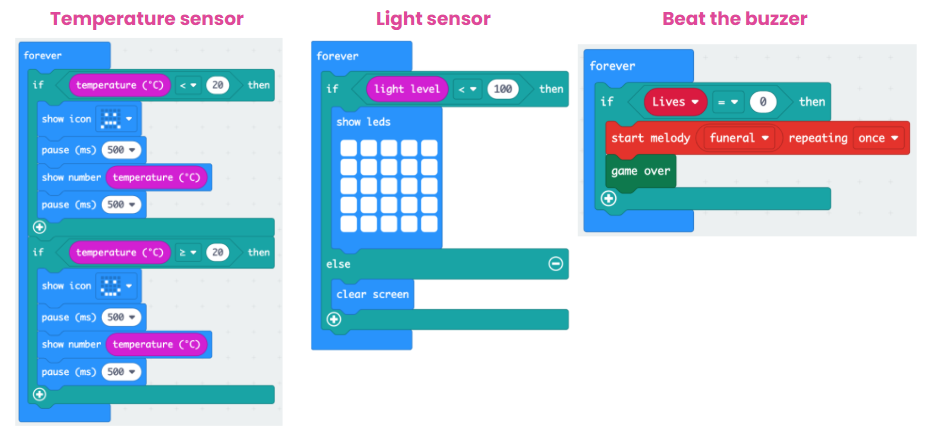
Here are some examples of where students may have used conditions in our other micro:bit projects:
The Magic 8 Ball
In this lesson we are going to focus on using conditions again, but also adding a random element into what happens. We're going to make our very own Magic 8 Ball toy.
Ask the class - Who has come across the Magic 8 ball toy before?
It’s a ‘fortune telling’ toy that looks like an 8 ball from the game of Pool. When you ask a question and shake it, it will give you a response to the chances of that thing happening. For example, questions such as “Will I be famous one day?” might get responses such as “Definitely!”, “The chances are slim” or “It’s possible”.
Take a look at this short video which explains a bit more.
We’re going to have a go at programming our micro:bit to behave just like the Magic 8 Ball toy and give us varying responses when we shake it and ask a question.
Programming your own 'magic 9-ball'
Ask the students - Which of the inputs from our previous lessons might be really useful to start things off?
The on shake option will work perfectly for this as that is exactly how the original toy works.
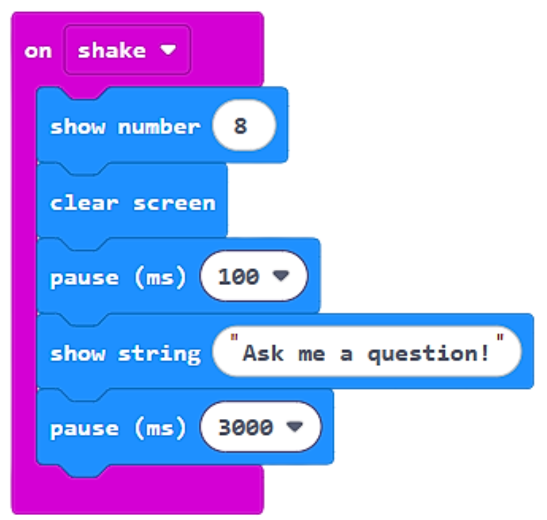
Here’s what we want to happen:
- When the micro:bit is shaken the LEDs show a number 8
- The screen is cleared
- Short pause
- It tells the user to ask a question
- It waits for three seconds (to give the user time to ask the question verbally)
Ask the class to have a go at coding this sequence.
Here's how the code should look so far.
Variables
Next, we need to give the toy options for how it responds. For this we need to use a variable. When using variable is any code:
- We create and name a variable.
- We set its value.
- We can change the value in our code if needed.
- We always see its name in our code but apply its value to what actually happens.
Programmers create variables to store data in code that might change. Each variable is a place in the computer’s memory. Think of it like a notepad that can hold some data for us to use in our code at any time. Examples of this are a players score, lives or how many objects they have collected in a game.
In the MakeCode editor, go to the Variable section and click Make a Variable. Give it the name of 'random number'.
Add the Set 'random number' variable block to the code and add a random number picker block from the Math section. Set the range from 0 to 2.
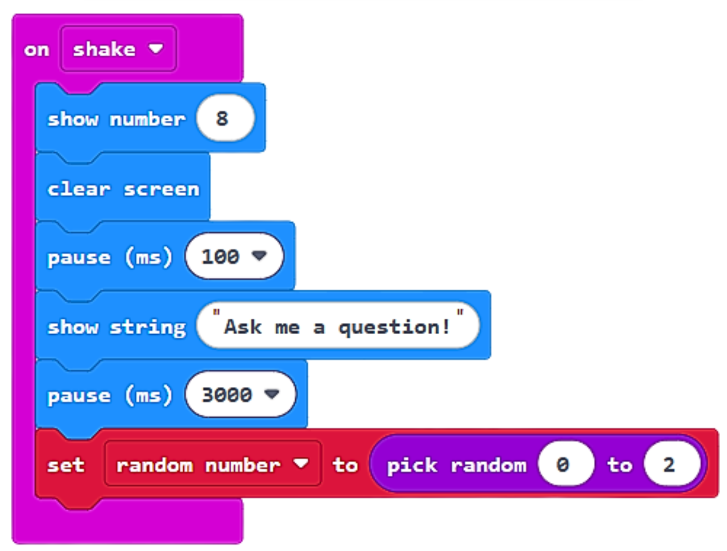
For now, we’re going to have three possible answers to the question the user asks, e.g. ‘Will I be famous one day?’
- Yes, No and Maybe
The range in our number picker goes from 0 to 2 because computers start counting at 0.
So the possible outcomes are 0, 1 or 2.
Next we'll add an 'if > then' condition block to set what happens next, based on the random number that is chosen for the variable.
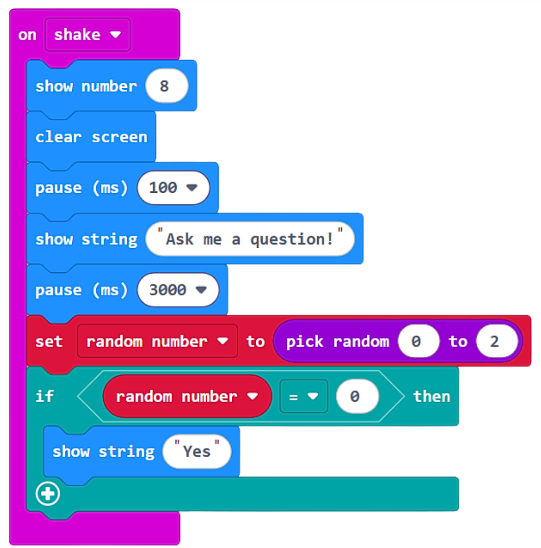
If the random number variable is set to 0, the show string (output) “Yes” is shown on the micro:bit.
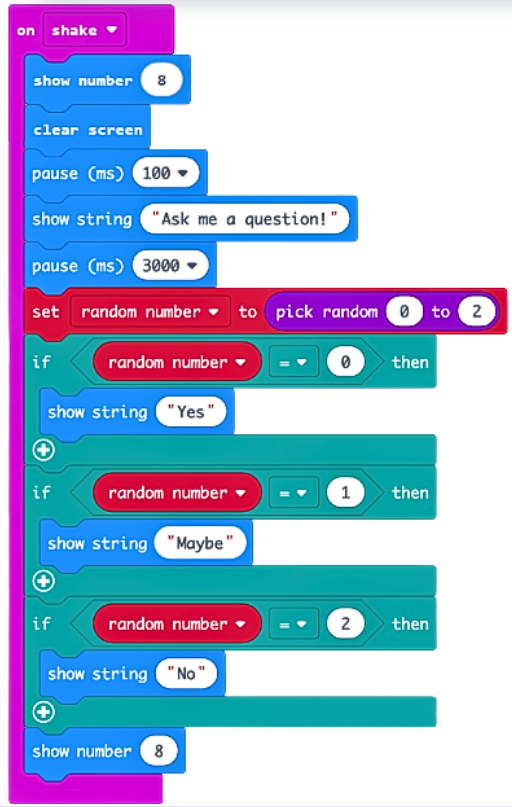
Ask the class to - Add the rest of the code so that ‘No’ and ‘Maybe’ answers are also possible.
Here's the solution:
Now let’s make things more interesting. Ask students to add some more possible answers and adjust your code to allow them to be chosen.
For example, they could add responses such as:
- Definitely!
- Never in a million years
- Nothing has ever been so certain!
Plus some of their own too.
To finish
Ask the students to talk to a partner about their success with the projects today. Consider these questions:
- Did your programs begin in response to an input?
- What are conditional statements in a program?
- Why are they useful?
- How have you used variables today?
- Can you think of any ways to improve your programs today?
Finish by revisiting the lesson objectives and asking students to consider their success and understanding. Invite any questions or requests for support if needed.