
Pause and think – now create!
Keep safe and create - Lesson 2
Objectives
- Understand the importance of being safe, responsible and respectful online.
- Import images into multimedia resources to share ideas to engage others.
- Add and format text appropriately for multimedia resources.
Lesson Resources
Lesson 1 - Pause and Think
Lesson 2 - Pause and think – now create!
Lesson 3 - How technology makes you feel
Lesson 4 - How technology makes you feel – now create!
Lesson 5 - Internet traffic lights
Lesson 6 - Internet traffic lights – now create!
Recap the characters mentioned in the video and how the body parts represent different things we can all do to stay safe and healthy online. For each one, ask the class if they can provide an example of a situation that applies.
- Arms: Use your arms when you're online to balance your time.
- Guts: Listen to your gut to stay safe online.
- Feet: Use your feet carefully when leaving tracks online.
- Legs: Use your legs to stand up to bullies online.
- Heart: Use your heart to be kind and respectful online.
- Head: Use your head to ask questions about what you see online.
Making matching pairs
In this unit, for each lesson we cover about online safety and digital citizenship, we're going to be following it up with an activity where the students can apply their knowledge of the previous lesson and also practise their digital making skills, to create multimedia resources that could be used by other children to learn the same online safety lessons.
In this lesson we'll look at how to make a digital version of the classic memory game - matching pairs.
Log in to Purple Mash and go to Tools > 2Do it yourself, in the Quiz and Game Creation section.

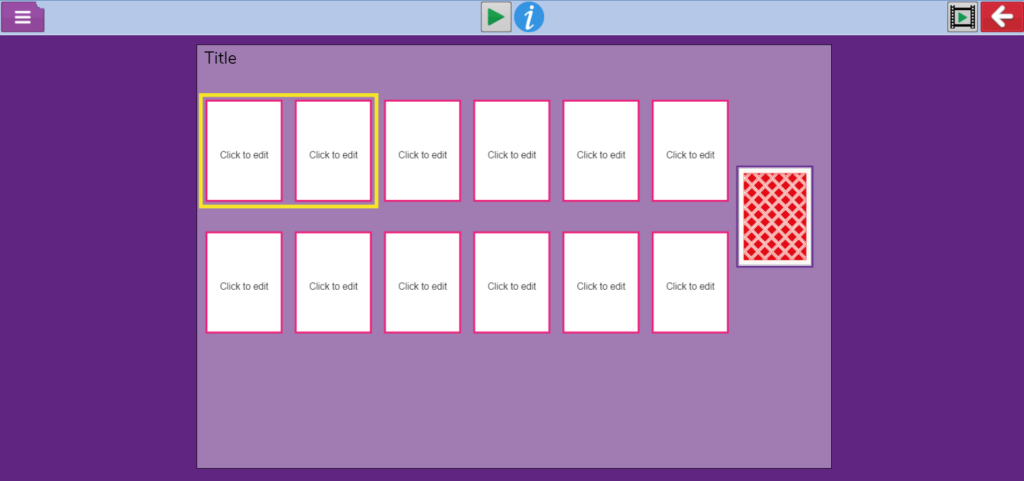
Then open the Pairs activity.

Then choose the 12 card version.

To help people remember the messages in the Pause and Think video. We are going to create pairs cards, one that has the linked body part or character, and the other with a written message that links to it.
Click on the first card in the first highlighted pair.
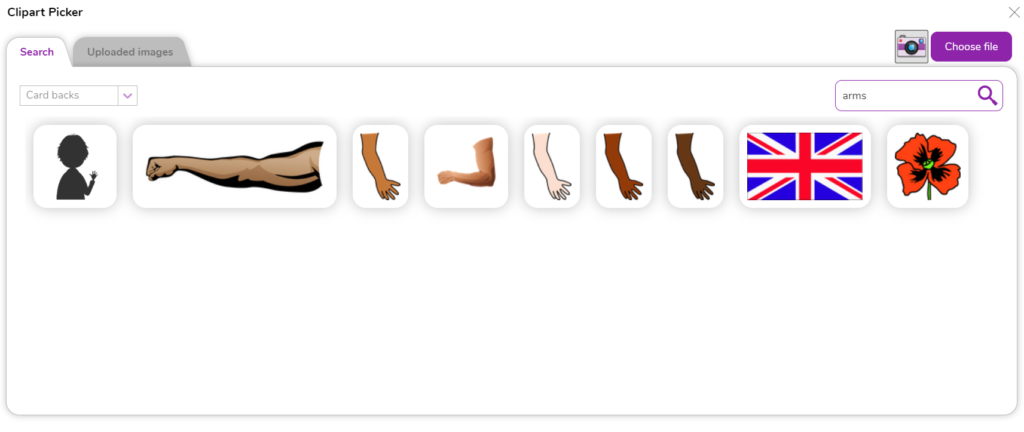
As with most of the apps in Purple Mash, there are a variety of ways to add images to your work, from the simple and more advanced drawing tools, to adding photos from your camera, uploading them, or using the clip art library that is provided. Suggest to the class that, where possible, we're going to use the clip art for speed and neatness, but where there are no suitable pictures, you can use the other options too.

When you select clip art, you can either browse the categories via the drop down menu, or there is a very useful search function. Demonstrate using this to the class to look for the first of the body parts mentioned in the Pause and think music video - arms.
Once the picture is added, click OK to save that card and open the second card in the first pair. Here we are going to add the written message that matches the body part. Ask the class, what do arms remind us to do when we go online? Arms are about balancing, and thinking about remembering to balance how much time we spend on things when we go online or use technology in general. Ask - Why is this important? Be sure to highlight the physical and mental health issues linked to spending too much time on devices, not taking breaks, and how it can have negative effects on things like sleep too.
Text is added via the advanced drawing tools. Select the A icon and drag a text box out to fill the space on the card and add your text.


You can add some simple formatting to the text by clicking the A icon on the purple banner of the text box.
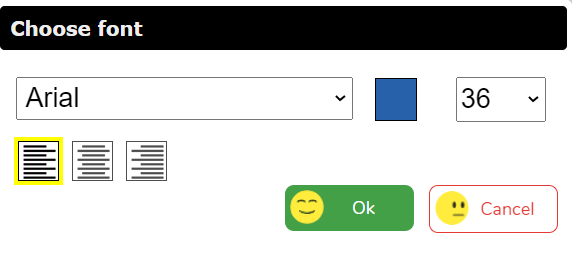
Sadly, you don't seem to be able to click back into a text box to edit it once it is saved to the page (when you click away from it), so encourage the children to take care when composing their text and formatting it. Otherwise they will have to add it again.
Finally, you can use the drawing tools to add pictures to accompany the writing if wanted. Be aware though, that if you try and add clip art at this point it will take up the whole page and you'll lose the writing, so stick to the drawing tools, or add the clip art before the text.

Repeat these steps with the other cards on the screen, so you have six sets of pairs for the body parts and the text that accompanies them. Here's an example of a finished set.

You can even design the back of the cards when you click the criss-cross card on the right of the screen. There are a variety of choices to pick from.

The last steps to get your game ready for people to play, is to edit the start screen. Click the blue circle with the i inside.

Here you can add a title, instructions for your game, edit the pictures, label the pictures, format the text, backgrounds and also set how long players get to play, and the sound effects they hear during the game.


Finally, you are ready to try out your game! Click the green play button at the top of the screen.

Ask the children to name and save their work from the file menu.

If they save into shared year group or class folders in Purple Mash, they can try out each others' games by opening them from there. But be clear that they must not edit or save any changes to each others' work.
There are also other options for sharing their work, such as via links or QR codes, which could be a nice way to send their work home and get other children in school to try the games. Click the Share option from the main file menu and choose Share a link or the option that works best for you.


Here's an embedded version of our example game. You can also play it at this link.
Plenary
Review the success of their games and how well they managed in constructing it.
Ask -
- Does your game work?
- Is there anything that could be improved?
- Did you make use of the different advanced drawing tools today?
- Which tools did you use?
- How did they help you work efficiently?
- Tell me a message about keeping safe online that your game contains.