
Let there be light
Getting started with a Crumble - Lesson 1
Objectives
- To identify and explain the parts in the Crumble starter set
- To safely and accurately set up a Crumble and Sparkle LEDs
- Detect and correct errors in algorithms and programs
- To use iteration (loops) in a program.
Lesson Resources
- Lesson Slides
- Crumble starter kits (1 between 2 students)
- 3 x AA batteries (per Crumble)
Other useful resources:
- Crumble website home (Redfern Electronics)
- Crumble Getting Started guide (Redfern Electronics)
Lesson 1 - Let there be light
Lesson 2 - Switch it up
Lessons 3 - Crumble colour codes
Projects part 1 - Illuminated making
Projects part 2 - Making it move
Credits
Many of the resources in this unit of work come from Redfern Electronics (creators of the Crumble) and the excellent work of Phil Bagge on his website code-it.co.uk. Between them they have created lots of great guides and ideas for Crumble projects in your classroom. We recommend you check them out.
The book ‘Crumble Creations’ by Phil Bagge is also available from Amazon and University of Buckingham Press.
As a result, this unit is FREE FOR ALL TO ACCESS and can be viewed by anyone without logging in to our website.
Purchasing your Crumbles
The Crumble is an easy to use microcontroller that has been created by Redfern Electronics. It's a fabulous and affordable way to get children engaged in programming, physical computing and a wide range of STEM maker projects.

You can purchase Crumble resources from the Redfern Electronics website.
Essential:
- Crumble starter kit (1 between 2 students) - buy here
Recommended:
-
Extra croc clips wires - 1 per starter set - buy here
-
Additional Sparkles Batons (LEDs) - 1 per starter kit - buy here
-
Pair of geared motors - 1 pair per starter kit - buy here
Other great extras
- Crumble Card Buggy Chassis (pack of 10) to aid the design and creation of programmable vehicles - buy here
- Giant Crumble (teaching aid) - buy here
- Sparkle Matrix - buy here
- You can find lots of other great resources to add to or replace parts in your Crumble sets here.
Introduction
So what exactly is a Crumble?! You may be familiar with the apple or rhubarb variety but this is something quite different!
Put your students into pairs and provide each pair with a Crumble starter kit. Before they open the box, display the image on slide 7 of the lesson slides. Ask them what do you think a Crumble could be? What could the holes be for?
Introduce that the Crumble is a microcontroller, an electronic board to which you can attach up to two motors, lights, switches, sensors, buzzers and more.
It's powered by AA batteries and plugs into your computer via usb and you can program it via the crumble software.

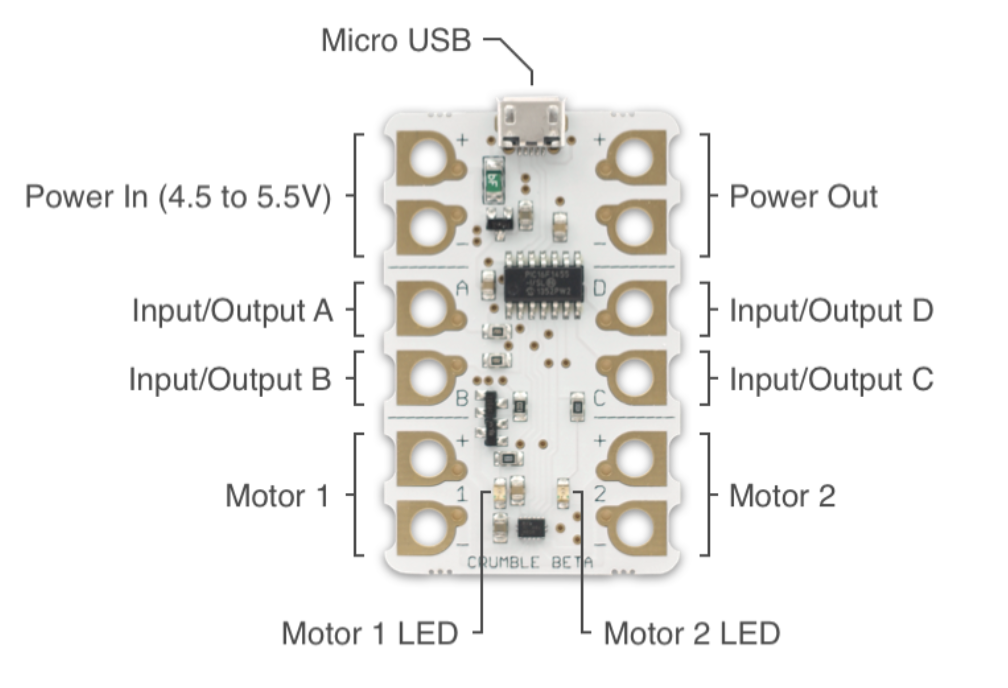
Image courtesy of redfernelectronics.co.uk
The holes on the Crumble are designed so you can easily attach other components to your Crumble using crocodile clip wires.

The holes have different purposes which can be seen in this diagram.
 Working safely
Remind the children that we will be working with electricity in these lessons, and while the amounts are very small and safe, we should still be careful and aware of the dangers. Make sure they follow instructions carefully, have clean dry hands when handling the equipment and touching something metal that's anchored to the ground (like a table leg) is good practise as it will discharge any static electricity from our bodies, which has the potential to damage electrical components.
What's in the kit?
Next display slide 11 which shows the contents of the Crumble starter kit. Ask the students to open their own box and identify all the parts in their kit. Don't do anything else at this point.
Do you know what any of these parts are already?

Briefly discuss the parts in the kit and any prior knowledge they may have.
Sparkles
Crumble Sparkles are RGB lights made specially for the Crumble controller.
RGB stands for red, green, and blue. Using the Crumble software, you can set different levels of red, green, and blue for the Crumble Sparkle lights to create lots of different colours!
The colours of all pixels on screens are also made up by mixing red, green and blue light and any colour can be created with a combination of red, green and blue.

Each pixel is made up of tiny red, green and blue lights which can be seen when magnified like this.

Ask the class: What colour of light do you get when equal amounts of red, green and blue light are mixed together? This creates white light.
In 8 bit colours for most screens, there are:
- 256 shades in the red spectrum
- 256 shades in the green spectrum
- 256 shades in the blue spectrum
- Which gives 16,777,216 possible colours! (256 x 256 x 256)
Although in reality, our eyes cannot distinguish between many of these.

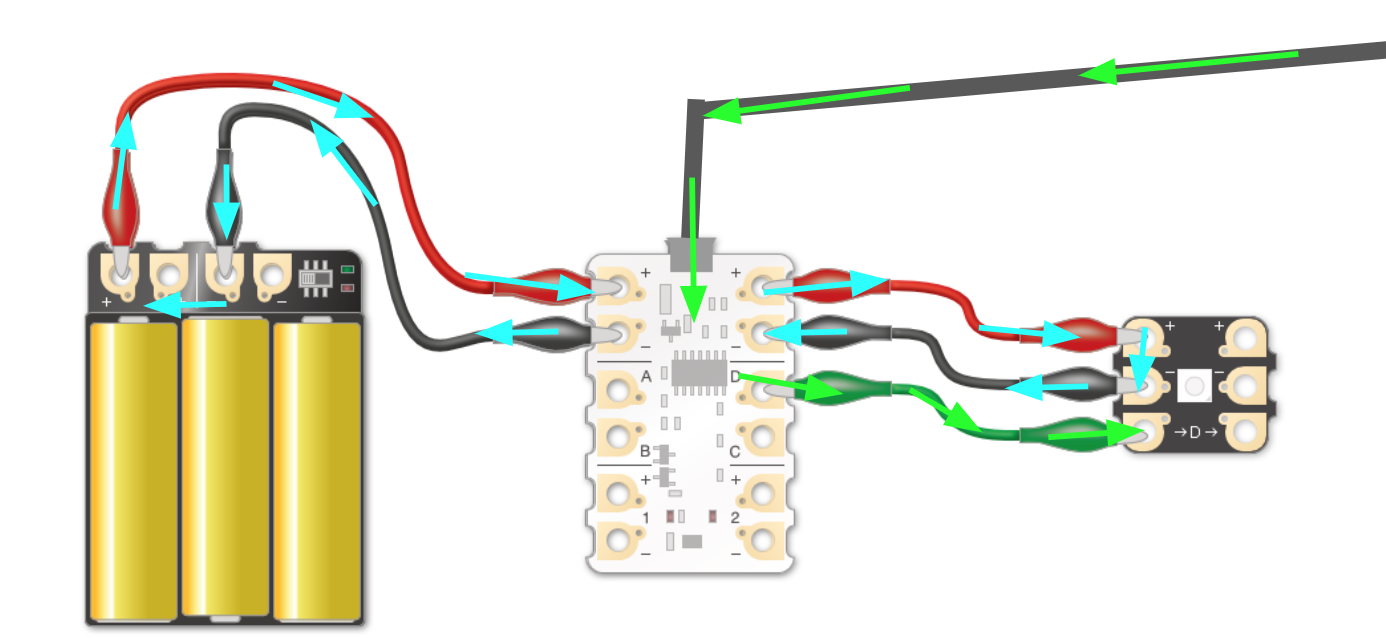
So let's connect up our Crumble, Sparkle and the batteries. This is best done step by step with the children.The teacher slides show this process one step at a time to help you describe the process.
First ask the students to insert their batteries, being aware of the + and - ends matching the symbols on the battery pack. connecting wires to the battery pack.
Then connect a wire from the + (positive) terminal on the battery pack to the + (positive) terminal on the Crumble, and then a second wire from the - (negative) terminal on the battery pack to the - (negative) terminal on the Crumble.
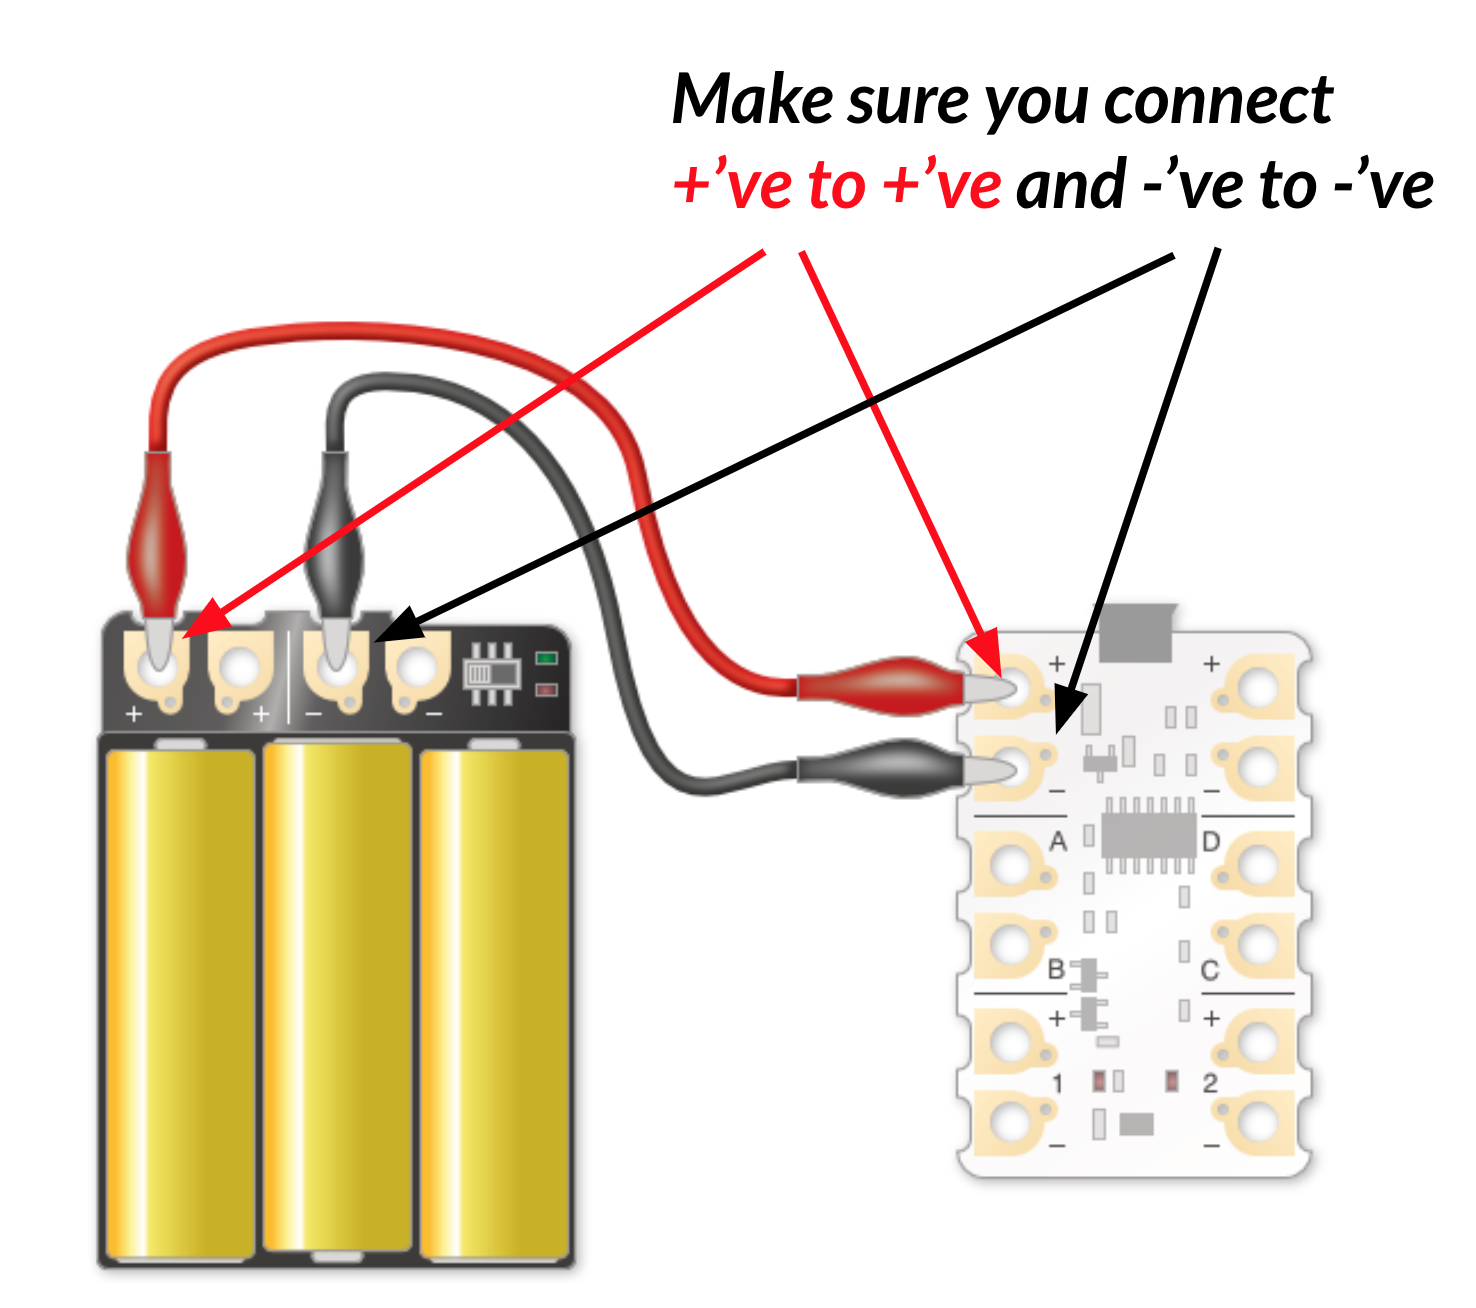
Images courtesy of redfernelectronics.co.uk
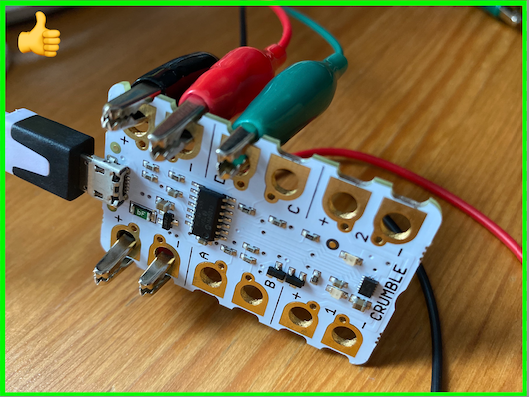
It's good practice that the students connect their crocodile clip wires through the holes, not over them as this provides a much more secure connection and reduces the chances of wires slipping, touching each other and creating short circuits.
✓ - Through the holes
X - Not over the holes
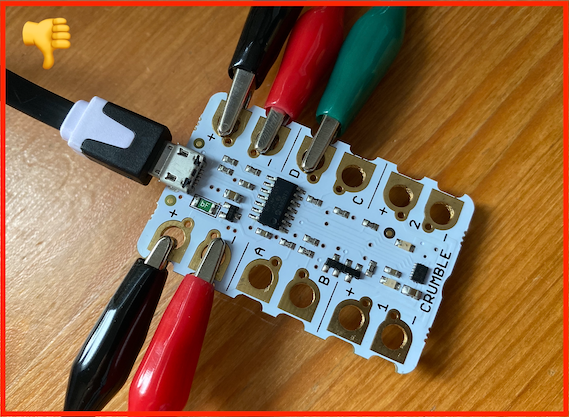
Connector clips have slipped and are now touching, creating a short circuit. This can damage the equipment and be dangerous as it can causes the batteries to heat up rapidly.

A red light on your battery pack indicates a short circuit has occurred. Turn off the battery pack immediately then find and fix the problem.

Then add two more wires that connect the + (positive) terminal on the Crumble to the + (positive) terminal on the Sparkle, and the - (negative) terminal on the Crumble to the - (negative) terminal on the Sparkle.
Finally, connect one more wire from the D terminal on the Crumble to the D terminal on the Sparkle. Make sure the Sparkle is orientated so the + is at the top and the D at the bottom, with the wires connected to the left hand side, as shown below.

Images courtesy of redfernelectronics.co.uk
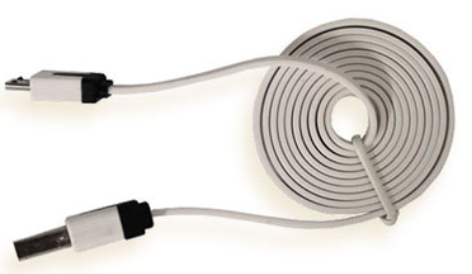
Then unravel the USB cable and connect it from the top of the Crumble to any USB port on your computer, then open the Crumble software, it's time to write some code!
Crumble software
You may notice that the software closely resembles MIT's Scratch software, which should be familiar to most students in Key Stage 2. While there are many similarities, some of the blocks are unique to Crumble as they are designed specifically to control the device.
Most of what you'll need to begin with can be found in the Basic section, which is a collection of the most commonly used blocks from the other categories. many more options are available as you delve deeper into the other sections, but we'll get to that later.
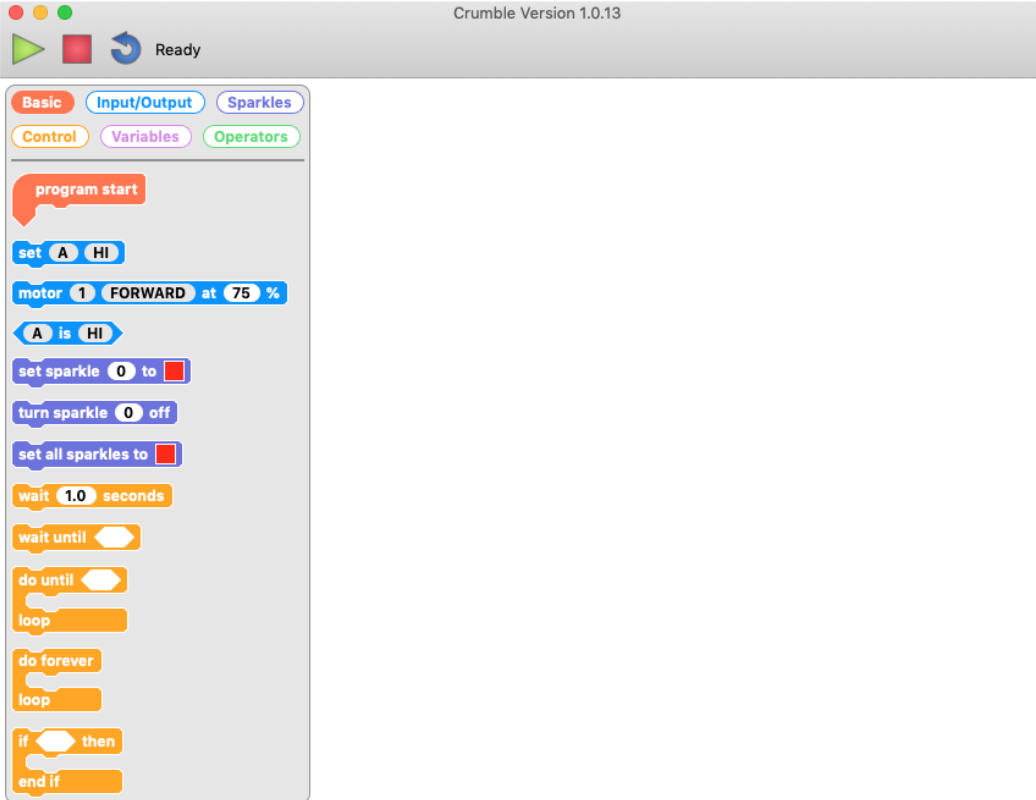
Light it up!
There's no 'When Green flag is clicked' (from Scratch) block in Crumble, so instead select the the 'program start' block and attach a 'set sparkle block'.
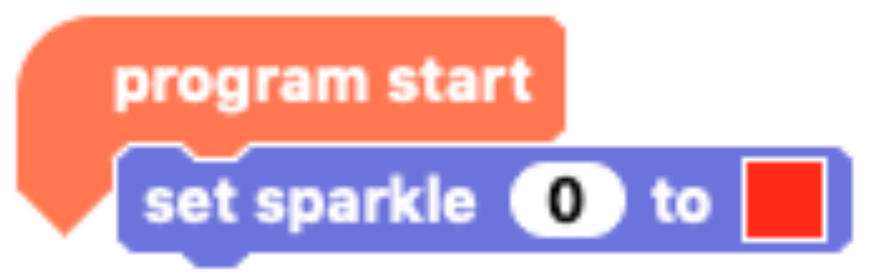
Make sure the battery pack is turned on and then run the code by clicking the green play button in the top left of the screen.

Your Sparkle should, well... sparkle (red)! If any Sparkles do not light up check all the connected wires, batteries correctly inserted (and turned on), and the wires connected to the correct side of the Sparkle (as mentioned above) as these are the most common errors at this point.
If you click on the red square in the 'set sparkle' block you can choose your own colour. Pick something else and run the code again (press play).

What’s happening in the wires?
Let's pause and take a look at the circuits we've created.
- The red and black wires create a circuit for the electricity to flow through, this powers the sparkle. The flow comes from the + terminal and returns to the - terminal, this is called polarity and is like a one way door. If the +s and -s don't match up the electricity cannot flow around the circuit.
- The Crumble receives instructions from the code on your computer and sends them onto the sparkle via the green wire.
Images courtesy of redfernelectronics.co.uk
Colour sequences
Ask the class, what will this code do?
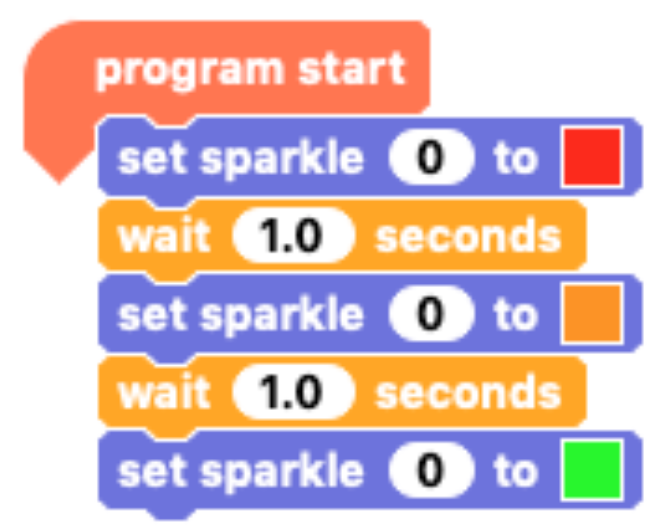
Ask them to build and test it and then challenge them:
- Can you make the sequence longer?
- Can you make it flash really fast?
- How could you make your sequence repeat so it keeps going?
To solve this final challenge they will require a loop. You will hear this referred to as different things such as iterating, repeating or looping, and the students should know and understand all these terms and understand that they are the same thing. Here we can see two types of loops they may have come across in Scratch before.
Ask the class, What’s the difference between these loops?

The loop on the left is a counted loop, this will run the code inside it a set number of times, which is defined by the number at the top of the loop. The loop on the right is an infinite loop and will continue to repeat the code inside it until it is manually ended.
Plenary
Finish the lesson by reviewing the students' understanding of the things covered:
- What safety considerations should we make when working with electronics?
- What do the + and - symbols mean on the batteries and the Crumble?
- How does the Sparkle create different colours?
- What different types of loops have we used today?