
Crumble colour codes
Getting started with a Crumble - Lesson 3
Objectives
- Use logical reasoning to explain how some simple algorithms work and to detect and correct errors in algorithms and programs
- To create (and decode) coded messages by programming light sequences
Lesson Resources
- Lesson Slides
- Colour codes worksheet
- Crumble starter kits (1 between 2 students)
- 3 x AA batteries (per Crumble)
- Crumble batons (optional)
Other useful resources:
- Crumble website home (Redfern Electronics)
- Crumble Getting Started guide (Redfern Electronics)
Lesson 1 - Let there be light
Lesson 2 - Switch it up
Lessons 3 - Crumble colour codes
Projects part 1 - Illuminated making
Projects part 2 - Making it move
Credits
Many of the resources in this unit of work come from Redfern Electronics (creators of the Crumble) and the excellent work of Phil Bagge on his website code-it.co.uk. Between them they have created lots of great guides and ideas for Crumble projects in your classroom. We recommend you check them out.
The book ‘Crumble Creations’ by Phil Bagge is also available from Amazon and University of Buckingham Press.
As a result, this unit is FREE FOR ALL TO ACCESS and can be viewed by anyone without logging in to our website.
Introduction
This lesson sets the students a code making and code breaking challenge, involving two sparkles. Recap the last lesson about how we used conditions, the switch and two sparkles.
- What is a condition?
- What types of conditional blocks did we use?
- What is the difference between 'if, then' and 'if, then, else' statements?
- What is an input?
- Which piece of equipment did we use as an input device?
- How did we control two Sparkles separately?
Remind the students of the safety messages for working with electronics:
- Follow all instructions carefully,
- Have clean, dry hands when handling the equipment
- Keep liquids away from the equipment
- Touch something metal that's anchored to the ground (like a table leg) before handling the equipment as it will discharge any static electricity from our bodies, which has the potential to damage electrical components.
Then ask them to set up their Crumble with two Sparkles attached. They do not need to use the switch.

Crumble colour codes
Provide each pair with a copy of the worksheet (print the two sides back to back if possible) and explain the concept of the challenge.
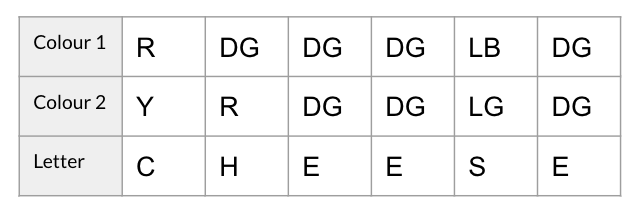
They are going to communicate a secret word to another pair in the room by using their Sparkles. The sheet shows how different colour combinations can be used as code for different letters of the alphabet. It is REALLY important that they stick to the combinations shown on the sheet!

Each pair should think of a secret word up to six letter long. The need to write their code, so when it is run, each letter is flashed slowly by the Sparkles by displaying the correct colours. Here's an example:
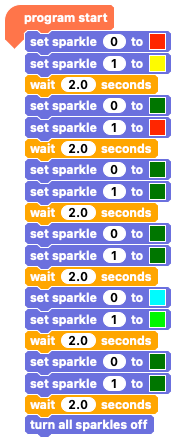
Once they have coded it and tested it they should swap with another pair in the room and:
1. Watch the Sparkles flash in sequence (maybe a few times). DO NOT just look at the code on the screen!
2. Then complete the first part of the table adding in which pairs of colours you saw (use the letter codes to speed things up).

3. Finally, they can use the front of the sheet to convert those into letters and discover the secret word.
4. Repeat with another pair.
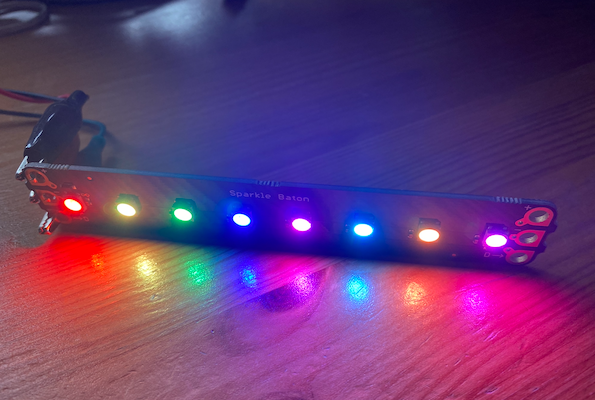
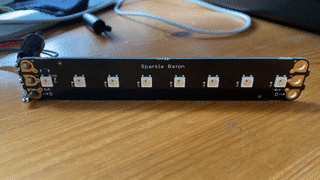
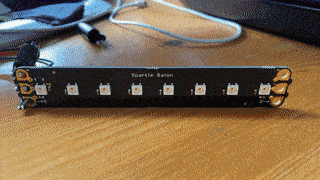
Sparkle batons
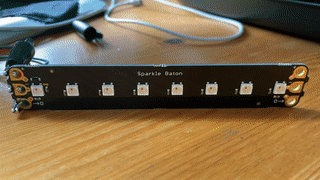
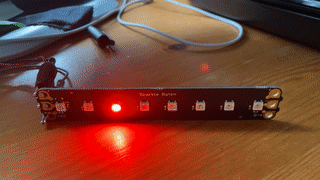
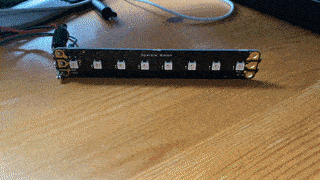
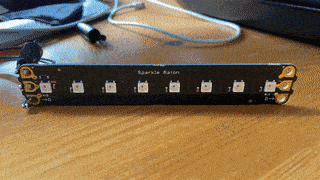
Sparkle batons are an extra component that DO NOT come with the Crumble starter kit. They are available to purchase from Redfern electronics (here) and are a great way to be able to really extend the coding possibilities for working with LEDs, without having to use lots and lots of extra wires to daisy chain sparkles together. The baton contains 8 sparkles in the one component and allows each sparkle to be controlled individually or as a group. Up to 4 batons can be daisy chained together to be controlled by a single Crumble, which might look some thing like the Blackpool illuminations!

If you do not have Sparkle batons, you could combine pairs into fours so that the students can daisy chain more sparkles together and create similar effects to the examples below.
Controlling your Sparkle baton
You connect the Sparkle baton to the Crumble in exactly the same way you would connect a normal Sparkle, with +ve, -ve and D connecting wires.
There are lots of options for how you control the baton and what you do with it. All the previous Sparkle blocks still work, just remember that the first Sparkle in the baton is Sparkle 0, the last one is Sparkle 7 (unless you have other Sparkles also connected in front of the baton).
You can still set individuals Sparkles to a colour of your choice with the colour selector or RGB options.
![]()
![]()
![]()
Or turn individual Sparkles off.
![]()
![]()
And you can make use of the 'all Sparkle' blocks to speed things up and treat them as one.
![]()
![]()
![]()
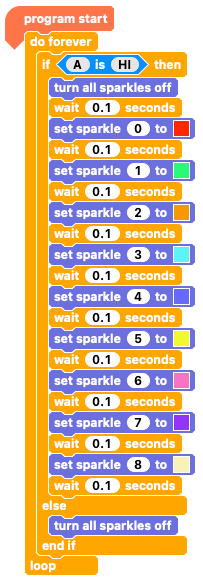
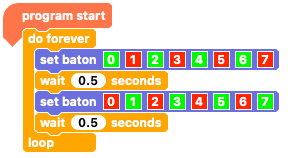
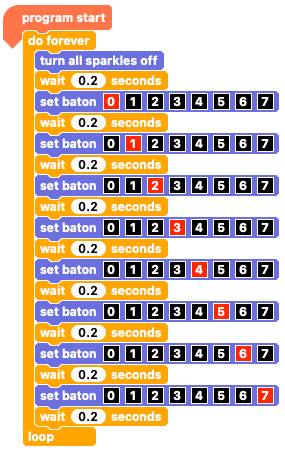
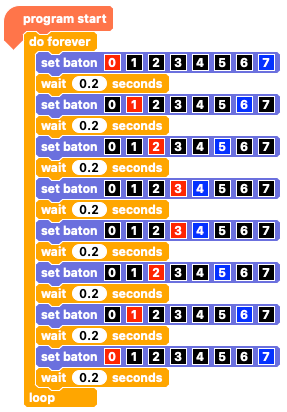
But it get's really interesting, and hugely time saving, when you use the 'set baton' block, as this lets you control all eight Sparkles in the baton in one go, but also set them to different colours, all with one block.
![]()
![]()
Challenges
You can keep the baton challenges quite open ended or set specific goals if you prefer, but here are some ideas for your students to try with some code examples. Can they come up with their own original light shows based on these?
Single Sparkle light sequences (multi-coloured):

Single Sparkle light sequences (multi-coloured) with a switch:
Light show patterns:
There are so many variations of these that you can have fun with!
Tip - Make use of the duplicate feature (right click the code - it copies that block and everything below it) when writing your code, it will save you a lot of time!
Alternating colours
The running light
Multi-colour running lights

The bounce back


2 colour bounce
2 colour cross over

Plenary
Ask some of the children to share what they have been working on and, if possible, show their light shows to the class.
Finish the lesson by reviewing the students' understanding of the things covered:
- Who successfully coded their sparkles to flash a secret word?
- Who decoded another pair's secret word by watching the colour pattern of the Sparkles?
- Why is the 'set baton' block especially useful?
- Can you explain how it works?